Mini chocolate mousse cake recipe
Recipe by : chef ssentongo
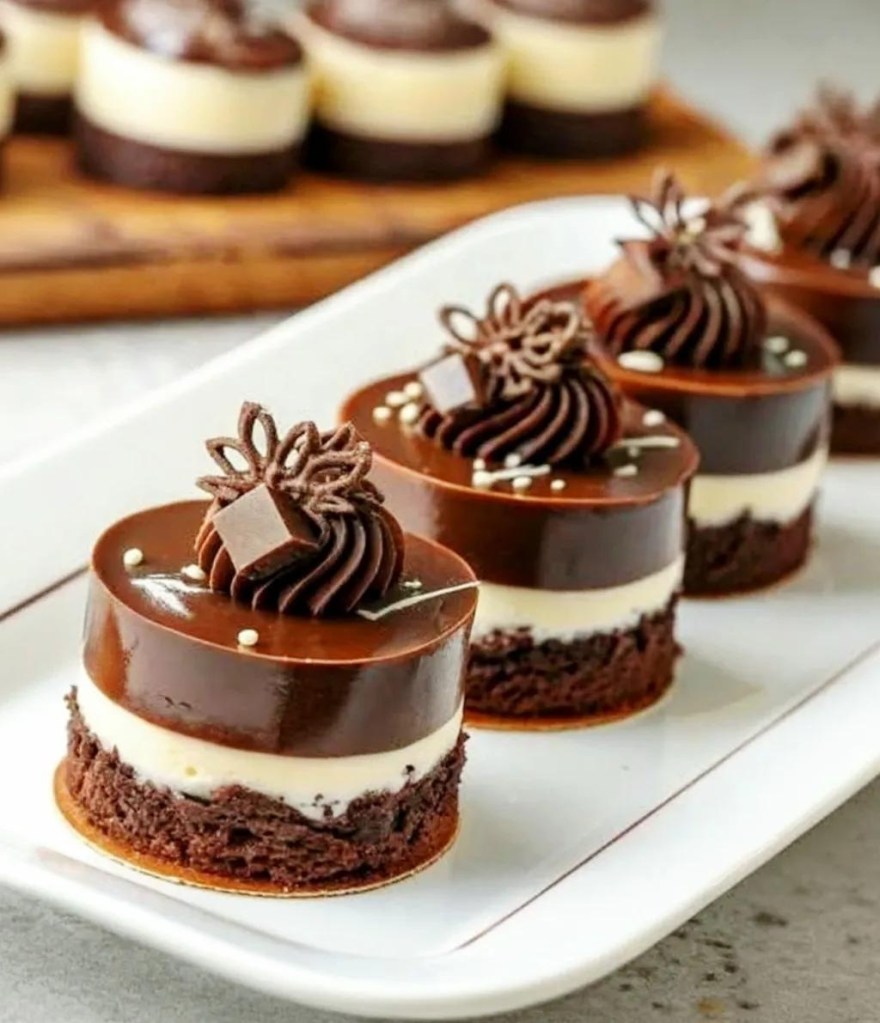
Here is a detailed, easy-to-follow recipe for a decadent mini chocolate mousse cake. This recipe creates individual desserts with a rich, flourless chocolate cake base and a light, airy chocolate mousse top, all finished with a glossy chocolate ganache.
They look impressive but are surprisingly simple to make.
Mini Chocolate Mousse Cakes
This recipe makes 6 individual desserts, perfect for standard muffin tins.
Ingredients
For the Cake Base:
· 4 oz (115g) high-quality semi-sweet or dark chocolate, finely chopped
· 4 tbsp (56g) unsalted butter
· 1 large egg, at room temperature
· 2 tbsp (25g) granulated sugar
· 1 tbsp (8g) unsweetened cocoa powder
· Pinch of salt
For the Chocolate Mousse:
· 4 oz (115g) high-quality semi-sweet or dark chocolate, finely chopped
· 1 cup (240ml) heavy whipping cream, cold, divided
· 1 tbsp (8g) powdered sugar (optional, for sweetness)
For the Chocolate Ganache Topping:
· 2 oz (60g) high-quality semi-sweet or dark chocolate, finely chopped
· 1/4 cup (60ml) heavy whipping cream
For Garnish:
· Whipped cream, chocolate shavings, or a few raspberries.
Equipment
· Muffin tin (for 6 standard muffins)
· 6 parchment paper liners OR non-stick spray
· Two heatproof bowls
· Electric hand mixer or stand mixer
· Spatula
Instructions
Part 1: The Cake Base
- Prep: Preheat your oven to 350°F (175°C). Line 6 cups of your muffin tin with parchment paper liners or grease them thoroughly with non-stick spray.
- Melt Chocolate & Butter: In a heatproof bowl set over a pot of simmering water (double boiler), melt the 4 oz of chocolate and butter together, stirring until smooth. Remove from heat and let cool slightly.
- Whip Egg: In a separate bowl, using an electric mixer, whip the egg, 2 tbsp granulated sugar, and pinch of salt for 3-5 minutes until it becomes pale, thick, and doubles in volume.
- Combine: Gently fold the slightly cooled chocolate mixture into the whipped egg until just combined. Be careful not to deflate the egg.
- Add Cocoa: Sift the cocoa powder over the batter and fold it in until no dry streaks remain.
- Bake: Divide the batter evenly among the 6 prepared muffin cups. Bake for 8-10 minutes. The tops will be set and might have a few cracks. They will be soft but will firm up as they cool.
- Cool: Let the cakes cool completely in the pan on a wire rack. They will sink in the middle as they cool, creating a perfect “well” for the mousse.
Part 2: The Chocolate Mousse
- Melt Chocolate: Place the 4 oz of chocolate for the mousse in a heatproof bowl. Heat 1/4 cup of the heavy cream until it is just beginning to simmer (either in the microwave or a small saucepan). Pour the hot cream over the chocolate and let it sit for 2 minutes. Whisk until completely smooth. Set aside to cool to room temperature. It must not be warm.
- Whip Cream: In a chilled bowl, whip the remaining 3/4 cup of cold heavy cream (and the optional powdered sugar, if using) until you achieve medium-stiff peaks. Do not overwhip.
- Fold: Once the chocolate mixture is at room temperature, gently fold about 1/3 of the whipped cream into it to lighten it. Then, carefully fold in the remaining whipped cream until no white streaks remain. Be gentle to keep the mousse airy.
Part 3: Assembly & Setting
- Pipe Mousse: Spoon or pipe the chocolate mousse on top of the completely cooled cake bases, filling the wells and creating a smooth, slightly domed top.
- Chill: Carefully transfer the muffin tin to the refrigerator and chill for at least 2 hours, or until the mousse is firmly set. For best results, chill for 4 hours or overnight.
Part 4: The Ganache Topping & Finish
- Make Ganache: Place the 2 oz of chopped chocolate for the ganache in a small bowl. Heat the 1/4 cup of heavy cream until it simmers, then pour it over the chocolate. Let it sit for 2 minutes, then whisk until smooth and glossy.
- Cool Slightly: Let the ganache cool for about 5-10 minutes so it thickens slightly but is still pourable.
- Top the Cakes: Remove the chilled cakes from the fridge. Spoon a layer of ganache over the top of each mousse cake, gently spreading it to the edges.
- Final Chill: Return the cakes to the refrigerator for another 15-20 minutes to set the ganache.
- Serve: Carefully remove the cakes from the muffin tin, garnish with a dollop of whipped cream, chocolate shavings, or a berry, and serve cold.
Tips for Success:
· Quality Chocolate: This recipe is all about the chocolate! Use a brand you enjoy eating on its own (e.g., Ghirardelli, Callebaut, Lindt).
· Room Temperature Egg: A room temperature egg whips up much better and provides more volume for the cake base.
· Cool Chocolate: Ensure the chocolate for the mousse is at room temperature before folding in the whipped cream. If it’s too warm, it will melt the cream and deflate your mousse.
· Chilled Bowl for Cream: For the best volume, chill your mixing bowl and whisk attachment in the freezer for 10 minutes before whipping the cream.
· Make Ahead: These are perfect make-ahead desserts. You can assemble them completely 1-2 days in advance and keep them covered in the refrigerator.
Enjoy your incredibly delicious and elegant mini desserts
CHOCOLATE WAFFLE CUP WITH WHIPPED CREAM AND BERRIES RECIPE
Certainly! Here is the detailed recipe for Chocolate Waffle Cup with Whipped Cream and Berries:
🍫 Chocolate Waffle Cup with Whipped Cream and Berries Recipe
Indulge in a delightful dessert that combines crisp chocolate waffle cups, fluffy whipped cream, and fresh berries. This elegant yet easy-to-make treat is perfect for special occasions or as a refreshing summer dessert. The contrast of textures and flavors—crispy chocolate, airy cream, and juicy berries—creates a truly sensational experience.
📝 Ingredients
For the Chocolate Cups:
· 4 waffle cones or waffle bowls
· 200 g (7 oz) dark or milk chocolate, melted
For the Whipped Cream:
· 250 ml (1 cup) heavy cream, chilled
· 2 tbsp powdered sugar
· 1 tsp vanilla extract
For the Toppings:
· Fresh strawberries (whole and halved)
· Fresh blueberries
· Berry sauce or strawberry syrup (optional)
· Edible gold flakes or gold dust (optional, for garnish)
· Powdered sugar, for dusting
Optional Additions:
· Vanilla ice cream (for serving)
· White or ruby chocolate (for alternative presentation)
🍳 Instructions
Step 1: Prepare the Chocolate Cups
- Melt the dark or milk chocolate using a double boiler or microwave, stirring until smooth.
- Using a small pastry brush, generously coat the inside and rim of each waffle cone or bowl with the melted chocolate. Ensure an even layer to create a sturdy chocolate barrier .
- Place the coated cones upright in drinking glasses or a muffin tin to hold their shape. Allow them to set at room temperature or refrigerate for 15–20 minutes until the chocolate hardens .
Step 2: Prepare the Whipped Cream
- Chill a glass bowl and mixer beaters in the refrigerator for 15 minutes before whipping .
- Pour the chilled heavy cream into the cold bowl. Add powdered sugar and vanilla extract.
- Whip the cream using an electric mixer on medium speed until stiff peaks form. Be careful not to over-whip. Set aside in the refrigerator until ready to use .
Step 3: Prepare the Berries and Toppings
- Wash and dry the strawberries and blueberries. Slice some strawberries into halves or quarters, leaving a few whole for garnish.
- If using a berry sauce, combine raspberry or strawberry jam with 2 tablespoons of hot water and whisk until smooth. Gently stir in fresh or frozen berries and mash lightly with a spoon to achieve a chunky or smooth consistency. Add powdered sugar to taste if desired .
Step 4: Assemble the Dessert
- Fill each chocolate-coated waffle cup with a layer of whipped cream using a piping bag or spoon. For extra decadence, add a small scoop of vanilla ice cream at the base before adding whipped cream .
- Top generously with fresh strawberries and blueberries .
- Drizzle with berry sauce or strawberry syrup for added sweetness and visual appeal .
- Garnish with edible gold flakes for a luxurious finish .
- Dust lightly with powdered sugar just before serving .
💡 Serving Suggestions
· Serve immediately to maintain the crispness of the chocolate waffle cup .
· Pair with a light fruit salad or sparkling beverage to balance the richness.
· For a crowd, prepare components in advance and assemble just before serving. Store chocolate-coated cones at room temperature, whipped cream in the refrigerator, and berries washed and dried .
🌟 Variations
· Chocolate Alternatives: Use white or ruby chocolate for coating the cups for a different visual and flavor profile .
· Berry Alternatives: Substitute with seasonal fruits like raspberries, blackberries, or sliced peaches.
· Vegan Option: Use dairy-free chocolate and coconut whipped cream.
📊 Nutritional Information (Per Serving)
Component Approximate Value
Calories 350-400 kcal
Fat 22-25 g
Carbohydrates 35-40 g
Protein 4-6 g
🎉 Tips for Success
· Chocolate Coating: Ensure the chocolate is fully melted and smooth for even coating. If the chocolate is too thick, add a teaspoon of coconut oil to thin it.
· Whipped Cream: Keep everything cold for the best volume and texture.
· Presentation: Use a variety of berry sizes and colors for visual appeal. Garnishes like mint leaves or lemon zest can add freshness.
This recipe offers a perfect balance of elegance and simplicity, making it ideal for dinner parties or festive celebrations. The combination of crisp chocolate, airy cream, and vibrant berries is sure to impress your guests!

Leave a comment