Chicken Biryan and Chicken Pilau masala Recipes, What is the difference between the two?
By : chef ssentongo Geoffrey
From : Mr Easy Recipes
Great question!
While Chicken Biryani and Chicken Pilau Masala are both delicious rice-based dishes with bold flavors, they differ significantly in preparation, ingredients, and overall taste.
Chicken Biryani vs. Chicken Pilau Masala
Chicken Biryani Chicken Pilau Masala
1. Cooking Method:
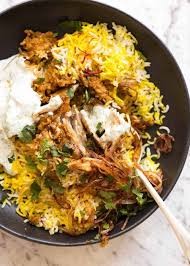
Chicken Biryani is a layered dish where the rice and chicken are cooked separately before being combined, often in a “dum” style (slow cooking with steam).
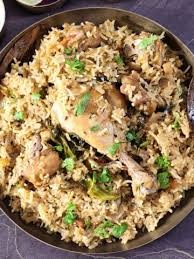
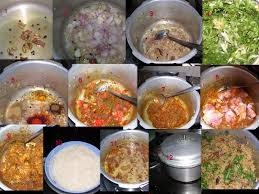
Chicken Pilau Masala is a one-pot dish where the chicken, rice, and spices are cooked together, allowing the flavors to fully infuse into the rice.
2. Use of Spices:
Biryani typically uses a complex blend of spices, including cloves, cardamom, cinnamon, bay leaves, star anise, nutmeg, and saffron (optional), giving it a more aromatic and layered flavor.
Pilau Masala has a simpler spice blend, often using pilau masala powder, cumin, black pepper, coriander, and sometimes cinnamon.
3. Rice Variety:
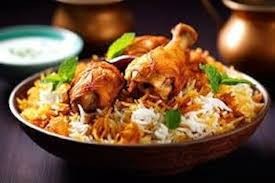
Biryani is traditionally made with long-grain Basmati rice for its fluffiness and distinct texture.
Pilau Masala can also be made with Basmati or other varieties of rice, but it tends to be softer since it absorbs all the cooking liquid.
4. Preparation Style:
Biryani often includes marinated chicken and sometimes yogurt-based sauces, with layers of rice and meat alternated before slow cooking.
Pilau Masala is cooked more straightforwardly, with rice simmered alongside the chicken and spices.
5. Garnishes and Accompaniments:
Biryani is commonly garnished with fried onions, boiled eggs, nuts, and saffron-infused milk.
Pilau Masala is typically simpler, sometimes served with fresh herbs or fried onions, but without the elaborate garnishing of biryani.
Both dishes have rich flavors and are loved across different cultures, but if you’re looking for something rich and layered in taste, Biryani is your go-to. If you prefer a simpler, well-seasoned one-pot dish, Pilau Masala is perfect!
Would you like a recipe for either? I’d be happy to help!
How To Make Chicken Jambaraya and Chicken Cacciatore Recipes Step by Step guide
Here’s a step-by-step guide to making Chicken Jambalaya and Chicken Cacciatore. Both dishes are flavorful and hearty, but they come from different culinary traditions—Jambalaya is a Creole/Cajun dish, while Cacciatore is an Italian classic.
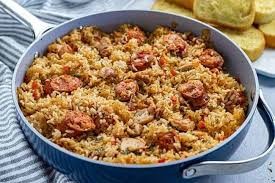
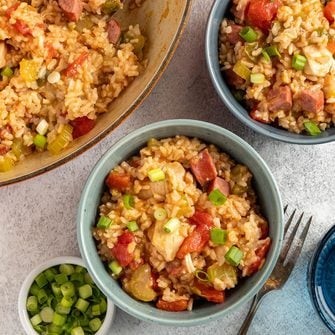
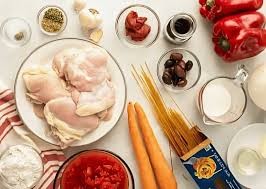
Chicken Jambalaya Recipe
Ingredients:
2 boneless, skinless chicken breasts, cut into bite-sized pieces
1 lb (450g) smoked sausage, sliced
1 large onion, diced
1 green bell pepper, diced
2 celery stalks, diced
3 garlic cloves, minced
1 can (14.5 oz) diced tomatoes
2 cups chicken broth
1 cup long-grain white rice
1 tbsp Cajun seasoning (adjust to taste)
1 tsp paprika
1 tsp dried thyme
1 tsp dried oregano
2 tbsp olive oil or vegetable oil
Salt and pepper to taste
Optional: 1/2 lb shrimp (peeled and deveined) for added flavor
Instructions:
Prepare the Ingredients: Dice the chicken, sausage, onion, bell pepper, and celery. Mince the garlic.
Cook the Meat: Heat oil in a large pot or Dutch oven over medium heat. Add the chicken and sausage, and cook until browned (about 5-7 minutes). Remove and set aside.
Sauté the Vegetables: In the same pot, add the onion, bell pepper, and celery. Cook until softened (about 5 minutes). Add the garlic and cook for another minute.
Add Seasonings and Rice: Stir in the Cajun seasoning, paprika, thyme, oregano, salt, and pepper. Add the rice and stir to coat it in the spices.
Combine Ingredients: Return the chicken and sausage to the pot. Add the diced tomatoes and chicken broth. Stir well.
Simmer: Bring the mixture to a boil, then reduce the heat to low. Cover and simmer for 20-25 minutes, or until the rice is cooked and the liquid is absorbed.
Optional Shrimp: If using shrimp, add them in the last 5 minutes of cooking.
Serve: Taste and adjust seasoning if needed. Serve hot, garnished with chopped parsley or green onions if desired.
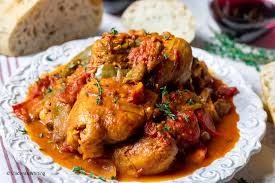
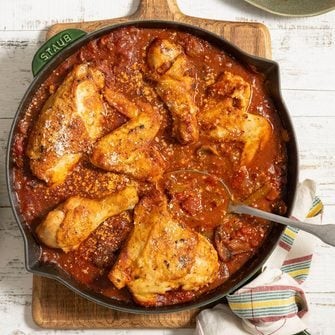
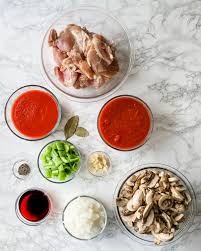
Chicken Cacciatore Recipe
Ingredients:
4 chicken thighs (bone-in, skin-on) or 2 chicken breasts, cut in half
1 large onion, sliced
1 red bell pepper, sliced
1 green bell pepper, sliced
3 garlic cloves, minced
1 cup mushrooms, sliced
1 can (14.5 oz) diced tomatoes
1/2 cup chicken broth
1/2 cup dry white wine (optional, substitute with broth)
2 tbsp tomato paste
1 tsp dried oregano
1 tsp dried basil
1/2 tsp red pepper flakes (optional)
2 tbsp olive oil
Salt and pepper to taste
Fresh parsley or basil for garnish
Instructions:
Prepare the Chicken: Season the chicken thighs or breasts with salt and pepper.
Brown the Chicken: Heat olive oil in a large skillet or Dutch oven over medium-high heat. Add the chicken, skin-side down, and cook until golden brown (about 5 minutes per side). Remove and set aside.
Sauté the Vegetables: In the same skillet, add the onion, bell peppers, and mushrooms. Cook until softened (about 5 minutes). Add the garlic and cook for another minute.
Deglaze the Pan: If using wine, pour it into the skillet and scrape up any browned bits from the bottom. Let it simmer for 2-3 minutes.
Add Tomatoes and Seasonings: Stir in the diced tomatoes, tomato paste, chicken broth, oregano, basil, and red pepper flakes. Mix well.
Simmer the Chicken: Return the chicken to the skillet, nestling it into the sauce. Cover and simmer on low heat for 25-30 minutes (or until the chicken is cooked through and tender).
Garnish and Serve: Sprinkle with fresh parsley or basil. Serve hot over pasta, rice, or with crusty bread.
Enjoy your Chicken Jambalaya and Chicken Cacciatore! Both dishes are perfect for family dinners or entertaining guests. Let me know if you need further assistance!
Grilled Vegetable Pesto Sandwiches and Pinto Beans Zucchini Cheese Boats Recipes Step by Step guide
Here’s a step-by-step guide to preparing Grilled Vegetable Pesto Sandwiches and Pinto Beans Zucchini Cheese Boats. These recipes are healthy, flavorful, and perfect for a satisfying meal.
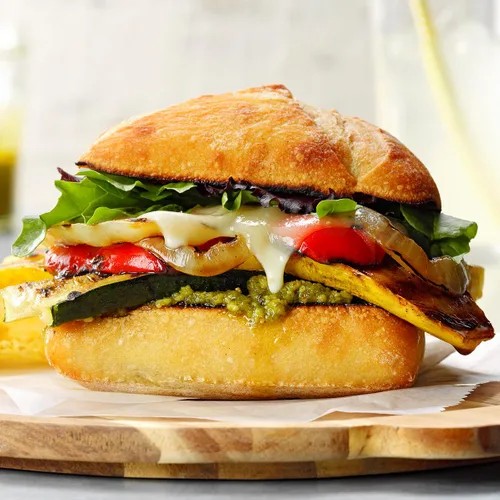
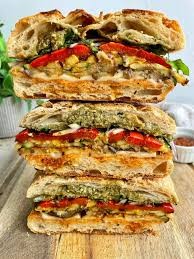
Grilled Vegetable Pesto Sandwiches
Ingredients:
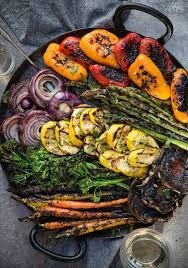
1 red bell pepper, sliced
1 zucchini, sliced lengthwise
1 eggplant, sliced
1 red onion, sliced
4 ciabatta or whole-grain rolls
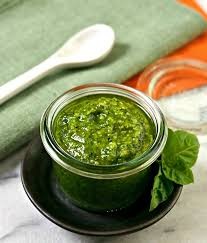
4 tbsp pesto (store-bought or homemade)
4 slices mozzarella or provolone cheese
Olive oil
Salt and pepper to taste
Balsamic glaze (optional)
Instructions:
Prepare the Vegetables:
Slice the bell pepper, zucchini, eggplant, and red onion into even pieces.
Brush the slices lightly with olive oil and season with salt and pepper.
Grill the Vegetables:
Preheat a grill or grill pan over medium-high heat.
Grill the vegetables for 3-4 minutes per side until tender and slightly charred. Remove and set aside.
Assemble the Sandwiches:
Slice the ciabatta rolls in half and lightly toast them on the grill or in a toaster.
Spread 1 tbsp of pesto on the bottom half of each roll.
Layer the grilled vegetables on top of the pesto.
Add a slice of cheese on top of the vegetables.
Drizzle with balsamic glaze if desired, then top with the other half of the roll.
Serve:
Serve immediately while warm. Enjoy!
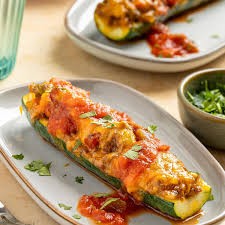
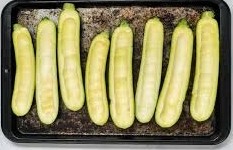
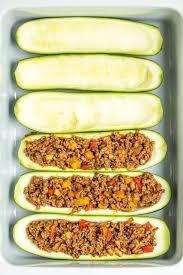
Pinto Beans Zucchini Cheese Boats
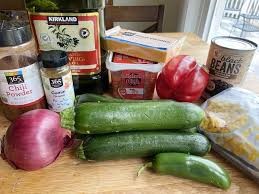
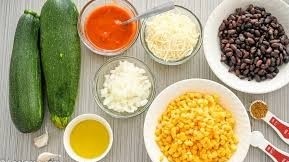
Ingredients:
4 medium zucchinis
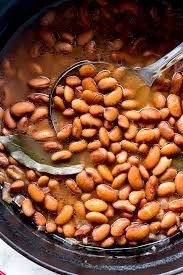
1 cup cooked pinto beans (canned or homemade)
1/2 cup diced tomatoes
1/4 cup diced onion
1/2 cup shredded cheese (cheddar, mozzarella, or pepper jack)
1 tsp cumin powder
1 tsp chili powder
1 tbsp olive oil
Salt and pepper to taste
Fresh cilantro or parsley for garnish (optional)
Instructions:
Prepare the Zucchinis:
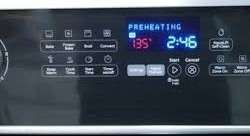
Preheat the oven to 375°F (190°C).
Cut the zucchinis in half lengthwise and scoop out the center flesh, leaving a 1/4-inch thick shell. Reserve the scooped flesh.
Prepare the Filling:
Dice the reserved zucchini flesh.
Heat olive oil in a pan over medium heat. Add diced onion and cook until translucent.
Add the diced zucchini flesh, pinto beans, diced tomatoes, cumin, chili powder, salt, and pepper. Cook for 5-7 minutes until the mixture is well combined and heated through.
Fill the Zucchini Boats:
Place the zucchini halves on a baking sheet lined with parchment paper.
Spoon the pinto bean mixture evenly into each zucchini boat.
Top with shredded cheese.
Bake:
Bake in the preheated oven for 20-25 minutes, or until the zucchinis are tender and the cheese is melted and bubbly.
Serve:
Garnish with fresh cilantro or parsley if desired. Serve warm as a main dish or side.
Enjoy your delicious and wholesome meal! Let me know if you need further assistance. 😊
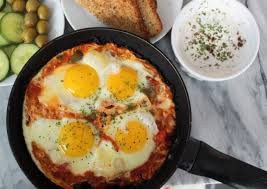
Breakfast is the first meal of the day, typically eaten in the morning to help fuel the body for the day ahead. It’s a crucial meal that provides energy, satisfies hunger, and helps maintain concentration and focus.
Breakfast can vary greatly depending on cultural, regional, and personal preferences. Some common breakfast foods include:
Cereals and grains (oatmeal, cornflakes, rice)
Eggs (scrambled, fried, poached, boiled)
Meat and poultry (bacon, sausage, ham, chicken)
Fruits and vegetables (fresh, juiced, or smoothied)
Dairy products (milk, yogurt, cheese)
Baked goods (bread, muffins, pastries)
International dishes (tacos, sushi, croissants)
Breakfast can be simple, like toast with coffee, or elaborate, like a full English breakfast with multiple courses. It’s a meal that sets the tone for the day, providing sustenance and satisfaction.
Here’s a step-by-step guide to preparing a delicious breakfast:
Step 1: Plan Your Breakfast Decide what you want to make for breakfast. Consider your dietary preferences, ingredient availability, and cooking time.
Step 2: Gather Ingredients Collect all the necessary ingredients for your chosen breakfast dish.
Step 3: Prepare Ingredients Chop, slice, or dice ingredients as needed.
Step 4: Cook Your Breakfast Follow a recipe or cooking instructions to prepare your breakfast. This may involve frying, boiling, baking, or toasting.
Step 5: Assemble and Serve Combine cooked ingredients, add any final touches (e.g., condiments, toppings), and serve your breakfast hot.
Step 6: Clean Up Wash dishes, wipe down surfaces, and clean any cooking utensils or equipment.
Some popular breakfast ideas and their estimated cooking times:
When should you use fresh pasta vs. dry pasta? The answer makes a big difference in the taste and texture of the final dish, but fresh isn’t always better.
Fresh or dry pasta can be used in any recipe, but they have different flavors and textures that will affect the final dish. Here are the major differences between the two to help you decide which to use.
Dry Pasta: Ingredients
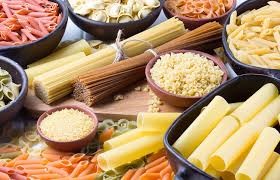
Dry pasta is made with water, semolina (a type of flour made from durum wheat) and sometimes egg. The ingredients are mixed together to create a crumbly dough. The dough is then pressed through an extruder fitted with a die to create the desired pasta shape, forming anything from long noodles to curly macaroni or tube-shaped ziti. Once formed, the pasta is dried for several days until the moisture evaporates, creating a shelf-stable product that’s good for several years.
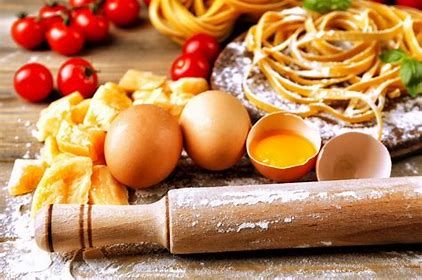
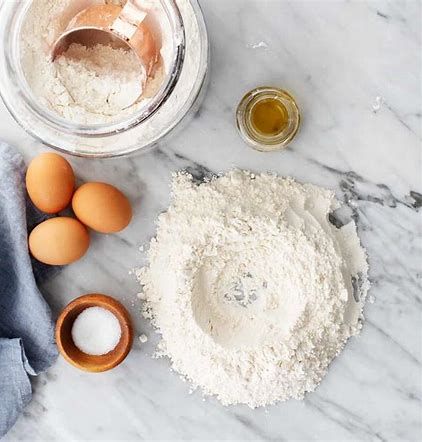
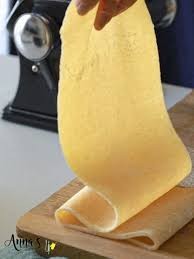
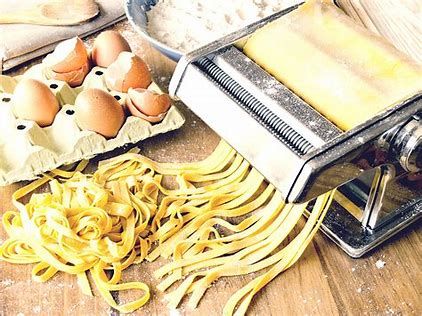
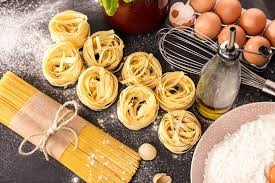
Fresh pasta, on the other hand, is made with eggs and flour, usually a specialty type of flour called “00” flour. It also contains water or olive oil, and sometimes extra ingredients (like pureed spinach or spices like paprika) are added to give the dough a vibrant color. The dough is kneaded and passed through a cutting machine, or it can be hand-cut for rustic-style pasta. Because fresh pasta contains perishable ingredients, it must be cooked immediately or stored in the refrigerator.
Texture
Dry pasta is often cooked al dente, which means “to the tooth” in Italian. That gives dry pasta a tender-firm texture that’s perfectly chewy, and it holds up well to hearty sauces. Of course, if you continue to boil dry pasta past the al dente stage, it will eventually become soft and mushy, so you can choose the desired level of texture based on your preference.
Fresh pasta doesn’t give you any options when it comes to texture.
Fresh Pasta vs. Dry Pasta: What’s the Difference?
When should you use fresh pasta vs. dry pasta? The answer makes a big difference in the taste and texture of the final dish, but fresh isn’t always better.
Today, you don’t even need to put in the work to enjoy fresh pasta: It’s available in the refrigerated section at most grocery stores. But, despite my love of fresh pasta, I’ve learned it’s not necessarily better than dry pasta. Both are worthy of a restaurant-quality meal—the one you choose depends on the pasta sauce you pair it with.
What’s the Difference Between Fresh and Dry Pasta?
Fresh or dry pasta can be used in any recipe, but they have different flavors and textures that will affect the final dish. Here are the major differences between the two to help you decide which to use.
Fresh Pasta vs. Dry Pasta: Ingredients
Dry pasta is made with water, semolina (a type of flour made from durum wheat) and sometimes egg. The ingredients are mixed together to create a crumbly dough. The dough is then pressed through an extruder fitted with a die to create the desired pasta shape, forming anything from long noodles to curly macaroni or tube-shaped ziti. Once formed, the pasta is dried for several days until the moisture evaporates, creating a shelf-stable product that’s good for several years.
Fresh pasta, on the other hand, is made with eggs and flour, usually a specialty type of flour called “00” flour. It also contains water or olive oil, and sometimes extra ingredients (like pureed spinach or spices like paprika) are added to give the dough a vibrant color. The dough is kneaded and passed through a cutting machine, or it can be hand-cut for rustic-style pasta. Because fresh pasta contains perishable ingredients, it must be cooked immediately or stored in the refrigerator.
When making fresh pasta, you’ll need to cook about 2 ounces per person. With dried pasta, it’s sometimes easier to use a cup measurer per person. Here’s our chart showing how much pasta per person you should make.
Dry Pasta: Texture
Dry pasta is often cooked al dente, which means “to the tooth” in Italian. That gives dry pasta a tender-firm texture that’s perfectly chewy, and it holds up well to hearty sauces. Of course, if you continue to boil dry pasta past the al dente stage, it will eventually become soft and mushy, so you can choose the desired level of texture based on your preference.
Fresh pasta doesn’t give you any options when it comes to texture. In general, it’s smoother and softer than dried pasta, and it’s not possible to cook it to the al dente stage. Because the pasta isn’t dried through to the center, these noodles cook through in a matter of minutes, creating a uniform finish inside and out. The end result is a soft, springy texture.
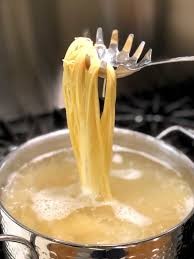
Dry Pasta: Cooking Time
Dry pasta cooking time depends on the size and shape. Most pasta takes 10 to 12 minutes, but thin pasta like angel hair may be done in as little as 8 minutes. Refer to the cooking instructions on the box and taste the pasta about 2 minutes before the timer expires. If it’s tender enough to chew but still contains a bit of a bite, you’ve reached al dente. If it’s too firm for your liking, continue cooking it until it reaches the preferred level of doneness.
Fresh pasta cooks much, much more quickly! Depending on the pasta’s thickness, it may be done in less than 2 minutes. Watch for the noodles to begin floating to the top of the pot. To check for doneness, bite into a noodle and look for a tiny white dot in the center. If you see it, continue cooking until it disappears, testing another noodle every 20 seconds.
When to Use Dry Pasta
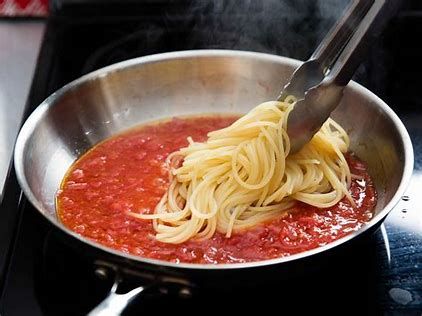
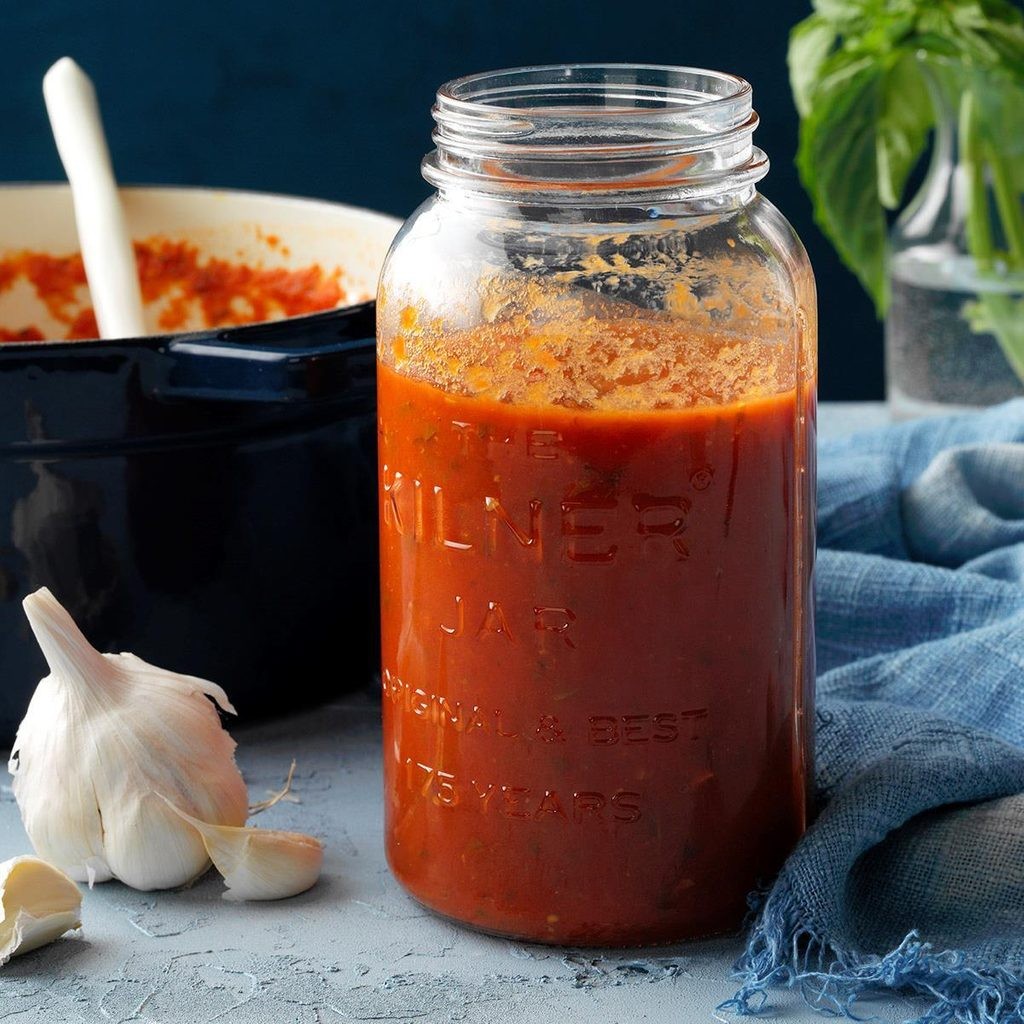
It’s best to use dry pasta with rich, hearty sauces, like a pasta puttanesca dish or a thick, meaty ragu. That’s because dry pasta can be cooked al dente, giving the pasta a chewy bite and thick texture that holds up to these hearty sauces. Dry pasta is also ideal for casseroles and soups because it can hold up to the extended cooking time.
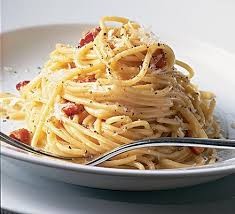
When to Use Fresh Pasta
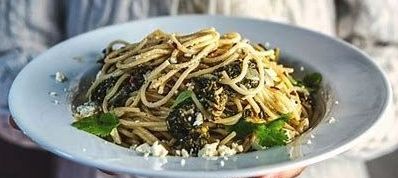
Fresh pasta shines with delicate sauces that accentuate its eggy flavor and chewy texture. Think carbonara, cacio e pepe or pasta tossed with simple sauces like butter, marinara or pesto. Using fresh pasta with a store-bought Alfredo sauce is an excellent way to elevate the canned sauce to something that tastes like it simmered away all day.
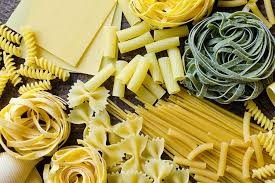
When it comes to pasta, there are two main types: fresh pasta and dry pasta. Here’s a breakdown of the differences:
Fresh Pasta
Made from scratch: Fresh pasta is typically made from scratch using eggs, flour, and water.
Soft and delicate texture: Fresh pasta has a soft, delicate texture and a more tender bite.
Short shelf life: Fresh pasta has a short shelf life (usually 1-2 days) and must be stored in the refrigerator.
More labor-intensive: Fresh pasta requires more labor and time to produce.
Better with light sauces: Fresh pasta pairs well with light, delicate sauces that won’t overpower its flavor.
Dry Pasta
Mass-produced: Dry pasta is mass-produced using a machine that extrudes the dough through a die.
Long shelf life: Dry pasta has a long shelf life (usually 1-2 years) and can be stored at room temperature.
Firm texture: Dry pasta has a firmer texture and a more robust bite.
Less labor-intensive: Dry pasta is easier and faster to produce.
Versatile with sauces: Dry pasta can handle a wide range of sauces, from light to heavy.
When to Choose Each
Fresh pasta: Opt for fresh pasta when you want a more delicate texture and flavor. It’s ideal for dishes like carbonara, cacio e pepe, or with light, oily sauces.
Dry pasta: Choose dry pasta when you want a more robust texture and a longer shelf life. It’s perfect for dishes like spaghetti Bolognese, pesto, or with hearty, meat-based sauces.
Ultimately, the choice between fresh and dry pasta comes down to personal preference, the type of dish you’re making, and the texture and flavor you desire.
Please don’t forget to drop your comment and follow.