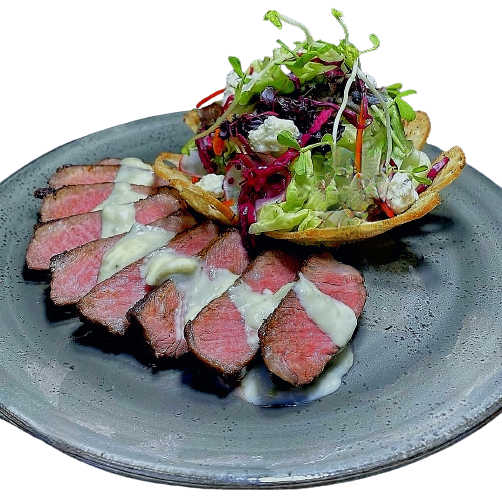
Tag: #chefjoshomosiisisiisi#katedechefosugwe #chefssentongo1 #mrdelicious #nigeria #recipe #mrdeliciousrecipe #chefjosh256

  • Home > Easy Recipes >Dishes >cooking Ideas

    STEAK MILANESA

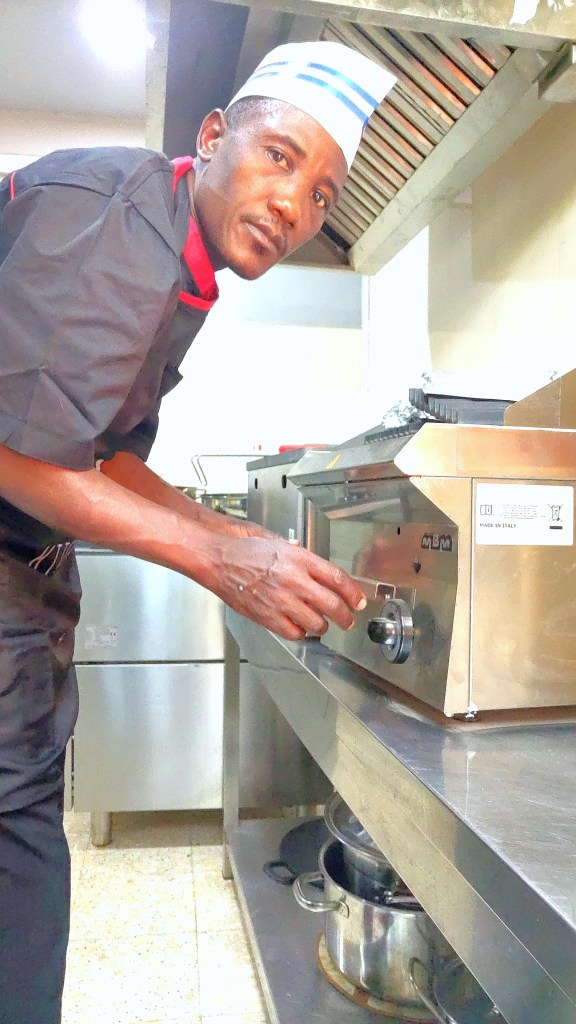
    By:chef ssentongo Geoffrey

    Here’s a classic Milanesa Steak recipe:

    Ingredients

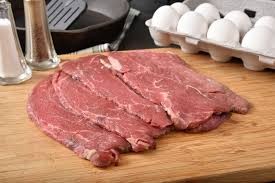
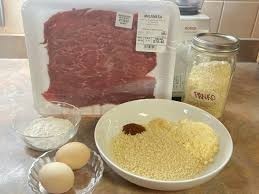
    1. 4 thinly sliced steaks (flank steak, skirt steak, or ribeye)
    2. 1 cup all-purpose flour
    3. 1 teaspoon paprika
    4. 1/2 teaspoon garlic powder
    5. 1/2 teaspoon salt
    6. 1/4 teaspoon black pepper
    7. 2 eggs
    8. 1 cup breadcrumbs (Panko or Italian-style)
    9. Vegetable oil for frying
    10. Lemon wedges and chopped parsley for garnish
    11. Optional: marinara sauce and melted mozzarella cheese

    Instructions

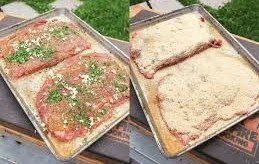
    1. Prepare the steak: Pound the steaks to 1/4-inch thickness.
    2. Season the flour: Mix flour, paprika, garlic powder, salt, and pepper.
    3. Dredge the steak: Coat each steak in flour mixture, shaking off excess.
    4. Dip in eggs: Dip floured steak in beaten eggs, coating completely.
    5. Bread the steak: Coat egg-coated steak in breadcrumbs, pressing gently.
    6. Heat oil: Heat 1/2-inch vegetable oil in a large skillet over medium-high.
    7. Fry the steak: Fry breaded steaks 3-4 minutes per side, until golden and crispy.
    8. Drain excess oil: Place fried steaks on paper towels.
    9. Serve: Serve hot, garnished with lemon wedges and parsley. Optional: top with marinara sauce and melted mozzarella cheese.

    Traditional Variations

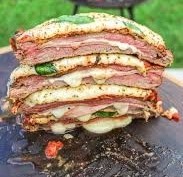
    1. Milanesa Napolitana: Top with marinara sauce, melted mozzarella, and chopped parsley.
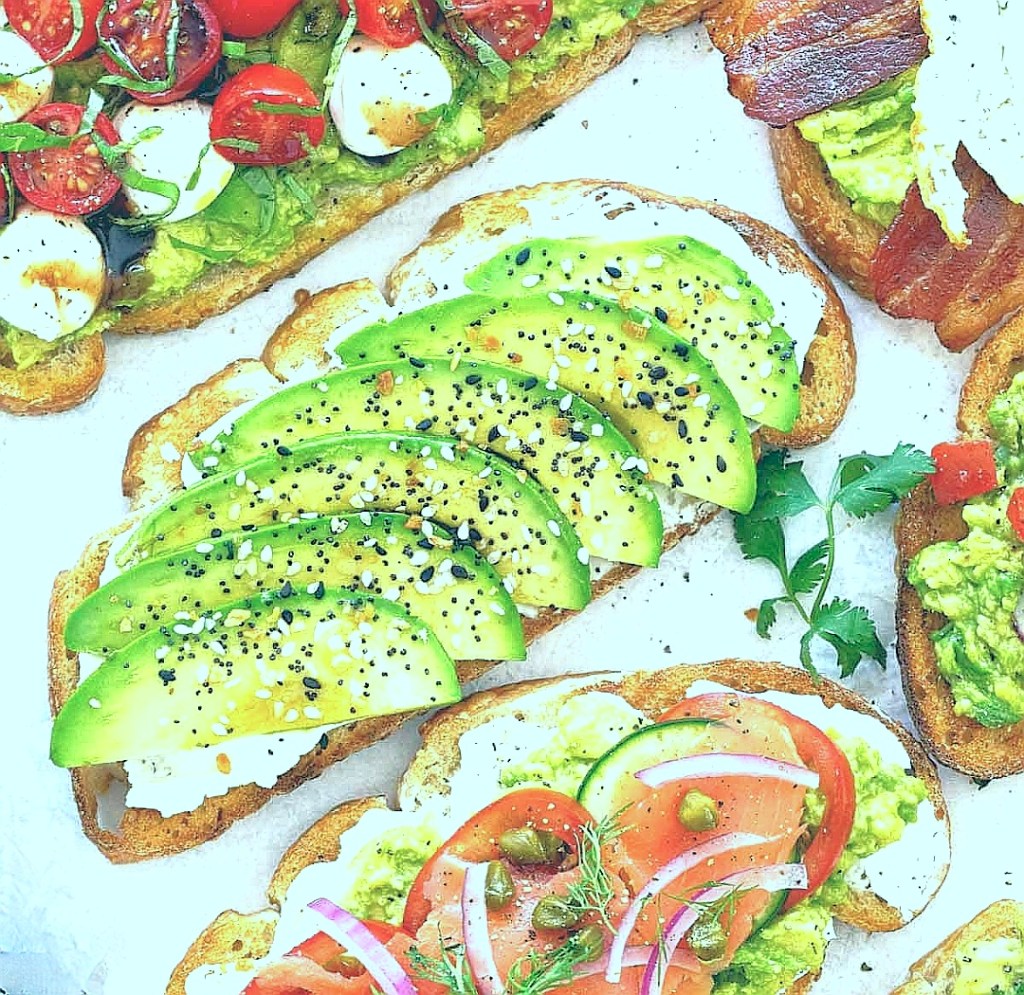
    2. Milanesa Mexicana: Serve with sliced avocado, sour cream, and salsa.
    3. Milanesa Argentina: Serve with chimichurri sauce.

    Tips

    1. Use high-quality breadcrumbs for crispy coating.
    2. Don’t overcrowd the skillet; fry steaks individually.
    3. Maintain medium-high heat for crispy breading.

    Would you like any variations or questions just comment ?

    http://www.chefsideacafe.food.blog

  • Home >Easy Recipes >Dishes >cooking Ideas >kitchen skills

    Author : chef ssentongo

    What is cioppino? And what is the ingredients?

    By:mr Delicious

    Cioppino

    Explore

    Cioppino is a hearty Italian-American seafood stew that originated in San Francisco. It was created by Italian immigrants who adapted their traditional fish stews to include the abundant seafood available on the Pacific coast. The stew typically features a rich tomato and wine broth, filled with a variety of seafood.

    Ingredients for Cioppino

    Here are the common ingredients you’ll need to make cioppino:

    • Olive oil: For sautéing the vegetables.
    • Fennel bulb: Thinly sliced.
    • Onion: Chopped.
    • Shallots: Chopped.
    • Garlic: Finely chopped.
    • Tomato paste: Adds depth to the broth.
    • Diced tomatoes: In juice.
    • Dry white wine: Enhances the flavor.
    • Fish stock: The base of the broth.
    • Bay leaf: For seasoning.
    • Red pepper flakes: For a bit of heat.
    • Salt: To taste.
    • Seafood: A mix of clams, mussels, shrimp, and firm-fleshed fish like halibut or salmon.

    Here’s a detailed recipe for making Cioppino:

    Ingredients

    • 1/4 cup olive oil
    • 1 fennel bulb, thinly sliced
    • 1 onion, chopped
    • 2 shallots, chopped
    • 4 cloves garlic, finely chopped
    • 2 tablespoons tomato paste
    • 1 (28-ounce) can diced tomatoes in juice
    • 1 1/2 cups dry white wine
    • 5 cups fish stock
    • 1 bay leaf
    • 1/2 teaspoon red pepper flakes
    • Salt and freshly ground black pepper, to taste
    • 1 1/2 pounds clams, scrubbed
    • 1 1/2 pounds mussels, scrubbed and debearded
    • 1 pound large shrimp, peeled and deveined
    • 1 1/2 pounds firm white fish (such as halibut or cod), cut into chunks
    • 1/4 cup fresh parsley, chopped

    Instructions

    1. Prepare the Base:
      • Heat the olive oil in a large pot over medium heat.
      • Add the fennel, onion, and shallots. Sauté until the onion is translucent, about 10 minutes.
      • Add the garlic and cook for another 2 minutes.
    2. Build the Broth:
      • Stir in the tomato paste and cook for 2 minutes.
      • Add the diced tomatoes with their juice, white wine, fish stock, bay leaf, and red pepper flakes.
      • Season with salt and pepper.
      • Bring to a simmer and cook for about 30 minutes to allow the flavors to meld.
    3. Add the Seafood:
      • Add the clams and mussels to the pot. Cover and cook until they begin to open, about 5 minutes.
      • Add the shrimp and fish. Simmer gently until the shrimp are pink and the fish is cooked through, about 5-7 minutes.
      • Discard any clams or mussels that do not open.
    4. Finish and Serve:
      • Stir in the chopped parsley.
      • Taste and adjust seasoning if necessary.
      • Serve hot with crusty bread for dipping.

    Enjoy your delicious homemade cioppino! 🍲

    If you have any questions or need further tips, feel free to ask!

    http://www.facebook.com/mrdeliciousfd

  • Home >Easy Recipes >Dishes >cooking Ideas

    By:mr Delicious recipe

    Here’s a detailed recipe for BBQ chicken with homemade sauce that you might enjoy,

    BBQ Sauce Ingredients:

    • 1 cup ketchup (refined sugar-free, if needed)
    • ½ cup coconut sugar (can sub brown sugar)
    • ½ cup apple cider vinegar
    • 2 teaspoons EACH: Dijon mustard, Worcestershire sauce, and sriracha
    • 1 teaspoon EACH: garlic powder, onion powder, and chili powder
    • 6 drops liquid smoke

    Chicken Ingredients:

    • 4 chicken breasts, skinless, boneless
    • 1 tsp salt
    • 1 tsp smoked paprika
    • ½ tsp garlic powder

    Instructions:

    1. Prepare the BBQ Sauce: Whisk together the ketchup, coconut sugar, apple cider vinegar, Dijon mustard, Worcestershire sauce, sriracha, garlic powder, onion powder, chili powder, and liquid smoke in a small pot over medium-high heat. Bring the mixture to a boil, then reduce the heat to medium-low and simmer for 10 minutes, stirring occasionally. Remove from the heat and allow the BBQ sauce to cool.
    2. Season the Chicken: Combine the salt, smoked paprika, and garlic powder in a small bowl. Generously season the chicken breasts with this spice mixture on both sides.
    3. Grill the Chicken: Preheat your grill or griddle pan. Cook the chicken, basting with the BBQ sauce continuously until the chicken is sticky, glossy, and cooked through. This should take about 5-6 minutes per side, depending on the size of the chicken breasts.
    4. Rest and Serve: Remove the chicken from the grill and let it rest for at least 5 minutes before slicing. This step is crucial as it allows the juices to redistribute, resulting in succulent chicken.

    Enjoy your BBQ chicken with a side of your choice, like a fresh salad or roasted vegetables!

    BBQ TILAPIA

    Explore

    BBQ Tilapia is a delightful dish that’s both flavorful and easy to prepare. Here’s a recipe that combines the mild taste of tilapia with a savory BBQ sauce:

    Ingredients for the BBQ Sauce:

    • ¾ cup ketchup
    • 3 tablespoons mustard
    • ½ cup oil
    • ½ cup apple cider vinegar
    • A pinch of garlic salt
    • 3 tablespoons Worcestershire sauce
    • 2 teaspoons paprika
    • ¼ cup lemon juice
    • 1 teaspoon pepper
    • 3 tablespoons brown sugar
    • ¾ cup water
    • ½ cup finely chopped onions
    • 2 cups fresh or canned peaches, pureed

    For the Tilapia:

    • 4 (7 oz) tilapia fillets
    • Olive oil
    • Salt to taste
    • Smoked paprika, garlic powder, onion powder, and celery seed for seasoning
    • Lime juice for finishing

    Instructions:

    1. Prepare the BBQ Sauce: In a saucepan, mix all the sauce ingredients except the peaches and simmer over medium heat for 15 to 20 minutes. Then, add the pureed peaches to the sauce and stir together
    2. Season the Tilapia: Pat the tilapia dry with a clean towel. Rub it with olive oil and sprinkle with kosher salt. Mix the smoked paprika, garlic powder, onion powder, and celery seed in a small bowl, then pat it onto the fish.
    3. Grill the Tilapia: Preheat your grill to medium-high heat (375 to 450°F). Grill the tilapia skin side down for 3 to 4 minutes until grill marks appear and it releases from the grates. Flip and cook another 3 to 4 minutes, depending on the thickness, until flaky and the internal temperature reaches 130°F.
    4. Serve: Remove the tilapia from the grill, allow it to rest for a few minutes, then serve with a generous spoonful of the peach BBQ sauce on top. Finish with a squeeze of fresh lime juice.

    Enjoy your BBQ Tilapia with a side of grilled vegetables or a fresh salad for a complete meal!

    Given your culinary background,  you might appreciate the balance of sweet and tangy flavors with a hint of smokiness in this dishes . Enjoy your cooking !

    Please, don’t forget to follow, comment and share.

    http://www.chefsideacafe.food.blog

  • WHAT IS THE TERM STAGIAIRE STAND FOR IN CULINARY ARTS AND IT’S ADVANTAGES

    Author :chef ssentongo Geoffrey

    Stagiaire, Apprenticeship And Externship

    In the culinary world, the term “stagiaire” refers to an unpaid intern or apprentice, typically in a professional kitchen. Stagiaires are individuals who are either enrolled in culinary school or seeking to gain practical experience in a professional kitchen environment. The term originates from the French word “stage,” which means “training” or “apprenticeship.”

    Advantages of being a stagiaire in the culinary industry include:

    1. Hands-on Experience: Stagiaires have the opportunity to work alongside experienced chefs and kitchen staff, gaining practical, real-world experience in a professional kitchen environment.
    2. Skill Development: Stagiaires can learn and develop culinary skills, techniques, and industry best practices by observing and working under the guidance of seasoned professionals.
    3. Networking: Working as a stagiaire allows individuals to build relationships with industry professionals, potentially opening doors to future employment opportunities or mentorship.
    4. Exposure to Different Culinary Styles: Stagiaires may have the chance to work in various types of kitchens, such as fine dining, casual dining, or specialized cuisine, providing exposure to different culinary styles and approaches.

    The main difference between a stagiaire and an apprenticeship or externship in the culinary industry lies in the nature and structure of the training:

    1. Apprenticeship: An apprenticeship in the culinary industry typically involves a formal, paid training program that combines on-the-job training with classroom instruction. Apprenticeships are often longer in duration and are designed to provide comprehensive training in various aspects of the culinary arts, leading to a recognized certification or qualification.
    2. Externship: An externship is a structured, supervised work experience that is typically a required component of a culinary education program. It allows students to gain practical experience in a professional kitchen setting as part of their academic curriculum. Externships are often shorter in duration compared to apprenticeships and may or may not be paid, depending on the program and the specific arrangement with the host kitchen.

    In summary, while stagiaires, apprentices, and externs all involve hands-on training in the culinary industry, the specific terms refer to different types of training programs, each with its own structure, duration, and objectives.

    I find this article helpful comment and share to your friends so that they can find more articles like this on my website or on Facebook page below.

    http://www.facebook.com/Chefssentongo1

    http://www.chefsideacafe.food.blog

  • AS A CHEF WHAT CAN YOU DO WITH YOUR COOKING SKILLS?

    Author :chef ssentongo Geoffrey

    I would suggest chefs out there trying out the following activities and hobbies related to creating recipes and improving kitchen skills:

    1. Recipe Swap: Connect with friends, family, or online cooking communities to exchange and try out new recipes from different cultures and cuisines. You can even organize a virtual cooking party to share your experiences.
    2. Food Photography: Experiment with food styling and improve your food photography skills. Try capturing and showcasing your culinary creations in an artistic and visually appealing way.
    3. Recipe Development: Challenge yourself to create new recipes by experimenting with different flavors, textures, and ingredients. You can start by modifying existing recipes or even invent entirely new dishes from scratch.
    4. Cooking Classes: Enroll in virtual or in-person cooking classes to learn new techniques and expand your culinary knowledge. You can explore a variety of cuisines, such as French, Italian, Asian, or vegan cooking, depending on your interests.
    5. Homemade Preserves: Learn the art of making homemade preserves, such as jams, pickles, or chutneys. Experiment with different fruits, vegetables, and spices to create unique and personalized flavor combinations.
    6. Culinary Storytelling: Combine your love for cooking with storytelling by creating a blog or social media platform where you can share your recipes, cooking experiences, and the stories behind them. Incorporate writing, photography, and videography to make it more engaging.
    7. Kitchen Science Experiments: Explore the scientific aspects of cooking by engaging in kitchen experiments. You can experiment with emulsions, fermentation, molecular gastronomy, or even make your own cheese or yogurt.
    8. Monthly Cooking Challenges: Participate in cooking challenges or set monthly themes for yourself to motivate continuous culinary exploration. For example, you can challenge yourself to bake a new type of bread every week or cook a dish from a different country each month.
    9. Cookbook Club: Start a cookbook club with friends or join existing ones. Each month, select a cookbook or a specific theme, and everyone can prepare a recipe from it. Share your experiences and thoughts on the recipes, ingredients, and techniques used.
    10. Kitchen Garden: If you have a yard or even a small balcony, consider starting a kitchen garden. Grow your own herbs, vegetables, or fruits. It will not only provide you with fresh ingredients but also be a rewarding and relaxing activity.

    Remember, kitchen skills and recipe creation can be enjoyed and practiced anywhere, encouraging your creativity and culinary expertise to soar.

    Please, send your comments

    on Facebook page or website below

    http://www.chefsideacafe.food.blog

  • HOW TO OPERATE A BAR AND RESTAURANT?

    Author : chef ssentongo Geoffrey

    Here are the way you can operate a bar & restaurant:

    Operating a bar and restaurant successfully involves a combination of careful planning, efficient management, and exceptional customer service. Here are some steps to help you get started:

    1. Develop a business plan: Outline your concept, target market, menu, pricing strategy, marketing plans, and financial projections. Consider factors like location, competition, and legal requirements.
    2. Secure funding: Determine your startup costs and explore funding options such as personal savings, loans, or partnerships. Create a budget that covers all expenses, including licenses, permits, rent, staff wages, inventory, utilities, and marketing.
    3. Find a suitable location: Look for a location that aligns with your target customer base and has high foot traffic. Ensure the space is well-equipped and complies with health and safety standards.
    4. Obtain necessary permits and licenses: Check with local authorities to obtain permits for serving alcohol, operating a food establishment, and playing music. Comply with health, safety, and sanitation regulations.
    5. Hire and train staff: Recruit reliable, experienced, and friendly personnel such as bartenders, servers, chefs, and kitchen staff. Provide thorough training on your menu, service standards, food handling, and customer interactions.
    6. Create a compelling menu: Develop a diverse menu with high-quality dishes and beverages that cater to your target market. Consider dietary preferences, seasonal ingredients, and local specialties. Price items competitively to ensure profitability.
    7. Manage inventory and suppliers: Establish relationships with trusted suppliers for regular deliveries of fresh ingredients and drinks. Implement inventory management systems to track and control stock levels. Minimize waste and spoilage through efficient ordering and storage practices.
    8. Market your establishment: Develop a marketing strategy to attract customers. Utilize social media, online platforms, local advertising, and partnerships with complementary businesses. Offer promotions, special events, and loyalty programs to encourage repeat visits.
    9. Prioritize customer service: Train your staff to provide exceptional customer service. Encourage a friendly and welcoming atmosphere, prompt service, and attentiveness to customer needs. Respond to customer feedback and address any issues promptly.
    10. Monitor financial performance: Regularly review your financial statements, including revenue, expenses, and profits. Analyze sales data, trends, and customer feedback to make informed business decisions. Adjust your strategies as required to maximize profitability.

    Remember, operating a bar and restaurant requires continuous improvement, adaptability, and staying up to date with industry trends.

    If you read this article and find useful follow, like, comment and share.

    Please, we need your comment so that we can keep posting, thanks see you again.

Design a site like this with WordPress.com
Get started