Tag: # cosamcookingandbaking

  • Home – Easy Recipes – Dishes – Cooking Ideas

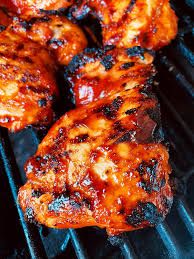
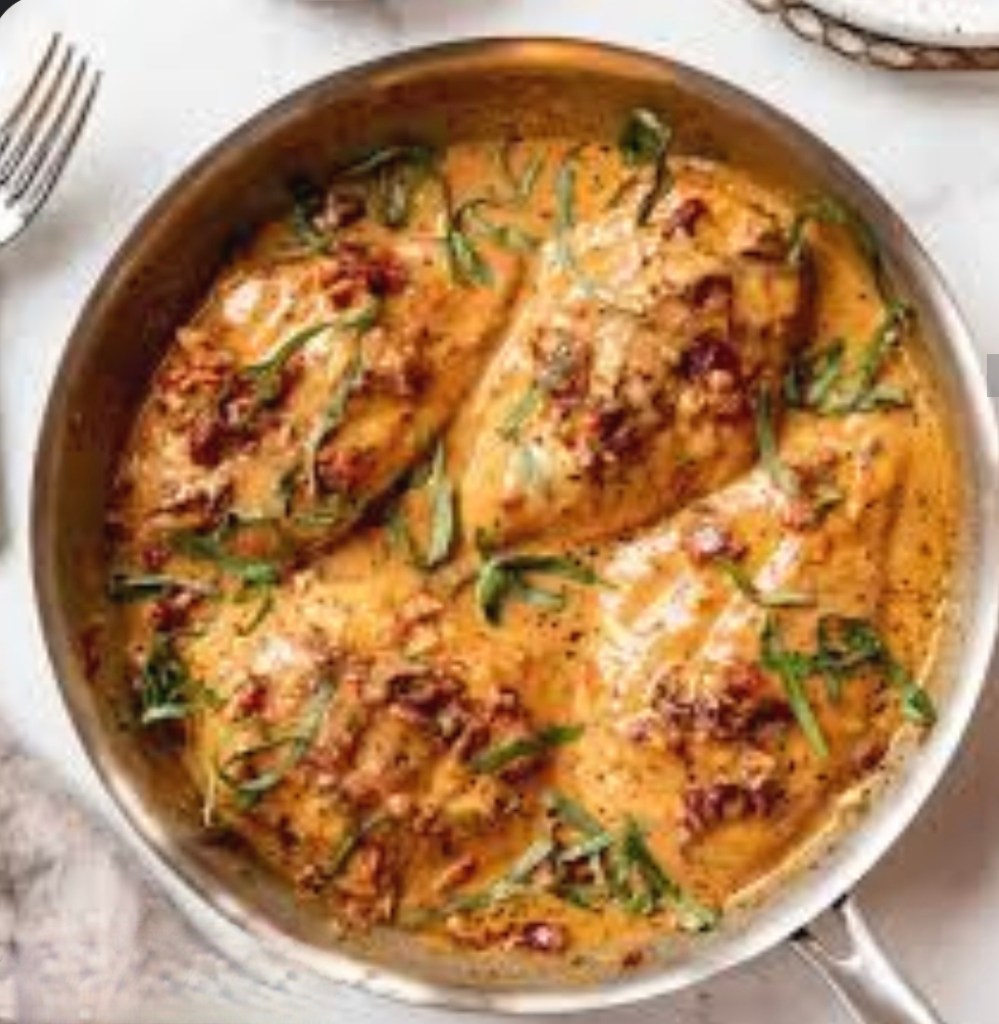
    PAN ‑SEARED CHICKEN BREAST WITH ROSEMARY ‑HONEY GLAZE & GARLIC SAUCE

    Ingredients (serves 2)

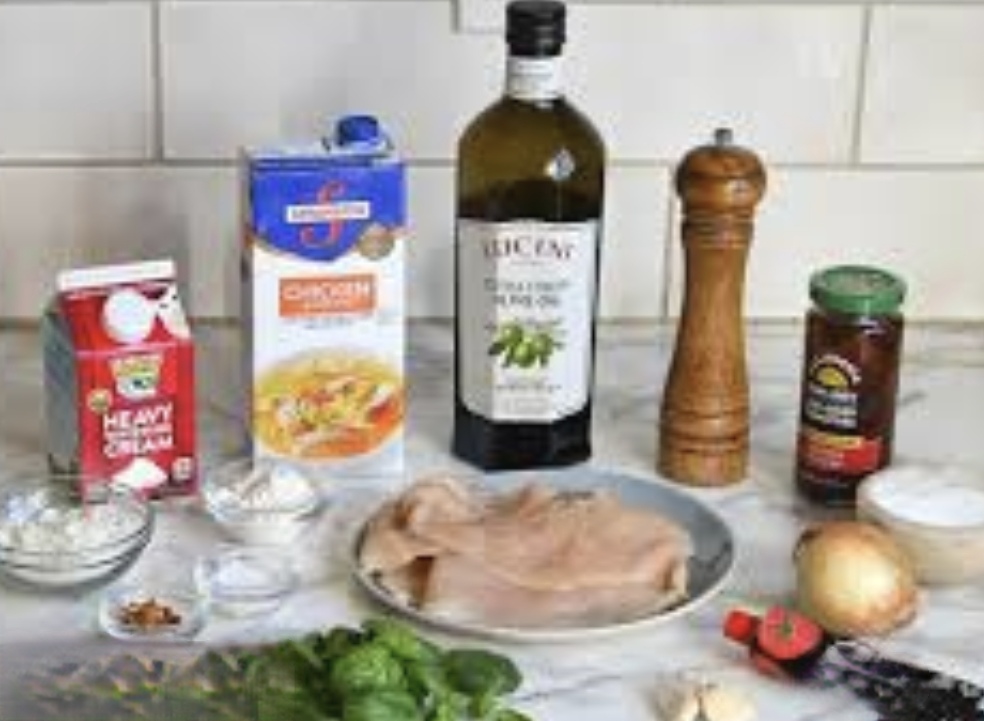
    • 2 boneless, skinless chicken breasts (about 6‑8 oz each)
    • 2 tbsp olive oil (for searing)
    • Salt & freshly ground black pepper, to taste
    • 2 sprigs fresh rosemary (1 for garnish, 1 for cooking)
    • 3 cloves garlic, thinly sliced
    • 8–10 small whole garlic cloves (for the sauce)
    • 2 tbsp honey
    • 2 tbsp balsamic or red‑wine vinegar
    • ¼ cup chicken broth (or water)
    • 1 tbsp butter
    • Optional: pinch of smoked paprika or herbs de Provence

    Method

    1. Prep the chicken
      • Pat the breasts dry with paper towel.
      • Season both sides generously with salt, pepper, and a light sprinkle of paprika (if using).
    2. Sear the chicken
      • Heat olive oil in a large skillet over medium‑high heat.
      • Add the chicken and a rosemary sprig. Sear 4‑5 min per side until golden brown and cooked through (internal temp ≈ 165°F/74°C).
      • Remove chicken to a plate and keep warm.
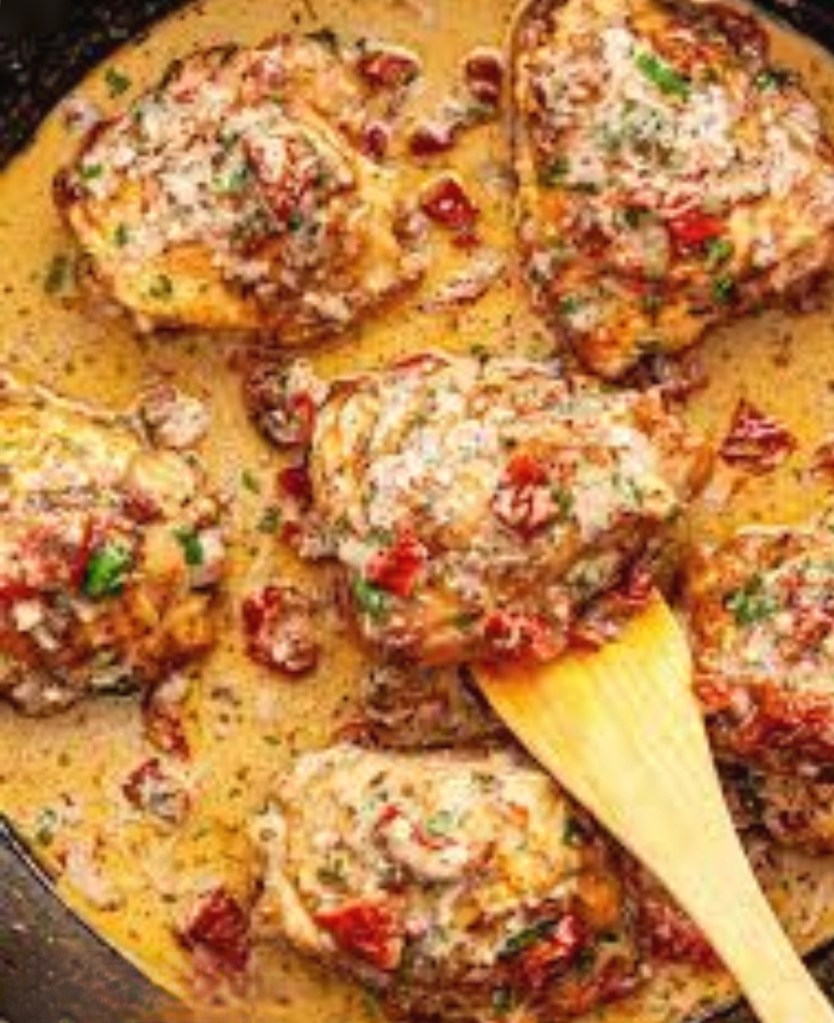
    3. Make the garlic‑honey sauce
      • In the same skillet, reduce heat to medium. Add butter and sliced garlic; sauté 30 s until fragrant.
      • Toss in the whole garlic cloves and cook 2 min, stirring.
      • Stir in honey, vinegar, and chicken broth. Simmer 3‑4 min, scraping up browned bits, until the sauce thickens slightly and coats the garlic.
    4. Glaze the chicken
      • Return the chicken to the skillet, spoon the sauce over it, and let it simmer together for 2 min so the flavors meld.
      • Remove the cooking rosemary sprig and discard.
    5. Plate
      • Place each chicken breast on a plate with the garlic‑sauce spooned around it.
      • Garnish with a fresh rosemary sprig on top of the chicken.
      • Serve with a glass of white wine (as in the photo) or your preferred side (e.g., roasted potatoes or greens).

    Tips & Variations

    • For extra caramelization, finish the chicken under a broiler for 1‑2 min after searing.
    • Swap honey for maple syrup for a different sweet note.
    • Add a splash of soy sauce to the glaze for umami depth.

    You want the exact measurements adjusted for 4 servings or need any specific cooking tips?

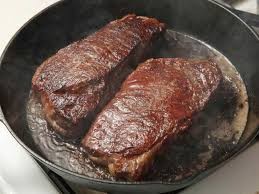
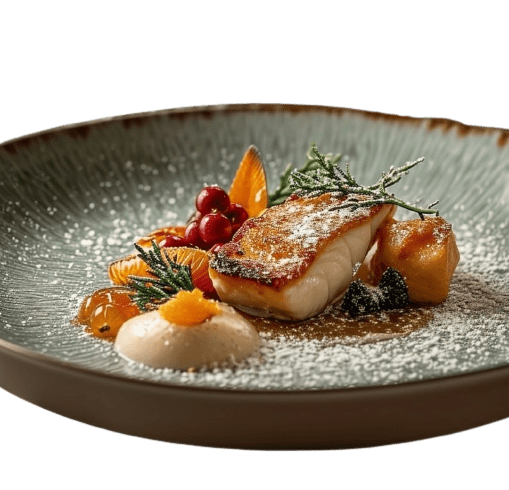
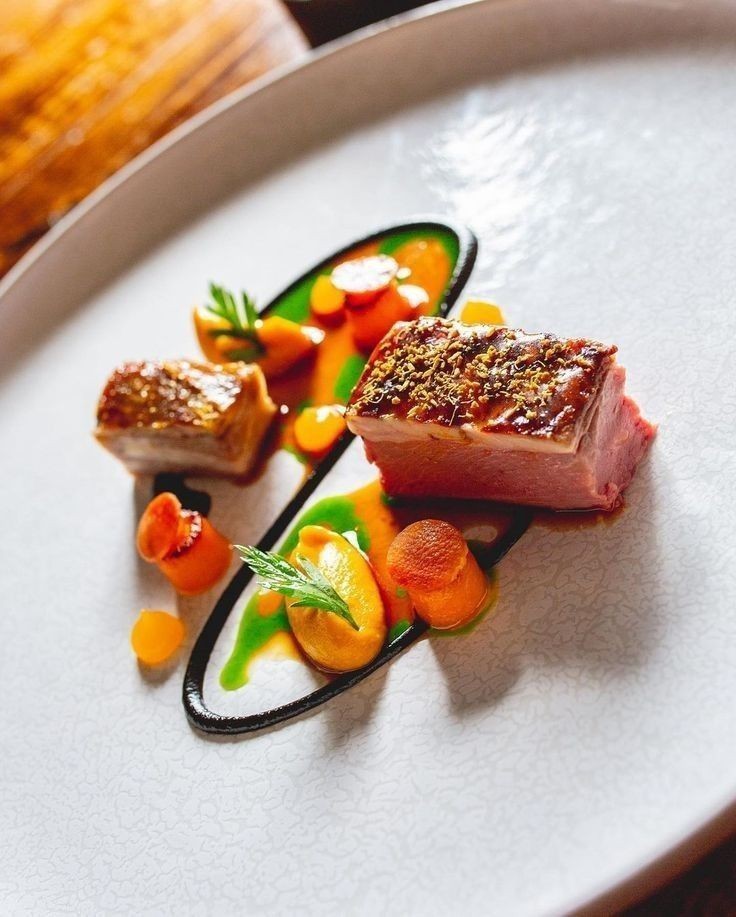
    PAN ‑SEARED PORK BELLY WITH CARROT PURÉE & HERB SAUCE (Fine Dining Style)

    Ingredients (serves 2)

    • 2 × 150 g pork belly slabs, skin on
    • Salt & freshly ground black pepper
    • 1 tsp dried rosemary (for crust)
    • 2 tbsp vegetable oil (for searing)

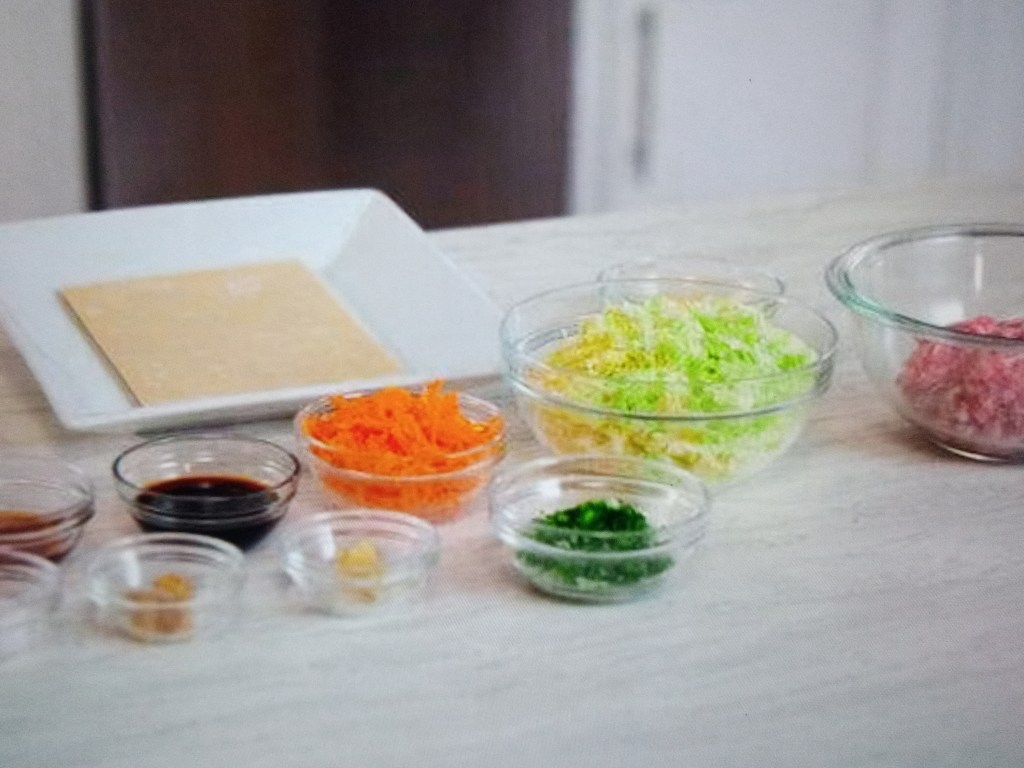
    Carrot accompaniment

    • 4 baby carrots, peeled & sliced into cylinders
    • 2 tbsp carrot purée (cooked carrots blended with butter & a pinch of sugar)
    • 1 tbsp orange‑carrot juice reduction (for orange sauce)

    Sauces & garnish

    • 1 tsp black reduction (sweet soy or balsamic reduction for the black line)
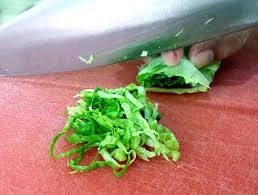
    • 1 tsp green herb oil (parsley or basil oil for the green streak)
    • Fresh rosemary sprig (for garnish)

    Method

    1. Prep the pork belly
      • Score the skin lightly in a cross‑hatch pattern.
      • Season generously with salt, pepper & dried rosemary.
    2. Cook the belly
      • Heat oil in a heavy skillet over medium‑high heat.
      • Sear skin side down 4–5 min until crisp, then flip & sear the flesh 2–3 min.
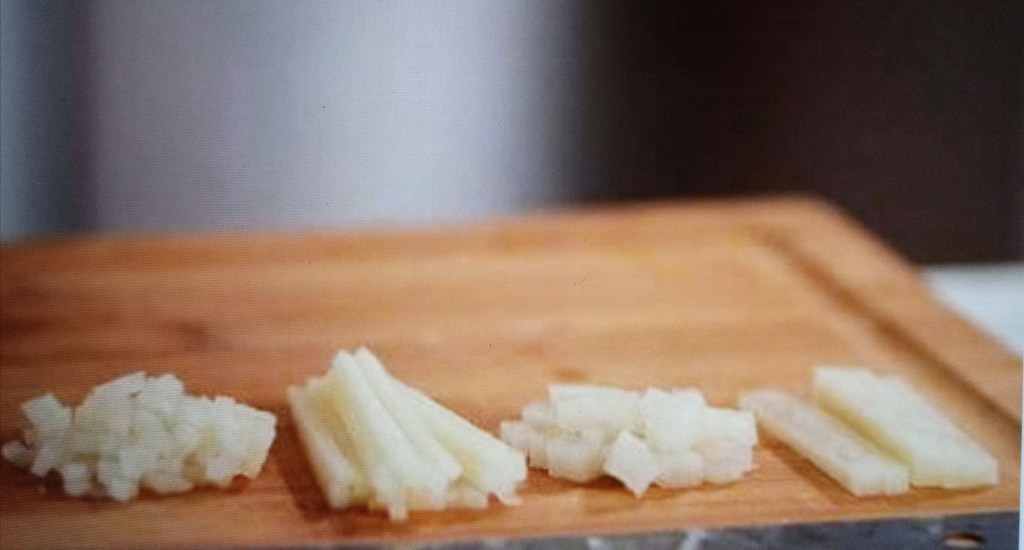
      • Finish in a 180 °C oven for 10 min for tender interior. Rest 5 min, then slice into neat cubes.
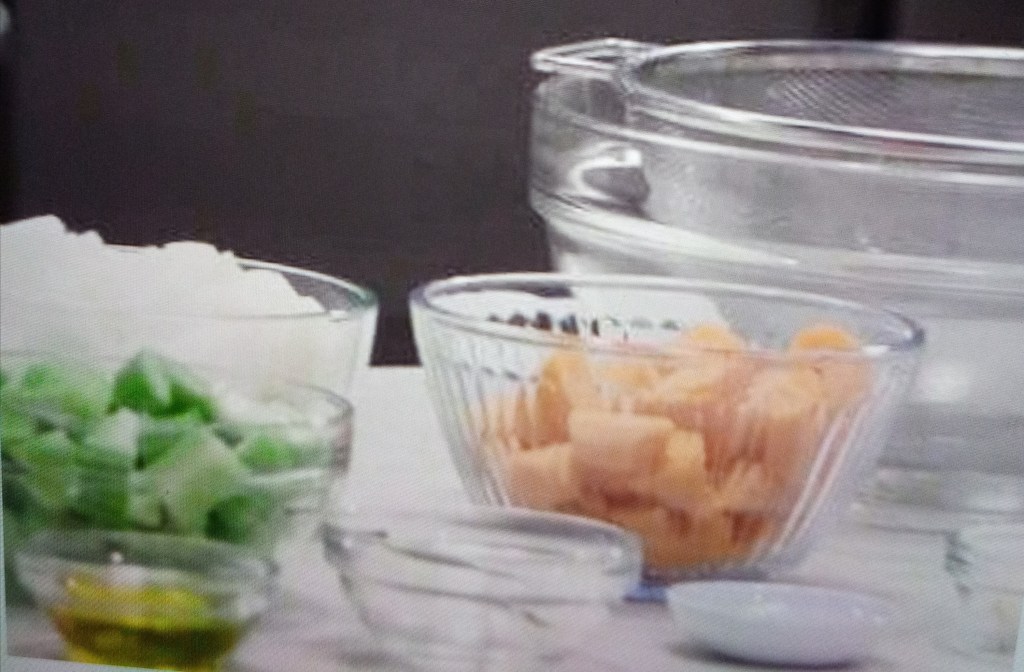
    3. Carrot prep
      • Blanch carrot cylinders 2 min, then glaze in butter & a pinch of salt.
      • Warm carrot purée and spoon onto the plate.
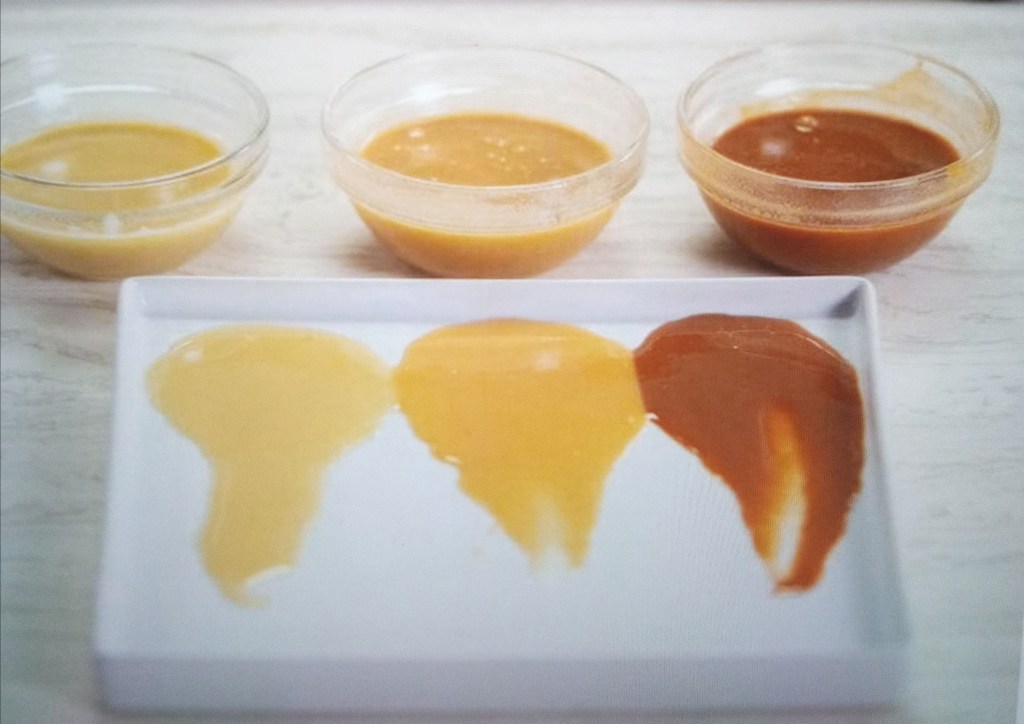
    4. Sauce work
      • Pipe black reduction in an elongated oval on the plate.
      • Add green herb oil in a parallel streak beside the black line.
      • Dot orange‑carrot reduction over the green line to create the orange accents.
    5. Plate
      • Place pork belly cubes on the sauce oval.
      • Arrange glazed carrot cylinders around the meat.
      • Add a small quenelle of carrot purée topped with a rosemary leaf beside the meat.
      • Finish with a fresh rosemary sprig on top for aroma.

    Tips & Variations

    • Swap pork belly for duck breast for a richer flavor.
    • Replace rosemary with thyme for a different herb note.
    • Use beet juice for a deep red sauce instead of orange reduction.

    You want me to tweak any part of the recipe (e.g., simplify it, change ingredients, or add plating tips)? 🍽️

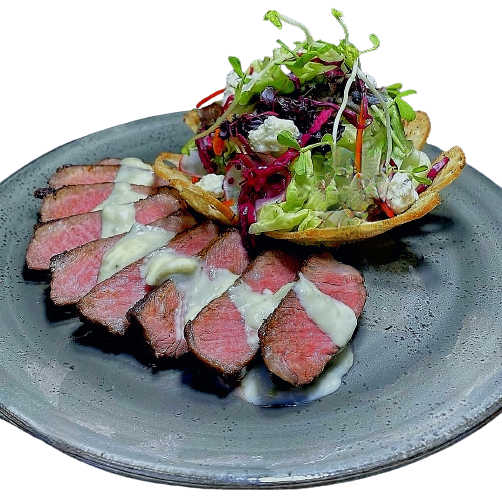
    PAN ‑SEARED BEEF MEDALLION WITH GRILLED ONION , VEGETABLE SALAD & HERB SAUCES

    Ingredients (serves 1)

    • 1 meat medallion (beef or pork), about 150 g
    • 1 small onion, cut into thick rings
    • 1 tsp olive oil (for searing)
    • Salt & pepper, to taste
    • 1 sprig fresh rosemary
    • 2 thin slices cucumber, julienned
    • 1 small carrot, julienned
    • ½ red bell pepper, sliced thin
    • 1 cherry tomato, halved
    • Micro‑greens (e.g., basil or watercress), for garnish

    Sauces

    • 2 tbsp carrot purée (orange sauce)
    • 2 tbsp herb‑infused oil or pesto (green sauce)

    Method

    1. Season the meat medallion with salt & pepper.
    2. Sear in olive oil over medium‑high heat, 3–4 min per side, until browned and cooked to desired doneness. Rest 2 min.
    3. Grill onion rings in the same pan, 2 min per side, until caramelized.
    4. Mix cucumber, carrot, and bell pepper for the vegetable salad; season lightly with salt.
    5. Plate: arrange the veg salad in the centre of the plate. Place the meat on top, then the grilled onion rings. Add a dollop of the orange sauce on each onion ring.
    6. Drizzle orange and green sauces in decorative lines on the plate.
    7. Garnish with rosemary sprig, cherry tomato halves, and micro‑greens.

    Tips

    • Adjust sauce thickness with a little water or stock if needed.
    • Swap meat type or use fish for variation.

    You want me to tweak any part of the recipe (e.g., seasoning, plating style) or do you need anything else about this dish?

    SPINACH & FETA CHRISTMAS TREE PUFF PASTRY RECIPE

    1. Ingredients
      • 1 package (2 sheets) puff pastry, thawed
      • 2 cups fresh spinach, chopped
      • 1/2 cup feta cheese, crumbled
      • 1/4 cup ricotta or cream cheese (optional for smoothness)
      • 1 egg (for egg wash)
      • 2 tbsp olive oil
      • 1 garlic clove, minced
      • 1/4 tsp nutmeg
      • Salt & pepper to taste
      • 1 tbsp sesame seeds (for topping)
      • Dried cranberries or red pepper flakes (optional garnish)
    2. Filling preparation
      • Heat olive oil in a pan over medium heat. Add garlic and sauté 30 s.
      • Add spinach, cook until wilted (2–3 min). Season with nutmeg, salt & pepper. Remove from heat.
      • Mix spinach with feta (and ricotta if using). Set aside to cool.
    3. Assemble the trees
      • Roll out puff pastry sheets on a lightly floured surface. Cut into 10 cm (4‑inch) squares.
      • Place a spoonful of filling in the center of each square.
      • Fold pastry into a triangle shape, layering strips of pastry over the filling to create a “tree” form with visible “branches”.
      • Brush tops with beaten egg and sprinkle sesame seeds. Add a cranberry or red flake for decoration.
    4. Bake
      • Preheat oven to 200 °C (400 °F).
      • Bake pastries 15–20 min, until golden brown and puffed.
    5. Serve
      • Cool slightly on a wire rack. Serve warm or at room temperature on a festive plate.

    You want me to tweak any part of the recipe (e.g., ingredient swap or step simplification), or do you need tips for presentation? 🍃🥧🎄

    PUMPKIN-SHAPED DESSERT RECIPE

    Ingredients

    • 200 g sponge cake or biscuit crumbs (for “soil”)
    • 100 g butter, melted (to bind crumbs)
    • 300 ml heavy cream
    • 200 g white chocolate, melted
    • 150 g pumpkin puree (cooked & strained)
    • 2 tbsp powdered sugar
    • 1 tsp vanilla extract
    • Orange food coloring (gel preferred)
    • Small chocolate or candy pumpkin stems (or cinnamon sticks for decoration)

    Equipment

    • Mixing bowls
    • Electric mixer
    • Silicone pumpkin molds (small, 6–8 cm diameter)
    • Baking sheet
    • Refrigerator

    Method

    1. Crumb base: Mix cake crumbs with melted butter until it holds together. Press a thin layer onto the bottom of your serving plates to form “soil”. Set aside.
    2. Pumpkin mousse: Whip heavy cream until soft peaks form. In another bowl, combine melted white chocolate, pumpkin puree, powdered sugar, vanilla, and orange coloring. Fold the whipped cream into the pumpkin mix gently until smooth.
    3. Assemble: Fill the pumpkin molds with the mousse, tap to release air bubbles, and smooth the tops. Insert a small piece of chocolate or cinnamon for the stem. Freeze for at least 2 hours or until firm.
    4. Finish: Unmold the pumpkin shapes and place each on a prepared crumb base. Sprinkle extra crumbs around the base for a “dirt” effect.
    5. Serve: Keep chilled until serving. Garnish with fresh leaves or berries if desired.

    Tips

    • Use high-quality chocolate for a glossy finish.
    • For a firmer mousse, substitute part of the cream with mascarpone.
    • Adjust coloring to get the bright orange pumpkin look you want.

    Would you like the exact measurements in metric cups or need a simplified version without special molds? 🍰🎃

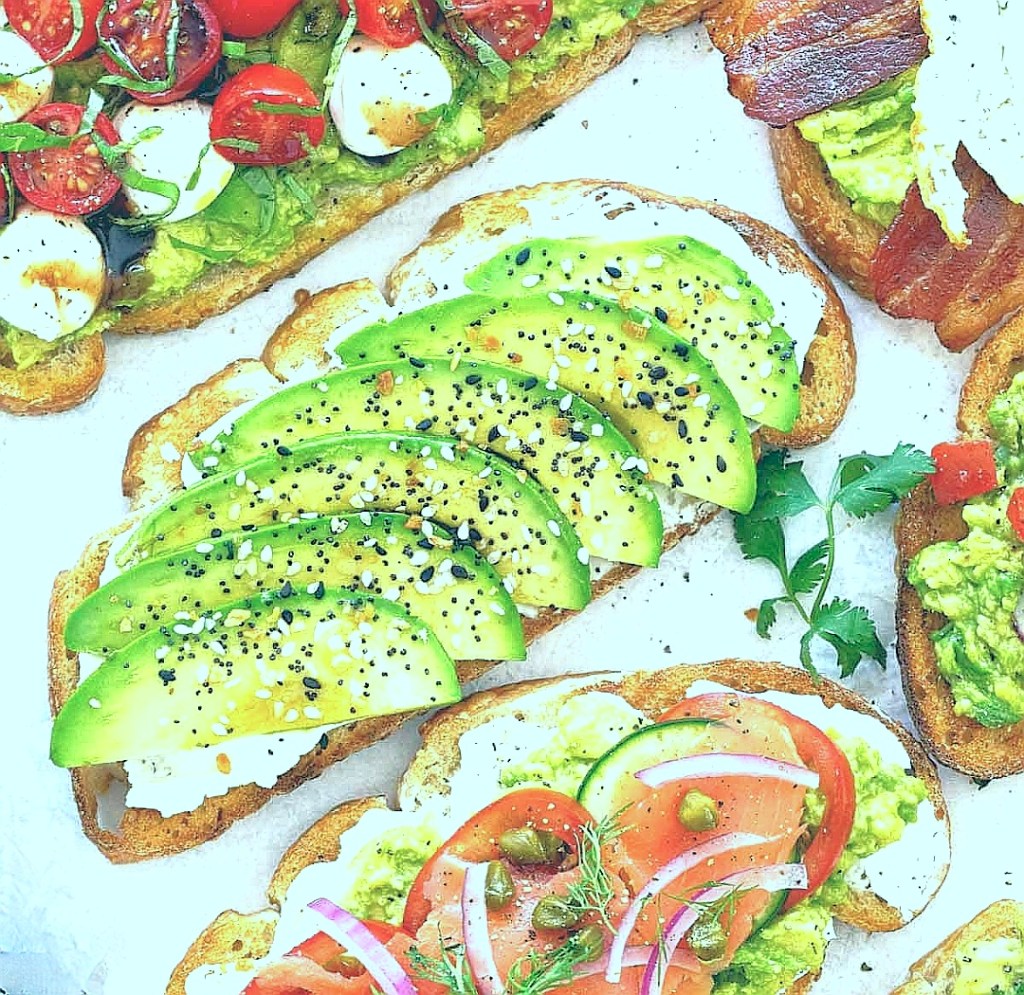
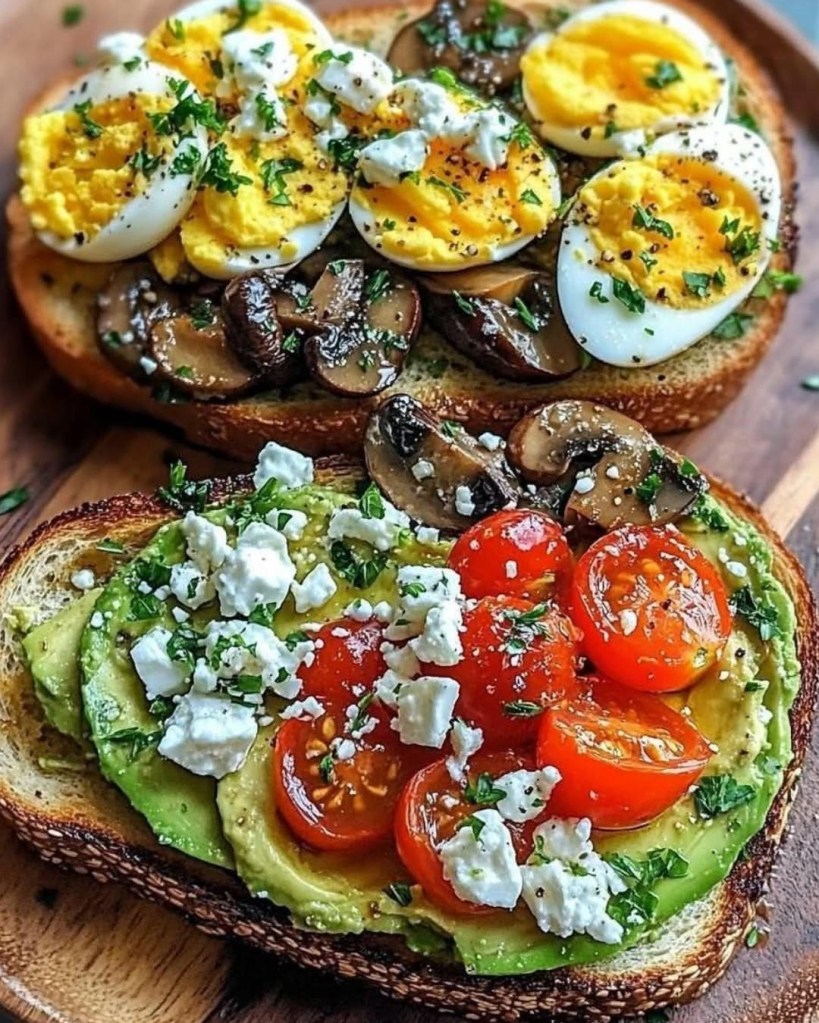
    GOURMET AVOCADO & EGG OPEN ‑FACE SANDWICHES (2 servings)

    Ingredients

    • 2 thick slices crusty bread (sourdough or artisan)
    • 1 ripe avocado, sliced
    • 4–5 cherry tomatoes, halved
    • 4–5 button mushrooms, sliced
    • 2 hard‑boiled eggs, sliced in halves
    • 50 g feta cheese, crumbled
    • Fresh parsley, chopped (for garnish)
    • 1 tsp olive oil
    • Salt & freshly cracked black pepper, to taste
    • Optional: pinch of chili flakes or lemon juice for extra zing

    Method

    1. Toast the bread
      • Preheat a grill pan or oven to medium‑high heat.
      • Brush each bread slice with olive oil, toast until golden and crisp on both sides. Set aside.
    2. Prepare the toppings
      • Mushrooms: In the same pan, add a splash of olive oil, sauté sliced mushrooms with a pinch of salt until browned and caramelized, ~3‑4 min. Sprinkle with parsley.
      • Avocado: Mash the avocado with a fork, season with salt, pepper, and optional lemon juice. Spread evenly on one toast slice.
      • Eggs: Arrange sliced hard‑boiled eggs on the other toast; season with salt, pepper, and parsley.
    3. Assemble the sandwiches
      • Bottom toast (avocado): Layer avocado mash, then mushrooms, cherry tomato halves, crumbled feta, and parsley. Finish with a drizzle of olive oil and a pinch of black pepper.
      • Top toast (egg): Place sautéed mushrooms on the bread, then egg halves, sprinkle feta, parsley, and black pepper.
    4. Serve
      • Plate the two open‑face sandwiches hot. Add chili flakes if you like a kick.

    Tips & Variations

    • Swap feta for goat cheese or cream cheese for a richer taste.
    • Add a thin layer of pesto on the bread before toppings for extra flavor.
    • For a softer egg texture, use soft‑boiled eggs instead of hard‑boiled.

    You want me to tweak any part of the recipe (e.g., measurements, ingredients) or do you need a step‑by‑step photo guide too?

    #easyrecipe09 #easyrecipe06 #easyrecipe006

  • Home – Easy Recipes – Dishes – Cooking Guide

    25 Easy Indian Dinner Recipes Bursting With Flavour Step by Step Guides

    Recipe by : chef ssentongo

    From : Easy Recipes

    Here are 25 easy Indian dinner recipes bursting with flavor, complete with step-by-step instructions. These dishes are perfect for weeknight meals, family dinners, or entertaining guests with authentic Indian flavors.


    1. Butter Chicken (Murgh Makhani)

    Ingredients:

    • 500g chicken, 1 cup yogurt, 2 tbsp butter, 1 onion (pureed), 1 cup tomato puree, 1 tsp garam masala, 1 tsp kasuri methi, 1 tbsp cream.

    Steps:

    1. Marinate chicken in yogurt and spices for 30 mins.
    2. Grill or pan-fry chicken.
    3. In a pan, melt butter, sauté onion, add tomato puree, spices, and cook.
    4. Add chicken, simmer, finish with cream and kasuri methi.

    2. Dal Tadka

    Ingredients:

    • 1 cup yellow lentils, 2 tomatoes, 1 onion, 1 tsp cumin, 1 tsp turmeric, 2 garlic cloves, ghee.

    Steps:

    1. Cook lentils until soft.
    2. Temper cumin, garlic, onions in ghee.
    3. Add tomatoes, spices, and mix into dal.
    4. Garnish with cilantro.

    3. Palak Paneer

    Ingredients:

    • 2 cups spinach, 200g paneer, 1 onion, 1 tsp cumin, 1 tsp garam masala, cream.

    Steps:

    1. Blanch spinach, blend into puree.
    2. Sauté onions, add spinach, spices.
    3. Add paneer cubes, simmer, finish with cream.

    4. Chana Masala

    Ingredients:

    • 2 cups chickpeas, 1 onion, 2 tomatoes, 1 tsp coriander powder, 1 tsp amchur.

    Steps:

    1. Sauté onions, tomatoes, spices.
    2. Add chickpeas, water, simmer.
    3. Garnish with cilantro.

    5. Vegetable Biryani

    Ingredients:

    • 1 cup basmati rice, mixed veggies, biryani masala, fried onions, mint, yogurt.

    Steps:

    1. Parboil rice.
    2. Layer rice with spiced veggies, saffron milk.
    3. Dum cook for 20 mins.

    6. Aloo Gobi

    Ingredients:

    • 2 potatoes, 1 cauliflower, 1 tsp turmeric, 1 tsp cumin, cilantro.

    Steps:

    1. Sauté spices, add chopped veggies.
    2. Cook covered until tender.

    7. Rajma (Kidney Bean Curry)

    Ingredients:

    • 1 cup kidney beans, 1 onion, 2 tomatoes, 1 tsp cumin, 1 tsp coriander.

    Steps:

    1. Cook beans until soft.
    2. Make a tomato-onion gravy, add beans.

    8. Paneer Tikka Masala

    Ingredients:

    • Paneer cubes, yogurt, bell peppers, onion, tikka masala paste.

    Steps:

    1. Marinate paneer in yogurt and spices.
    2. Grill, then simmer in tomato gravy.

    9. Jeera Rice

    Ingredients:

    • 1 cup rice, 1 tsp cumin, ghee, cashews.

    Steps:

    1. Temper cumin in ghee.
    2. Add cooked rice, mix.

    10. Baingan Bharta

    Ingredients:

    • 1 roasted eggplant, 1 onion, 2 tomatoes, 1 tsp garam masala.

    Steps:

    1. Mash roasted eggplant.
    2. Sauté onions, tomatoes, add eggplant.

    11. Malai Kofta

    Ingredients:

    • Paneer-potato balls, creamy tomato gravy.

    Steps:

    1. Make koftas, fry.
    2. Simmer in rich gravy.

    12. Methi Thepla

    Ingredients:

    • Whole wheat flour, fenugreek leaves, spices.

    Steps:

    1. Knead dough, roll, cook on tawa.

    13. Masoor Dal

    Ingredients:

    • Red lentils, garlic, tomatoes, turmeric.

    Steps:

    1. Cook lentils, temper with garlic.

    14. Aloo Matar

    Ingredients:

    • Potatoes, peas, onions, tomatoes.

    Steps:

    1. Sauté spices, add veggies, cook.

    15. Chicken Curry

    Ingredients:

    • Chicken, onions, ginger-garlic paste, coconut milk.

    Steps:

    1. Brown chicken, make gravy, simmer.

    16. Paneer Bhurji

    Ingredients:

    • Crumbled paneer, onions, tomatoes, spices.

    Steps:

    1. Sauté veggies, add paneer.

    17. Sambar

    Ingredients:

    • Toor dal, tamarind, sambar powder, veggies.

    Steps:

    1. Cook dal, add veggies, temper.

    18. Pav Bhaji

    Ingredients:

    • Mixed veggies, butter, pav bread.

    Steps:

    1. Mash veggies, cook with spices.
    2. Serve with toasted pav.

    19. Dahi Bhalla

    Ingredients:

    • Lentil fritters, yogurt, tamarind chutney.

    Steps:

    1. Soak vadas, top with yogurt.

    20. Egg Curry

    Ingredients:

    • Boiled eggs, onion-tomato gravy.

    Steps:

    1. Make gravy, add eggs.

    21. Vegetable Pulao

    Ingredients:

    • Rice, mixed veggies, whole spices.

    Steps:

    1. Cook rice with veggies.

    22. Kadai Paneer

    Ingredients:

    • Paneer, bell peppers, kadai masala.

    Steps:

    1. Sauté paneer, peppers in spicy gravy.

    23. Dal Makhani

    Ingredients:

    • Black lentils, butter, cream.

    Steps:

    1. Slow-cook lentils, finish with cream.

    24. Fish Curry

    Ingredients:

    • Fish, coconut milk, tamarind.

    Steps:

    1. Simmer fish in tangy gravy.

    25. Masala Dosa

    Ingredients:

    • Dosa batter, potato filling.

    Steps:

    1. Spread batter, cook, add filling.

    Each of these recipes balances authentic flavors with easy steps. Pair with rice, roti, or naan for a complete meal! Let me know if you’d like detailed instructions for any specific dish. 😊

    3 WAYS MEXICAN BARBECUE CHICKEN SKEWERS RECIPE STEP-BY-STEP

    Here are 3 delicious ways to make Mexican Barbecue Chicken Skewers, each with a unique twist—spicy, tangy, and smoky. Perfect for grilling, oven-roasting, or pan-searing!


    🌶️ 1. Spicy Chipotle-Lime Chicken Skewers

    Flavor: Smoky, spicy, citrusy.

    Ingredients:

    • 500g boneless chicken (thighs or breast), cubed
    • 2 tbsp olive oil
    • 2 tbsp lime juice
    • 2 minced garlic cloves
    • 1 tbsp honey
    • 1 tbsp chipotle in adobo (chopped)
    • 1 tsp smoked paprika
    • 1 tsp cumin
    • Salt & pepper
    • Wooden skewers (soaked in water)

    Steps:

    1. Marinate: Mix olive oil, lime juice, garlic, honey, chipotle, paprika, cumin, salt, and pepper. Coat chicken and marinate for 1+ hours (or overnight).
    2. Skewer: Thread chicken onto skewers.
    3. Grill/Bake:
    • Grill: Cook on medium-high heat for 8-10 mins, turning occasionally.
    • Oven: Bake at 400°F (200°C) for 15-20 mins, flipping halfway.
    1. Serve: Garnish with lime wedges & cilantro.

    🍍 2. Tangy Pineapple-Jalapeño Chicken Skewers

    Flavor: Sweet, tangy, slightly spicy.

    Ingredients:

    • 500g chicken, cubed
    • 1 cup pineapple chunks
    • 1 jalapeño (sliced)
    • 3 tbsp BBQ sauce
    • 2 tbsp lime juice
    • 1 tbsp soy sauce
    • 1 tsp garlic powder
    • 1 tsp chili powder
    • Skewers

    Steps:

    1. Marinate: Mix BBQ sauce, lime juice, soy sauce, garlic powder, and chili powder. Coat chicken for 30+ mins.
    2. Skewer: Alternate chicken, pineapple, and jalapeño.
    3. Cook:
    • Grill: 8-10 mins, basting with extra BBQ sauce.
    • Pan-sear: Cook in a skillet on medium-high for 10-12 mins.
    1. Serve: Drizzle with extra sauce & chopped cilantro.

    🔥 3. Smoky Ancho Chile & Coffee Chicken Skewers

    Flavor: Deep, earthy, with a coffee kick.

    Ingredients:

    • 500g chicken
    • 1 tbsp ancho chile powder
    • 1 tsp instant coffee powder
    • 1 tsp brown sugar
    • 1 tsp cumin
    • 1 tsp garlic powder
    • 2 tbsp olive oil
    • 1 tbsp lime juice
    • Skewers

    Steps:

    1. Dry Rub: Mix ancho chile, coffee, sugar, cumin, garlic powder, salt, and pepper. Coat chicken with oil and rub.
    2. Skewer: Thread chicken tightly.
    3. Cook:
    • Grill: Over indirect heat for 10-12 mins, turning often.
    • Oven: Broil on high for 10 mins, flipping once.
    1. Serve: Sprinkle with lime zest & cotija cheese.

    Tips for Perfect Skewers:

    Soak wooden skewers for 30 mins to prevent burning.
    Preheat grill/pan for even cooking.
    Rest chicken 5 mins before serving for juiciness.

    Pair with Mexican rice, guacamole, or grilled corn! Which version will you try first? 😊🔥

  • Home – Easy Recipes – Dishes – Cooking Guide

    24 REASONS TO USE A PERSONAL CHEF AT HOME, VARIATIONS OR ON PARTY

    By: chef ssentongo

    From : Get Easy Recipes / cook smart

    Here are 24 compelling reasons to hire a personal chef for home meals, customized variations, or parties:

    For Everyday Home Meals:

    1. Saves Time – No more grocery shopping, prepping, or cleaning.
    2. Healthier Meals – Professionally crafted balanced, nutritious dishes.
    3. Customized Diets – Accommodates keto, vegan, gluten-free, paleo, etc.
    4. Portion Control – Helps with weight management goals.
    5. Reduces Food Waste – Precise ingredient usage.
    6. No More Meal Planning Stress – A chef handles the menu.
    7. Fresh, High-Quality Ingredients – Better than takeout.
    8. Learn New Recipes & Techniques – Get cooking tips from a pro.
    9. Consistent Quality – Restaurant-level meals at home.
    10. Perfect for Busy Professionals/Families – More family time, less kitchen hassle.

    For Customized Variations:

    1. Personalized Flavors – Meals tailored to your taste preferences.
    2. Allergy-Friendly Options – Safe meals for dietary restrictions.
    3. Cultural Cuisine Exploration – Authentic global dishes made just for you.
    4. Meal Variety – Avoids repetitive, boring meals.
    5. Special Occasion Menus – Romantic dinners, anniversary meals, etc.
    6. Kid-Friendly Meals – Picky eaters? A chef can adapt.

    For Parties & Events:

    1. Stress-Free Hosting – No cooking, just enjoying guests.
    2. Restaurant Experience at Home – Impress friends & family.
    3. Professional Presentation – Instagram-worthy dishes.
    4. Custom Party Menus – Themed dinners (Italian, Mexican, sushi night, etc.).
    5. Dietary Accommodations for Guests – Ensures everyone eats well.
    6. No Cleanup Hassle – The chef handles post-party mess.
    7. Cocktail & Wine Pairings – Elevate the dining experience.
    8. Memorable Experiences – A personal chef makes events unforgettable.

    Whether for convenience, health, or entertainment, a personal chef brings luxury, efficiency, and gourmet excellence to your home!

    Would you like recommendations on finding the right chef for your needs? 😊

  • Home – Easy Recipes – Dishes – Cooking Guide/Skills

    25 Basic Cooking Skills You Should Master

    By: chef ssentongo

    Here’s an expanded list of 25 fundamental cooking skills every home cook should master to build confidence and versatility in the kitchen:


    Knife Skills & Prep

    1. Knife Handling & Safety – Proper grip, sharpening, and cutting techniques.
    2. Basic Cuts – Chopping, dicing, mincing, julienne, and chiffonade.
    3. Peeling & Trimming – Efficiently peeling vegetables, deveining shrimp, trimming fat.

    Cooking Techniques

    1. Sautéing – Cooking quickly in a little oil (e.g., stir-fries, garlic, onions).
    2. Boiling & Simmering – Pasta, grains, and soups (knowing when to use a rolling boil vs. gentle simmer).
    3. Roasting – Oven-cooking meats and vegetables for caramelization.
    4. Grilling – Cooking over direct heat (charcoal, gas, or grill pan).
    5. Baking – Measuring accurately, understanding oven temperatures.
    6. Pan-Frying & Deep-Frying – Controlling oil temperature for crispy results.
    7. Steaming – Retaining nutrients in veggies, fish, and dumplings.
    8. Braising & Stewing – Slow-cooking tough cuts in liquid (pot roast, curries).
    9. Broiling – High-heat cooking from above (melting cheese, browning).
    10. Poaching – Gently cooking eggs, fish, or chicken in liquid.

    Staples & Fundamentals

    1. Making Stock/Broth – Using bones, veggies, and herbs for soups/sauces.
    2. Cooking Rice Perfectly – Absorption method, pilaf, or risotto.
    3. Pasta Al Dente – Timing, salting water, and avoiding mushiness.
    4. Egg Mastery – Scrambled, fried, poached, omelets, and hard/soft-boiled.
    5. Making Basic Sauces – Béchamel, tomato sauce, gravy, vinaigrette.
    6. Kneading Dough – For bread, pizza, or pastries.

    Flavor & Seasoning

    1. Balancing Flavors – Salt, acid (lemon/vinegar), sweetness, umami, heat.
    2. Using Herbs & Spices – When to add fresh vs. dried, toasting spices.
    3. Deglazing a Pan – Using wine/stock to lift browned bits for sauces.

    Safety & Efficiency

    1. Food Safety – Avoiding cross-contamination, proper storage.
    2. Mise en Place – Prepping ingredients before cooking for efficiency.
    3. Multitasking & Timing – Coordinating multiple dishes for a meal.

    Why These Skills Matter

    Mastering these basics allows you to:

    • Cook faster and more efficiently.
    • Adapt recipes creatively.
    • Reduce kitchen stress and wasted food.

    Which skill do you want to tackle first? Need tips on any of them?

    15 STREET FOOD BUSINESS IDEAS YOU CAN START , DETAILED GUIDANCE AND EVE WITH LOW-CAPITAL IDEAS

    Here are 15 profitable street food business ideas you can start in 2025, including low-capital options, detailed guidance, and key insights from industry trends:


    Which idea aligns with your skills and budget? I can help refine your plan!

    1. Gourmet Food Truck (Global Fusion Cuisine)

    • Concept: Serve elevated street food like Korean BBQ tacos, sushi burritos, or truffle-infused fries.
    • Why It Works: Combines convenience with premium flavors, appealing to foodies and social media trends .
    • Startup Cost: $20,000–$50,000 (used truck, permits, branding).
    • Tip: Focus on a niche (e.g., vegan or regional specialties) to stand out.

    2. Dessert Boxes or Themed Sweet Stands

    • Concept: Sell Instagram-worthy dessert boxes (cookie dough cups, macarons) or operate a churros/nitro ice cream stall.
    • Why It Works: High profit margins; seasonal themes (e.g., pumpkin spice) boost sales .
    • Startup Cost: $1,000–$10,000 (home-based or cart setup).
    • Tip: Offer customization (toppings bars) for engagement.

    3. Healthy Street Food Kiosk

    • Concept: Açai bowls, quinoa salads, or grilled chicken wraps for health-conscious customers.
    • Why It Works: 65% of Gen Z prioritizes wellness in dining .
    • Startup Cost: $5,000–$15,000 (portable stall, blenders).
    • Tip: Partner with gyms or offices for recurring orders.

    4. Mobile Coffee or Bubble Tea Unit

    • Concept: Compact cart selling specialty coffee, matcha lattes, or boba tea.
    • Why It Works: Coffee/bubble tea markets will hit $174B and $4.3B by 2030 .
    • Startup Cost: $10,000–$30,000 (equipment, licenses).
    • Tip: Use eco-friendly cups and loyalty programs.

    5. Ethnic Fusion Tacos Stand

    • Concept: Korean BBQ tacos, Mediterranean lamb flatbreads, or vegan jackfruit tacos.
    • Why It Works: Appeals to adventurous eaters; low ingredient overlap reduces waste .
    • Startup Cost: $5,000–$20,000 (cart, permits).
    • Tip: Rotate weekly specials to keep customers intrigued.

    6. Loaded Nachos Stand

    • Concept: Customizable nachos with pulled pork, mango salsa, or vegan cheese.
    • Why It Works: Instagrammable and indulgent; perfect for events .
    • Startup Cost: $10,000–$25,000 (portable griddle, ingredients).
    • Tip: Use “aroma marketing” to attract crowds.

    7. Artisanal Pizza Stand

    • Concept: Handmade wood-fired pizzas with local ingredients.
    • Why It Works: High demand for authentic, non-chain options .
    • Startup Cost: $15,000–$40,000 (portable oven, dough prep station).
    • Tip: Offer gluten-free or sourdough bases for niche appeal.

    8. Gourmet Hot Dog Stand

    • Concept: Premium sausages with toppings like truffle aioli or kimchi.
    • Why It Works: Cross-generational appeal; low-cost ingredients .
    • Startup Cost: $5,000–$20,000 (cart, local sausage supplier).
    • Tip: Feature regional flavors (e.g., bratwurst in German-themed areas).

    9. Crepes and Waffles Stand

    • Concept: Sweet (Nutella, berries) and savory (ham-cheese) options.
    • Why It Works: Versatile for breakfast or dessert; easy to scale .
    • Startup Cost: $3,000–$15,000 (griddle, batter mixer).
    • Tip: Operate near tourist spots or universities.

    10. Customizable Ice Cream Sandwiches

    • Concept: Let customers pick cookies, ice cream flavors, and toppings.
    • Why It Works: Engages customers; high perceived value .
    • Startup Cost: $8,000–$25,000 (freezer, fresh-baked cookies).
    • Tip: Pop up at beaches or festivals for peak sales.

    Low-Capital Ideas ($1,000–$5,000)

    1. Shaved Ice Stand: $1,000–$5,000; perfect for summer events .
    2. Handheld Mini Pies: $2,000–$10,000; savory or sweet options .
    3. Snack Kiosk: $1,500–$7,000; sell pretzels, popcorn, or nuts .
    4. Fruit Stand: $500–$3,000; focus on exotic or pre-cut fruit .
    5. BBQ Stand: $2,000–$8,000; start with a grill and simple menu .

    Key Considerations

    • Licenses: Register with local health departments (fines up to £1,000 in the UK for non-compliance) .
    • Location: High-footfall areas (parks, offices, events) are critical .
    • Marketing: Use social media to announce locations/menu drops .

    For deeper insights, explore guides like The Complete Guide to Starting Your Own Street Food Business or BossWallah’s Low-Capital Ideas .

  • Home – Easy Recipes – Dishes – Cooking Guide

    15 EASY WEDDING FINGER FOODS FOR RECEPTIONS

    By: chef ssentongo

    If you’re looking for easy, budget-friendly, and crowd-pleasing finger foods for your wedding reception, here are 15 delicious options that are simple to prepare or order in bulk:

    1. Caprese Skewers

    Cherry tomatoes, fresh mozzarella balls, and basil leaves drizzled with balsamic glaze.

    2. Mini Quiches

    Bite-sized spinach, cheese, or bacon quiches (store-bought or homemade).

    3. Stuffed Mushrooms

    Button mushrooms filled with cream cheese, garlic, and herbs.

    4. Bruschetta

    Toasted baguette slices topped with tomato, basil, garlic, and olive oil.

    5. Chicken Satay Skewers

    Grilled chicken skewers with peanut sauce for dipping.

    6. Spinach & Artichoke Cups

    Phyllo or puff pastry cups filled with warm spinach-artichoke dip.

    7. Mini Grilled Cheese Sandwiches

    Bite-sized sandwiches with cheddar or gouda—great with tomato soup shooters!

    8. Bacon-Wrapped Dates

    Sweet and savory—stuff with goat cheese for extra flavor.

    9. Deviled Eggs

    Classic or with fun twists (spicy, bacon, or avocado).

    10. Mini Meatballs

    Cocktail-sized meatballs in BBQ, teriyaki, or marinara sauce.

    11. Shrimp Cocktail Shooters

    Small cups with chilled shrimp and cocktail sauce.

    12. Cheese & Charcuterie Cups

    Individual cups with cured meats, cheeses, olives, and crackers.

    13. Cucumber Sandwiches

    Light and refreshing—cream cheese, dill, and cucumber on bread.

    14. Pigs in a Blanket

    Mini sausages wrapped in puff pastry (always a hit!).

    15. Fruit & Cheese Skewers

    Alternate grapes, cheese cubes, and melon for a sweet-savory bite.

    Bonus Tips:

    Mix store-bought & homemade (Costco & Trader Joe’s have great pre-made options).
    Go for variety (3-5 savory, 2 sweet, and a few vegetarian options).
    Use disposable bamboo picks for easy serving.

    20 CHEAP FOOD IDEAS FOR BRIDES ON A WEDDING BUDGET

    Planning a wedding on a budget doesn’t mean you have to sacrifice delicious food! Here are 20 cheap food ideas that will keep your guests happy without breaking the bank:

    1. Pasta Bar

    Serve a variety of pasta (penne, spaghetti) with simple sauces (marinara, Alfredo, pesto) and toppings (meatballs, grilled chicken, veggies).

    2. Taco/Nacho Bar

    Set up a DIY taco or nacho station with seasoned ground beef or chicken, beans, cheese, salsa, and toppings.

    3. Baked Potato Bar

    Offer baked potatoes with toppings like cheese, sour cream, bacon bits, chives, and chili.

    4. Slider Station

    Mini burgers (beef, chicken, or veggie) are budget-friendly and filling.

    5. Grilled Cheese & Tomato Soup

    A comforting and inexpensive crowd-pleaser.

    6. BBQ Sandwiches

    Slow-cooked pulled pork or chicken with buns and coleslaw.

    7. DIY Pizza Station

    Pre-made dough or flatbreads with sauce, cheese, and toppings for guests to customize.

    8. Hot Dogs & Brats

    Classic and affordable, especially for a casual wedding.

    9. Chili Bar

    Serve chili with cornbread, cheese, and onions.

    10. Salad Bar

    A mix of greens, veggies, proteins (chicken, beans), and dressings.

    11. Finger Sandwiches

    Tea-style sandwiches (cucumber, egg salad, chicken salad) for a light option.

    12. Rice & Beans

    A hearty, budget-friendly dish (add grilled chicken or sausage for extra protein).

    13. Breakfast for Dinner

    Pancakes, scrambled eggs, bacon, and fruit—fun and affordable!

    14. Baked Ziti or Lasagna

    Feeds a crowd and is easy to make in bulk.

    15. Meatball Subs

    Frozen meatballs in marinara sauce with rolls.

    16. Veggie & Hummus Platter

    A healthy, low-cost appetizer.

    17. Mac & Cheese Bar

    Classic mac with add-ins like bacon, jalapeños, or breadcrumbs.

    18. Quesadilla Station

    Tortillas with cheese, beans, and optional meat.

    19. Soup Bar

    A few different soups (broccoli cheddar, tomato basil) with bread rolls.

    20. Dessert: Donut Wall or Cookie Table

    Skip the expensive cake—offer donuts, cookies, or cupcakes instead.

    Bonus Tips to Save More:

    Buy in bulk (Costco, Sam’s Club)
    DIY food prep (family & friends can help)
    Buffet-style (cuts down on serving costs)
    Skip the open bar (offer beer, wine, and a signature drink)

    Would you like recommendations for budget-friendly drinks too?

    http://www.facebook.com/geteasyrecipes

    http://www.facebook.com/cookedsmart

    http://www.chefsideacafe.food.blog

  • Home – Easy Recipes – Dishes – Cooking Tips

    30 Epic Curry Dishes To Fire Up Your Taste Buds Recipes

    By : chef ssentongo Geoffrey

    From : Mr Easy Recipes

    Here are 30 epic curry dishes from around the world to ignite your taste buds! Whether you love creamy, spicy, tangy, or aromatic flavors, there’s a curry here for everyone.


    1. Indian Curries 🇮🇳

    1. Butter Chicken (Murgh Makhani) – Creamy tomato-based curry with tender chicken.
    2. Chicken Tikka Masala – Grilled chicken in a rich, spiced tomato-cream sauce.
    3. Rogan Josh – Aromatic Kashmiri lamb curry with deep red gravy.
    4. Vindaloo – Fiery Goan curry with pork or chicken, vinegar, and spices.
    5. Saag Paneer – Spinach and cottage cheese curry, mildly spiced.
    6. Chana Masala – Spicy chickpea curry with tomatoes and onions.
    7. Malai Kofta – Fried veggie balls in a creamy, nutty gravy.
    8. Fish Curry (Goan Style) – Coconut-based, tangy, and spicy.

    2. Thai Curries 🇹🇭

    1. Green Curry (Gaeng Keow Wan) – Spicy, herbal, and coconut-based.
    2. Red Curry (Gaeng Phet) – Rich, slightly sweet, with red chili paste.
    3. Massaman Curry – Mild, nutty, with potatoes and peanuts.
    4. Panang Curry – Thick, creamy, with a hint of peanut flavor.

    3. Japanese Curries 🇯🇵

    1. Japanese Curry Rice (Kare Raisu) – Sweet, thick, with carrots and potatoes.
    2. Katsu Curry – Crispy breaded cutlet with curry sauce.

    4. Southeast Asian Curries 🌏

    1. Rendang (Indonesian) – Slow-cooked beef in coconut and spices.
    2. Laksa (Malaysian/Singaporean) – Spicy coconut noodle soup.
    3. Cambodian Amok Curry – Fragrant fish curry steamed in banana leaves.

    5. British & Fusion Curries 🇬🇧

    1. Chicken Korma – Mild, creamy, with almonds and yogurt.
    2. Balti Curry – Birmingham’s famous quick-cooked, tomato-based curry.
    3. Jalfrezi – Stir-fried curry with bell peppers and onions.

    6. African & Middle Eastern Curries 🌍

    1. Doro Wat (Ethiopian) – Spicy chicken stew with berbere spice.
    2. Harissa Lamb Curry (North African) – Fiery chili and garlic-infused lamb.
    3. Korma (Pakistani Style) – Rich, nutty, and mildly spiced.

    7. Caribbean Curries 🏝️

    1. Jamaican Curry Goat – Bold, spicy, with thyme and allspice.
    2. Trinidadian Chicken Curry – Turmeric-heavy, with Caribbean flavors.

    8. Vegan & Vegetarian Curries 🌱

    1. Thai Pumpkin Curry – Creamy, sweet, and spicy.
    2. Dal Tadka – Lentil curry tempered with garlic and spices.
    3. Eggplant (Brinjal) Curry – Smoky and spicy South Indian style.

    9. Unique & Fusion Curries

    1. Korean Curry (Ka-re Rice) – Mild, slightly sweet, with veggies.
    2. Thai Pineapple Curry – Sweet, tangy, with coconut milk.

    Tips for the Perfect Curry:

    • Toast your spices for deeper flavor.
    • Use fresh herbs (cilantro, curry leaves, basil).
    • Balance flavors (sweet, sour, spicy, umami).
    • Simmer slowly for richer taste.

    Which one will you try first? Let me know if you’d like a detailed recipe for any of these! 🔥🍛

  • Home > Easy Recipes > Dishes >Cooking Ideas

    Chicken Biryan and Chicken Pilau masala Recipes, What is the difference between the two?

    By : chef ssentongo Geoffrey

    From : Mr Easy Recipes

    Great question!

    While Chicken Biryani and Chicken Pilau Masala are both delicious rice-based dishes with bold flavors, they differ significantly in preparation, ingredients, and overall taste.

    Chicken Biryani vs. Chicken Pilau Masala

    Chicken Biryani
    Chicken Pilau Masala

    1. Cooking Method:

    • Chicken Biryani is a layered dish where the rice and chicken are cooked separately before being combined, often in a “dum” style (slow cooking with steam).
    • Chicken Pilau Masala is a one-pot dish where the chicken, rice, and spices are cooked together, allowing the flavors to fully infuse into the rice.

    2. Use of Spices:

    • Biryani typically uses a complex blend of spices, including cloves, cardamom, cinnamon, bay leaves, star anise, nutmeg, and saffron (optional), giving it a more aromatic and layered flavor.
    • Pilau Masala has a simpler spice blend, often using pilau masala powder, cumin, black pepper, coriander, and sometimes cinnamon.

    3. Rice Variety:

    • Biryani is traditionally made with long-grain Basmati rice for its fluffiness and distinct texture.
    • Pilau Masala can also be made with Basmati or other varieties of rice, but it tends to be softer since it absorbs all the cooking liquid.

    4. Preparation Style:

    • Biryani often includes marinated chicken and sometimes yogurt-based sauces, with layers of rice and meat alternated before slow cooking.
    • Pilau Masala is cooked more straightforwardly, with rice simmered alongside the chicken and spices.

    5. Garnishes and Accompaniments:

    • Biryani is commonly garnished with fried onions, boiled eggs, nuts, and saffron-infused milk.
    • Pilau Masala is typically simpler, sometimes served with fresh herbs or fried onions, but without the elaborate garnishing of biryani.

    Both dishes have rich flavors and are loved across different cultures, but if you’re looking for something rich and layered in taste, Biryani is your go-to. If you prefer a simpler, well-seasoned one-pot dish, Pilau Masala is perfect!

    Would you like a recipe for either? I’d be happy to help!

    http://www.facebook.com/mreasyrecipes

    http://www.chefsideacafe.food.blog

  • Was Being A Chef A Good Career Choice For Me?

    By : chef ssentongo Geoffrey

    To Answer the first question and Today’s question

    Trying to decide if a chef career is right for you is not easy, especially with all the misinformation out there. Here I share my personal view using my years of experience as a chef to answer the ultimate question, is being a chef a good career?

    My experience as a chef taught me that being a chef is a good career for those that love to cook, enjoy meeting new people, are happy to work long hours and want the potential to work anywhere in the world.

    Those who are looking for a career that is well paid or with lots of traditional job benefits may be better suited pursuing other career paths.

    In this post I attempt to answer whether being a chef is a good career or not, with a fair and unbiased view, looking at all the factors a person would look at when considering any new career.

    I could just give my overall option, but I am confident that many readers would like a more detailed breakdown so they can make their own decision! I wrote an article regarding why I want to leave this industry to another after many years which will make a great accompaniment to this article.

    Do Chefs Have High Job Satisfaction?

    In my experience, being a chef has high levels of job satisfaction. Those that choose a career in catering do so because they have a love of food and cooking. Our role as chefs allows us to spend each and every day doing what we love.

    Do Chefs Have Good Career Progression

    In my experience working in many kitchens, chefs are some of the most career focused people I know. The good news is that with hard work the career progression opportunities are unlimited for chefs.

    The way a kitchen is set up to run, with it’s clear rank structure, makes it easy for all chefs to see the career ladder that they are able to climb.

    As chefs move around jobs relatively frequently there are constantly new chef de partie and sous chef positions opening up for the new chefs to move into.

    Do Chefs Get On Well With Other Chefs?

    In my experience, most chefs get on very well with other chefs. In all the kitchens I have worked in, the camaraderie and team ethos is excellent. There are so many opportunities to make lifelong friends within the catering industry.

    Chefs are notorious for spending their days off together and getting up to fun activities in their split shifts.

    The work atmosphere in the kitchen itself is usually great as well. There is a shared vision where everyone has to truly work together as a team. This makes for a sometimes stressful, but more often than not, fun place to be – The banter among chefs is always great.

    Do Chefs Receive Good Training?

    In my experience as a chef, the training we receives is very much dependent on the places that we work, or where someone goes to culinary school. Being a chef has such a wide range of job roles that the training can vary greatly depending upon where you work.

    For example, a person who works in a chain pub/restaurant may qualify as a chef but their training is clearly not going to be as good as a chef that has trained at the best restaurants around the world. (The difference between a chef and a cook)

    An individual chef has a huge amount of control over where their career takes them.

    As with most careers, location plays a large part in a chef’s ability to train to the standard that they would like. In order to find the best jobs and receive the best training a chef may have to travel quite far from home.

    One negative of the training which I think is worth mentioning is the fact that being great chef is not really transferable outside of the hospitality industry. Other career experiences and qualifications can be used in many different industries.

    For example, if a person trained as a lawyer and gained a law degree they can use this in multiple fields, as lots of employers recognise the value of this qualification. Chefs are a lot more pigeon holed into the hospitality sector.

    However, The ability to carve out your own training path makes me believe that being a chef is a good career and should win the final point.

    Being a chef is a great career with lots of positive points that are hard to find in any other industry.

    The buzz of the kitchen and endless progression opportunities really are unparalleled . That being said, the trade-off for all these great factors is the unsociable and long hours that are the norm in the industry.

    Now all that’s left to doo is discover how to become a chef!

    How Chefs Make Cooking So Much More Fun

    Cooking is an incredibly divisive activity. Some people love spending their time in the kitchen, whilst others find it a monotonous chore. You may feel that in order to become a chef you must find…

    How Chefs Get Rated

    The path of how chefs get rated can be an extremely difficult road to navigate. Unfortunately, here is no one standardised system. Instead, we rely on several different factors for rating.

    Having spent around 15 years working as a qualified chef in high end restaurants, my mission is to use this experience to help others as they begin their career in catering!

    Thanks for reading this article and I’m looking forward to read your comments

    http://www.facebook.com/mreasyrecipes

    http://www.chefsideacafe.food.blog

  • Home > Easy Recipes > Dishes > cooking Ideas = Healthy meals

    Author : chef ssentongo Geoffrey

    Here are some healthy food recipe ideas:

    Breakfast Recipes


    1. Avocado Toast with Poached Eggs
    • 2 slices whole-grain bread, 1/2 avocado, 2 eggs, salt, and pepper
    1. Greek Yogurt Parfait with Berries and Granola
    • 1 cup Greek yogurt, 1/2 cup mixed berries, 2 tablespoons granola
    1. Overnight Oats with Nuts and Seeds
    • 1/2 cup rolled oats, 1/2 cup unsweetened almond milk, 1/4 cup chopped nuts, 1 tablespoon chia seeds

    Lunch Recipes

    1. Grilled Chicken Salad with Quinoa and Veggies
    • 4 oz grilled chicken, 1 cup mixed greens, 1/2 cup cooked quinoa, 1 cup mixed veggies
    1. Lentil Soup with Whole-Grain Bread
    • 1 cup cooked lentils, 2 cups vegetable broth, 1 slice whole-grain bread
    1. Turkey and Avocado Wrap
    • 1 whole-grain tortilla, 2 oz sliced turkey, 1/2 avocado, lettuce, tomato

    Dinner Recipes

    1. Baked Salmon with Roasted Veggies
    • 6 oz salmon fillet, 1 cup mixed veggies, 2 tablespoons olive oil
    1. Quinoa and Black Bean Bowl with Grilled Chicken
    • 1 cup cooked quinoa, 1 cup cooked black beans, 4 oz grilled chicken, 1 cup mixed veggies
    1. Vegetable Stir-Fry with Brown Rice
    • 1 cup cooked brown rice, 1 cup mixed veggies, 2 tablespoons olive oil

    Snack Recipes

    1. Fresh Fruit Salad
    • 1 cup mixed fresh fruit
    1. Hummus with Carrot Sticks
    • 1/2 cup hummus, 4-6 carrot sticks
    1. Energy Balls with Oats and Nuts
    • 2 tablespoons rolled oats, 2 tablespoons chopped nuts, 1 tablespoon honey

    Healthy Cooking Tips

    1. Use whole grains instead of refined grains
    2. Choose lean protein sources
    3. Incorporate a variety of colorful veggies
    4. Limit added sugars and saturated fats
    5. Cook with herbs and spices for flavor

    Nutrition Information (per serving)

    1. Calories: 350-500
    2. Fat: 10-20g
    3. Saturated Fat: 2-5g
    4. Cholesterol: 60-80mg
    5. Sodium: 200-400mg
    6. Carbohydrates: 30-50g
    7. Fiber: 5-10g
    8. Protein: 20-30g

    Would you like more recipe ideas or specific dietary recommendations?

    I’d be delighted to help you create delicious food recipes.

    What type of recipe are you interested in creating ?

    Here are some options to get started:

    Cuisine

    1. Italian
    2. Mexican
    3. Indian
    4. Asian Fusion
    5. Mediterranean

    Dish Type

    1. Main Course
    2. Dessert
    3. Appetizer
    4. Snack
    5. Breakfast

    Dietary Preferences

    1. Vegetarian
    2. Vegan
    3. Gluten-free
    4. Low-carb
    5. Keto

    Additional Requirements

    1. Quick and easy
    2. Healthy
    3. Budget-friendly
    4. Special occasion (e.g., birthday, holiday)

    Please I’ll provide you with some details, and I’ll help you create a mouth-watering recipe!

    Just drop your comment, follow and share or visit our website below

    http://www.chefsideacafe.food.blog

    http://www.facebook.com/Chefssentongo1

    http://www.facebook.com/mrdeliciousrecipe

  • Home >Easy Recipes >Dishes >cooking Ideas

    Sent by : Mr Delicious

    Satisfying Stew Recipes For Some Serious Home Comfort Recipes step by step instructions

    Author : chef ssentongo Geoffrey
    Stew

    Explore

    Here are a couple of satisfying stew recipes with step-by-step instructions to bring some serious home comfort:

    Classic Beef Stew

    Ingredients:

    • 2 lbs beef chuck, cut into 1-inch cubes
    • Salt and pepper to taste
    • 3 tbsp all-purpose flour
    • 2 tbsp olive oil
    • 1 large onion, chopped
    • 3 cloves garlic, minced
    • 4 cups beef broth
    • 1 cup red wine (optional)
    • 2 tbsp tomato paste
    • 1 tsp dried thyme
    • 2 bay leaves
    • 4 large carrots, peeled and cut into chunks
    • 4 large potatoes, peeled and cut into chunks
    • 2 stalks celery, chopped
    • 1 cup frozen peas

    Instructions:

    1. Prep the Beef: Season the beef cubes with salt and pepper, then toss them in flour until evenly coated.
    2. Brown the Beef: In a large pot or Dutch oven, heat the olive oil over medium-high heat. Add the beef cubes in batches, browning them on all sides. Remove and set aside.
    3. Cook the Aromatics: In the same pot, add the chopped onion and garlic. Cook until the onion is translucent.
    4. Deglaze the Pot: Pour in the red wine (if using) and scrape up any browned bits from the bottom of the pot. Let it simmer for a few minutes.
    5. Build the Stew: Add the beef broth, tomato paste, thyme, and bay leaves. Return the browned beef to the pot.
    6. Simmer: Bring the stew to a boil, then reduce the heat to low. Cover and let it simmer for about 1.5 hours.
    7. Add Vegetables: Add the carrots, potatoes, and celery. Continue to simmer for another 30-40 minutes, or until the vegetables are tender.
    8. Finish: Stir in the frozen peas and cook for an additional 5 minutes. Adjust seasoning with salt and pepper to taste.
    9. Serve: Remove the bay leaves and serve the stew hot, garnished with fresh parsley if desired.

    Vegetarian Lentil Stew

    Ingredients:

    • 2 tbsp olive oil
    • 1 large onion, chopped
    • 3 cloves garlic, minced
    • 2 carrots, diced
    • 2 celery stalks, diced
    • 1 cup dried lentils, rinsed
    • 1 can (14.5 oz) diced tomatoes
    • 4 cups vegetable broth
    • 1 tsp dried thyme
    • 1 tsp ground cumin
    • 1 tsp smoked paprika
    • Salt and pepper to taste
    • 2 cups chopped kale or spinach
    • 1 tbsp lemon juice

    Instructions:

    1. Cook the Aromatics: In a large pot, heat the olive oil over medium heat. Add the onion, garlic, carrots, and celery. Cook until the vegetables are softened.
    2. Add Lentils and Spices: Stir in the lentils, diced tomatoes, vegetable broth, thyme, cumin, and smoked paprika. Season with salt and pepper.
    3. Simmer: Bring the mixture to a boil, then reduce the heat to low. Cover and let it simmer for about 30-40 minutes, or until the lentils are tender.
    4. Add Greens: Stir in the chopped kale or spinach and cook for an additional 5 minutes, until the greens are wilted.
    5. Finish: Stir in the lemon juice and adjust seasoning with salt and pepper to taste.
    6. Serve: Serve the stew hot, with a side of crusty bread if desired.

    I hope these recipes bring you some cozy comfort! Which one are you planning to try first?

  • Home > Cooking Terms > Skills

    Author by : chef ssentongo Geoffrey

    30 Essential Culinary Terms Every Cook Should Know, and it’s Explanation

    By : Mr Delicious Recipe

    Here are 30 essential culinary terms every cook should know, along with their explanations:

    1. Al Dente: An Italian term meaning “to the tooth,” used to describe pasta or rice that is cooked until it offers a slight resistance when bitten.
    2. Braise: A cooking method where food is first seared at a high temperature and then finished in a covered pot with liquid at a lower temperature.
    3. Chiffonade: A technique for cutting herbs or leafy vegetables into thin, ribbon-like strips.
    4. Deglaze: Adding liquid to a hot pan to dissolve the browned bits of food stuck to the bottom, creating a flavorful base for sauces.
    5. Emulsify: Combining two liquids that normally don’t mix, such as oil and vinegar, into a stable mixture.
    6. Fold: Gently incorporating ingredients together without deflating air, often used in baking.
    7. Julienne: Cutting vegetables into thin, matchstick-like strips.
    8. Knead: Working dough with your hands to develop gluten, giving it elasticity and strength.
    9. Macerate: Soaking fruit in liquid (often alcohol or sugar) to soften it and enhance its flavor.
    10. Mise en Place: A French term meaning “everything in its place,” referring to the setup of ingredients and tools before cooking.
    11. Poach: Cooking food gently in simmering liquid, typically water, broth, or wine.
    12. Reduce: Cooking a liquid until it decreases in volume and thickens, intensifying its flavor.
    13. Roux: A mixture of fat (usually butter) and flour cooked together and used as a thickening agent for sauces and soups.
    14. Sauté: Cooking food quickly in a small amount of oil or fat over high heat.
    15. Scald: Heating a liquid, usually milk, to just below boiling point.
    16. Score: Making shallow cuts in the surface of food to help it cook evenly or absorb flavors.
    17. Sear: Browning the surface of food quickly at a high temperature to develop flavor.
    18. Simmer: Cooking food gently in liquid at a temperature just below boiling.
    19. Sweat: Cooking vegetables over low heat in a small amount of fat until they soften and release moisture without browning.
    20. Temper: Gradually raising the temperature of a cold or room-temperature ingredient by adding a hot ingredient to it slowly.
    21. Whip: Beating ingredients, such as cream or egg whites, to incorporate air and increase volume.
    22. Zest: The outer, colored part of citrus peel, used for its aromatic oils.
    23. Blanch: Briefly boiling food and then plunging it into ice water to stop the cooking process, often used to preserve color and texture.
    24. Caramelize: Cooking sugar until it turns golden brown and develops a rich flavor.
    25. Clarify: Removing impurities from a liquid, such as butter or stock, to make it clear.
    26. Cure: Preserving food by salting, smoking, or drying.
    27. Dredge: Coating food lightly with flour, breadcrumbs, or another dry ingredient before cooking.
    28. Flambé: Pouring alcohol over food and igniting it to create a burst of flames.
    29. Glaze: Coating food with a glossy, often sweet or savory, substance.
    30. Marinate: Soaking food in a seasoned liquid to add flavor and tenderize it.

    These terms will help you navigate recipes and cooking techniques with confidence.

    What’s the difference between blanching and parboiling

    Blanching and parboiling are both useful cooking techniques, but they serve different purposes and involve slightly different processes.

    Here’s a breakdown of each:

    Blanching:

    Parboiling:

    Key Differences:

    Both techniques are valuable in the kitchen and can help you achieve different results depending on your cooking needs.

    Would you like to know more about any other cooking techniques or terms?

    Happy cooking! 🍳

    Is there a specific technique or term you’d like to learn more about?

    http://www.facebook.com/Chefssentongo1

    http://www.chefsideacafe.food.blog

  • Home >Easy Recipes >Dishes >cooking Ideas

    By:mrdeliciousrecipe

    Ingredients

    Chicken Tetrazzini is a creamy pasta dish with mushrooms and chicken. Here’s a simple recipe you can follow:

    Ingredients:

    • 8 ounces of spaghetti
    • 2 cups of cooked, chopped chicken
    • 1/4 cup of butter
    • 1/4 cup of all-purpose flour
    • 1/2 teaspoon of salt
    • 1/4 teaspoon of white pepper
    • 1 cup of chicken broth
    • 1 cup of heavy cream
    • 1/2 cup of grated Parmesan cheese
    • 1/4 cup of sherry wine (optional)
    • 2 cups of sliced mushrooms

    Instructions:

    1. Preheat your oven to 350°F (175°C).
    2. Cook the spaghetti according to package instructions, drain and set aside.
    3. In a large saucepan, melt the butter over medium heat. Add the mushrooms and sauté until tender.
    4. Stir in the flour, salt, and pepper; cook until bubbly.
    5. Gradually add the chicken broth and heavy cream, stirring constantly until the sauce thickens.
    6. Add the Parmesan cheese and sherry wine if using, and stir until the cheese melts.
    7. Combine the sauce with the cooked spaghetti and chicken in a greased baking dish.
    8. Bake uncovered for about 30 minutes or until bubbly.

    Enjoy your Chicken Tetrazzini!

    To make a vegetarian version of Chicken Tetrazzini, you can replace the chicken with a plant-based protein or more vegetables. Here’s how you can adjust the recipe:

    Ingredients:

    • 8 ounces of spaghetti
    • 2 cups of your choice of plant-based protein (like tofu, tempeh, or seitan), or additional mushrooms or other vegetables such as zucchini or bell peppers
    • 1/4 cup of butter or a plant-based alternative
    • 1/4 cup of all-purpose flour
    • 1/2 teaspoon of salt
    • 1/4 teaspoon of white pepper
    • 1 cup of vegetable broth
    • 1 cup of heavy cream or a plant-based cream alternative
    • 1/2 cup of grated Parmesan cheese or a vegan cheese alternative
    • 1/4 cup of sherry wine (optional)
    • 2 cups of sliced mushrooms

    Instructions: Follow the same steps as the original recipe, substituting chicken broth with vegetable broth and chicken with your chosen vegetarian option. If you’re using tofu, tempeh, or seitan, consider sautéing it with the mushrooms for added flavor.

    Would you like any specific suggestions for plant-based proteins or other vegetarian ingredients?

    Would you like any tips on variations or additional garnishing for this dish?

  • Home >Easy Recipes >Dishes >cooking Ideas

    By:mr Delicious recipe

    Here’s a detailed recipe for BBQ chicken with homemade sauce that you might enjoy,

    BBQ Sauce Ingredients:

    • 1 cup ketchup (refined sugar-free, if needed)
    • ½ cup coconut sugar (can sub brown sugar)
    • ½ cup apple cider vinegar
    • 2 teaspoons EACH: Dijon mustard, Worcestershire sauce, and sriracha
    • 1 teaspoon EACH: garlic powder, onion powder, and chili powder
    • 6 drops liquid smoke

    Chicken Ingredients:

    • 4 chicken breasts, skinless, boneless
    • 1 tsp salt
    • 1 tsp smoked paprika
    • ½ tsp garlic powder

    Instructions:

    1. Prepare the BBQ Sauce: Whisk together the ketchup, coconut sugar, apple cider vinegar, Dijon mustard, Worcestershire sauce, sriracha, garlic powder, onion powder, chili powder, and liquid smoke in a small pot over medium-high heat. Bring the mixture to a boil, then reduce the heat to medium-low and simmer for 10 minutes, stirring occasionally. Remove from the heat and allow the BBQ sauce to cool.
    2. Season the Chicken: Combine the salt, smoked paprika, and garlic powder in a small bowl. Generously season the chicken breasts with this spice mixture on both sides.
    3. Grill the Chicken: Preheat your grill or griddle pan. Cook the chicken, basting with the BBQ sauce continuously until the chicken is sticky, glossy, and cooked through. This should take about 5-6 minutes per side, depending on the size of the chicken breasts.
    4. Rest and Serve: Remove the chicken from the grill and let it rest for at least 5 minutes before slicing. This step is crucial as it allows the juices to redistribute, resulting in succulent chicken.

    Enjoy your BBQ chicken with a side of your choice, like a fresh salad or roasted vegetables!

    BBQ TILAPIA

    Explore

    BBQ Tilapia is a delightful dish that’s both flavorful and easy to prepare. Here’s a recipe that combines the mild taste of tilapia with a savory BBQ sauce:

    Ingredients for the BBQ Sauce:

    • ¾ cup ketchup
    • 3 tablespoons mustard
    • ½ cup oil
    • ½ cup apple cider vinegar
    • A pinch of garlic salt
    • 3 tablespoons Worcestershire sauce
    • 2 teaspoons paprika
    • ¼ cup lemon juice
    • 1 teaspoon pepper
    • 3 tablespoons brown sugar
    • ¾ cup water
    • ½ cup finely chopped onions
    • 2 cups fresh or canned peaches, pureed

    For the Tilapia:

    • 4 (7 oz) tilapia fillets
    • Olive oil
    • Salt to taste
    • Smoked paprika, garlic powder, onion powder, and celery seed for seasoning
    • Lime juice for finishing

    Instructions:

    1. Prepare the BBQ Sauce: In a saucepan, mix all the sauce ingredients except the peaches and simmer over medium heat for 15 to 20 minutes. Then, add the pureed peaches to the sauce and stir together
    2. Season the Tilapia: Pat the tilapia dry with a clean towel. Rub it with olive oil and sprinkle with kosher salt. Mix the smoked paprika, garlic powder, onion powder, and celery seed in a small bowl, then pat it onto the fish.
    3. Grill the Tilapia: Preheat your grill to medium-high heat (375 to 450°F). Grill the tilapia skin side down for 3 to 4 minutes until grill marks appear and it releases from the grates. Flip and cook another 3 to 4 minutes, depending on the thickness, until flaky and the internal temperature reaches 130°F.
    4. Serve: Remove the tilapia from the grill, allow it to rest for a few minutes, then serve with a generous spoonful of the peach BBQ sauce on top. Finish with a squeeze of fresh lime juice.

    Enjoy your BBQ Tilapia with a side of grilled vegetables or a fresh salad for a complete meal!

    Given your culinary background,  you might appreciate the balance of sweet and tangy flavors with a hint of smokiness in this dishes . Enjoy your cooking !

    Please, don’t forget to follow, comment and share.

    http://www.chefsideacafe.food.blog

  • WHAT IS THE TERM STAGIAIRE STAND FOR IN CULINARY ARTS AND IT’S ADVANTAGES

    Author :chef ssentongo Geoffrey

    Stagiaire, Apprenticeship And Externship

    In the culinary world, the term “stagiaire” refers to an unpaid intern or apprentice, typically in a professional kitchen. Stagiaires are individuals who are either enrolled in culinary school or seeking to gain practical experience in a professional kitchen environment. The term originates from the French word “stage,” which means “training” or “apprenticeship.”

    Advantages of being a stagiaire in the culinary industry include:

    1. Hands-on Experience: Stagiaires have the opportunity to work alongside experienced chefs and kitchen staff, gaining practical, real-world experience in a professional kitchen environment.
    2. Skill Development: Stagiaires can learn and develop culinary skills, techniques, and industry best practices by observing and working under the guidance of seasoned professionals.
    3. Networking: Working as a stagiaire allows individuals to build relationships with industry professionals, potentially opening doors to future employment opportunities or mentorship.
    4. Exposure to Different Culinary Styles: Stagiaires may have the chance to work in various types of kitchens, such as fine dining, casual dining, or specialized cuisine, providing exposure to different culinary styles and approaches.

    The main difference between a stagiaire and an apprenticeship or externship in the culinary industry lies in the nature and structure of the training:

    1. Apprenticeship: An apprenticeship in the culinary industry typically involves a formal, paid training program that combines on-the-job training with classroom instruction. Apprenticeships are often longer in duration and are designed to provide comprehensive training in various aspects of the culinary arts, leading to a recognized certification or qualification.
    2. Externship: An externship is a structured, supervised work experience that is typically a required component of a culinary education program. It allows students to gain practical experience in a professional kitchen setting as part of their academic curriculum. Externships are often shorter in duration compared to apprenticeships and may or may not be paid, depending on the program and the specific arrangement with the host kitchen.

    In summary, while stagiaires, apprentices, and externs all involve hands-on training in the culinary industry, the specific terms refer to different types of training programs, each with its own structure, duration, and objectives.

    I find this article helpful comment and share to your friends so that they can find more articles like this on my website or on Facebook page below.

    http://www.facebook.com/Chefssentongo1

    http://www.chefsideacafe.food.blog

  • AS A CHEF WHAT CAN YOU DO WITH YOUR COOKING SKILLS?

    Author :chef ssentongo Geoffrey

    I would suggest chefs out there trying out the following activities and hobbies related to creating recipes and improving kitchen skills:

    1. Recipe Swap: Connect with friends, family, or online cooking communities to exchange and try out new recipes from different cultures and cuisines. You can even organize a virtual cooking party to share your experiences.
    2. Food Photography: Experiment with food styling and improve your food photography skills. Try capturing and showcasing your culinary creations in an artistic and visually appealing way.
    3. Recipe Development: Challenge yourself to create new recipes by experimenting with different flavors, textures, and ingredients. You can start by modifying existing recipes or even invent entirely new dishes from scratch.
    4. Cooking Classes: Enroll in virtual or in-person cooking classes to learn new techniques and expand your culinary knowledge. You can explore a variety of cuisines, such as French, Italian, Asian, or vegan cooking, depending on your interests.
    5. Homemade Preserves: Learn the art of making homemade preserves, such as jams, pickles, or chutneys. Experiment with different fruits, vegetables, and spices to create unique and personalized flavor combinations.
    6. Culinary Storytelling: Combine your love for cooking with storytelling by creating a blog or social media platform where you can share your recipes, cooking experiences, and the stories behind them. Incorporate writing, photography, and videography to make it more engaging.
    7. Kitchen Science Experiments: Explore the scientific aspects of cooking by engaging in kitchen experiments. You can experiment with emulsions, fermentation, molecular gastronomy, or even make your own cheese or yogurt.
    8. Monthly Cooking Challenges: Participate in cooking challenges or set monthly themes for yourself to motivate continuous culinary exploration. For example, you can challenge yourself to bake a new type of bread every week or cook a dish from a different country each month.
    9. Cookbook Club: Start a cookbook club with friends or join existing ones. Each month, select a cookbook or a specific theme, and everyone can prepare a recipe from it. Share your experiences and thoughts on the recipes, ingredients, and techniques used.
    10. Kitchen Garden: If you have a yard or even a small balcony, consider starting a kitchen garden. Grow your own herbs, vegetables, or fruits. It will not only provide you with fresh ingredients but also be a rewarding and relaxing activity.

    Remember, kitchen skills and recipe creation can be enjoyed and practiced anywhere, encouraging your creativity and culinary expertise to soar.

    Please, send your comments

    on Facebook page or website below

    http://www.chefsideacafe.food.blog

  • WHAT IS THE TERM APPRENTICESHIP MEANS IN CULINARY INDUSTRY AND WHAT DO YOU GAIN FROM THERE..

    Author :chef ssentongo Geoffrey

    Apprenticeship :

    An apprenticeship in the culinary industry is a type of formalized training program that combines on-the-job learning with classroom instruction. It provides individuals with the opportunity to learn and develop their culinary skills, while also gaining valuable work experience in a professional kitchen setting.

    Advantages of apprenticeships in the culinary industry include:

    1. Hands-on Experience: Apprentices have the opportunity to work directly in a kitchen environment, gaining practical skills and knowledge under the guidance of experienced chefs.
    2. Culinary Education: Apprenticeships often include structured classroom instruction which can supplement and enhance a trainee’s practical experience.
    3. Mentorship: Apprentices typically work closely with experienced chefs who can provide guidance, mentorship, and feedback, helping them refine their culinary techniques and develop their own cooking style.
    4. Career Advancement: Completing an apprenticeship program can increase the likelihood of securing job opportunities in the culinary industry, as it demonstrates both practical experience and formal training.
    5. Networking: Apprenticeships often provide opportunities to make connections with industry professionals, colleagues, and potential employers, which can be valuable for future career prospects.
    6. Industry Recognition: Graduating from a recognized apprenticeship program can enhance an individual’s professional credibility within the culinary industry and may also lead to certifications or credentials that can be beneficial for career advancement.

    Overall, apprenticeships offer a structured and practical approach to learning and skill development, making them an effective pathway for individuals seeking to build a career in the culinary industry.

    Visit our website below for more

    http://www.chefsideacafe.food.blog

  • MARRY ME CHICKEN RECIPE (A Review Recipe)

    Author :chef ssentongo Geoffrey {Mr delicious}

    Chicken marry me recipe (review)

    I posted this delicious chicken recipe a year ago but still have some confusion, this recipe usually made when you have party or any occasions not for marriage issues.

    Here is a simple recipe for chicken marry me:

    Ingredients:

    • 4 boneless, skinless chicken breasts
    • 2 tablespoons olive oil
    • Salt and pepper to taste
    • 4 cloves garlic, minced
    • 1 cup cherry tomatoes, halved
    • 1/2 cup balsamic vinegar
    • 1/4 cup honey
    • Fresh basil leaves for garnish

    Instructions:

    1. Season the chicken breasts with salt and pepper on both sides.
    2. In a large skillet, heat the olive oil over medium-high heat. Add the chicken breasts and cook for 6-7 minutes on each side, or until golden brown and cooked through. Remove the chicken from the skillet and set aside.
    3. In the same skillet, add the minced garlic and cherry tomatoes. Cook for 2-3 minutes, or until the tomatoes begin to soften.
    4. Add the balsamic vinegar and honey to the skillet. Stir to combine and bring the mixture to a simmer.
    5. Return the chicken breasts to the skillet and spoon the balsamic glaze over the top. Cook for an additional 2-3 minutes, or until the glaze has thickened.
    6. Serve the chicken marry me with a garnish of fresh basil leaves and enjoy!

    This chicken marry me recipe is a delicious and simple dish that is perfect for a special occasion or a weeknight meal. Enjoy!

    Please, like, follow, comment and share or visit our website below

    http://www.chefsideacafe.food.blog

  • SET CULINARY GOALS TO ACCOMPLISH YOUR DREAMS IN 2023

    Author : chef Ssentongo Geoffrey

    Set Culinary Goals To Accomplish your goals 2023

    Whether you’ve recently graduated from culinary arts or you’re just getting started currently arts, the new year is the ideal time to designate culinary goals and set them into action.

    Establishing culinary goals can help you stay focused during your studies or while searching for your first job in the food or hospitality industries.

    Let’s get started with some simple questions:

    * What do you want to cook?

    * How high up the kitchen hierarchy do you want to climb?

    * What matters to you the most as you serve your guests?

    Now let’s Explore a bit Deeper…

    Consider your Core Values

    Taking the time to identify and understand your personal values and beliefs is just as important as the time you may spend honing-Your skills in the classroom or kitchen. The competitive skills you can use in all sorts of culinary environments: Restaurants, food trucks, hotels, convention centers, and institutions… Some even become personal or private chefs.

    It’s important to realize that everyone might come to the table with different culinary goals. Some want to make their mark as culinary pioneers and run their own restaurants. Others desire to maintain a more stable income in a Monday to Friday job that provides the freedom. Just make sure to identify your individual path by the time you graduate.

    Keep in mind that your culinary goals and aspirations may evolve over time as your knowledge, circumstances, or opportunities change. Be open to that change.

    Make your Culinary Goals Detailed

    I want to work in a five-star restaurant, isn’t a culinary goal, but it might be the makings of one.

    What kind of restaurant do you want to work in, and where? Be specific about the style of cuisine, the location, and how long you intend to take in order to achieve that goal. Be sure your culinary goals are realistic. It might be effective to set the bar high for your career achievement.

    Experience Life Beyond the Kitchen

    Don’t limit yourself to the kitchen when you’re building your foundation of knowledge. This is particularly important if you aspire to become an Executive chef someday. Cooking skills are a must, of course, but it might be wise to also earn a food entrepreneurship certificate too.

    Continuously challenge yourself

    Dr. Edwin Locke wrote in 1968 that addressed the concepts of motivation and incentives, and how they inspire action and growth. The greatest motivator; it was the work itself that drove people to succeed.

    How does this relate to setting your goals?

    It might entice you to squash your fears to set lofty goals for yourself.

    Challenging yourself with an everyday task you haven’t perfected yet gives you something to chase, even if that pursuit is simply refining a skill that might save you time and energy. You might reap greater rewards in your daily work life and grow.

    Other Factors to Consider when Setting Culinary Goals

    When we constantly strive to achieve big dreams, this usually bolsters our personal and professional development. However, it’s just as pivotal to remain realistic and consider other factors that might come into action.

    * Stress

    When you set those lofty career goals, you might put in extra time, grit, and effort to hit those major milestones. Naturally, you might feel a bit of stress creep in, but don’t fret, it’s part of the process.

    * Luck

    Don’t listen to people who say, “How great that you landed your dream job” as though you just stumbled into it. Instead, remember the words of Roman Philosopher seneca: “Luck is where opportunity and preparedness meet.” it’s vital to acknowledge how hard you worked to earn the break.

    * Timing

    Don’t apologize for your success. If you’ve put in the hard work at culinary school,or kitchen then really hustled to secure an amazing opportunity right out of the gate, take pride in that achievement.

    * Complaining

    It’s perfectly okay to complain about your “ Dream job” some days. It might be the toughest job you’ve had! You may feel pure excitement about working in your dream kitchen.

    * Happiness

    For all the stress, less-than-encouraging feedback, and hard days you might experience you may realize you’re happier than ever when accomplishing your culinary goals.

    * Establish your Culinary Goals From today

    Would you like to find out if a career in the culinary arts might be your “ Dream job”?

    Contact us today, to get one step closer to accomplish your culinary goals.

    The journey to your dream job might start here!

    Read more articles from our web site

    http://www.chefsideacafe.food.blog

  • WHAT IS THE DIFFERENCE BETWEEN CUSTOMER CARE AND CUSTOMER SERVICE?

    Home —Restaurant owners —kitchen Customer Care —Customer Service

    Author :chef ssentongo Geoffrey

    The Differences Between Customer Care and Customer Service

    At its core, your business exists to take care of your customers. Whether you do that by providing a solution to their problems or a way of fulfilling their needs, your relationship with your customers is at the heart of your business. But there are many ways to build, maintain, and strengthen these relationships.

    One of the most powerful is customer care.

    Customer care goes beyond other elements of the customer experience, such as Customer service and Customer relations. It’s a more intimate, expensive way of thinking and caring about your customers’ needs and wants. And if you’re able to provide an excellent customer care experience, your customers will be happy, loyal, and profitable for years to come.

    But what exactly is customer care all about?

    How does it stand out from the rest of your customer experience?

    And how can you create an exemplary customer care program?

    All that and more for your business to make stand.

    What is Customer Care?

    Customer care is a facet of your overall Customer experience program. It is how people are treated when they interact with your restaurant or company and brand and it includes every experience they have, from the pre-purchase steps to buying products to after they become a customer and and beyond. Customer care fosters an emotional connection between your customers and your restaurant and deepens and strengthens your relationship over the long term.

    What Customer Care can Look Like…

    There are many ways of providing customer care, but they all come back to creating the same feeling in your customers that your restaurant or company is looking out for them and has their back.

    Measuring Customer Care

    It’s much harder to measure than things like customer loyalty or customer success. Most customer care interactions are unique and happen on 1:1 basis so capturing trends across a broad customer base isn’t possible.

    Loyalty and success happen as a byproduct of caring for your customers, and it’s not possible to pursue them as goals on their own. You need to create experiences and a customer journey that delights and satisfies customers and loyalty and success will come from those efforts.

    How to do Customer care the Right Way….

    Since customer care is a deeply personal experience, you can’t just create a checklist of what your employees should do to provide it. It’s not just another box to check on the road to creating a great customer journey. And it’s difficult to standardize since the needs of each customer vary so much.

    You need to train your employees in the most important customer care skills. Examples include Active Listening, Problem-solving, Empathy, Independent judgment. It’s not not about providing them with a service list of steps to take but instead giving them the skills to take care of these unique customer care experiences when they arise.

    But your management also has a large role to play in the customer care department.

    CUSTOMER CARE VS. CUSTOMER SERVICE

    Customer care and customer service might just seem like different terms to describe the same thing-taking care of customers when they need you. But they’re actually quite separate concepts, though they do work together to create your overall Customer experience.

    What is the difference between customer care and customer service?

    In customer care, you’re building a personal and emotional connection with the people who interact with your business.

    But customer service, you’re providing assistance or advice to to customers who need help. Customer care isn’t as easy to qualify as customer service, and it’s more personalized.

    While they are different, both customer care and customer service increases customer satisfaction. They just do it in different ways.

    Customer Service

    Customer service is an important part of your customer experience strategy just because it’s not the same as customer care doesn’t mean it’s not vital. It’s how your customer gets support with their most basic needs and issues, like instructions for their service needed or product by conveniencing.

    Can your business resolve simple issues quickly and efficiently for the vast majority of your customers?

    Customer Care

    But customer care is about more than just a moment in time when a customer needs a little help and a quick response back to a question. It’s forming an emotional connection with your customers and helping them for the sake of improving your metrics or increase loyalty.

    Your Customer Experience

    As part of your overall Customer experience strategy, most of your customer who experience a problem or issue will need the help of your customer service team.

    But as part of your customer experience, you’ll also encounter a few customers along the way who need a different kind of help.

    Customer care Best Practices

    Since it is such a personalized and customer experience, it can be hard to understand exactly what great customer care looks like through broad explanations alone.

    Business invest in their customer care programs because caring for your customers isn’t just a pleasant idea – it’s also good business sense.

    Customer Convenience

    Owning a restaurant offers you plenty of freedom, but it also comes with regular hassles. When it comes time for regular service or maintenance, these additional services to the dealer and time spent can add stress to your already busy day.

    Personalized Customer Interactions

    One of the core tenets of customer care is that people don’t like to be treated like interchangeable parts in your customer service, they expect personalized, customized services where it’s possible.

    Unique Customer Care

    Ever turn on your restaurant work endlessly through without options no service in, and struggle to make a decision on what to do right? This is a common modern dilemma.

    Key Takeaways

    Improving and refining the way you care for your customers when they have an urgent or out-of-the-box needs can be challenging, but it also can have a huge impact on the loyalty and satisfaction of those customers.

    How satisfied are you with this content piece?

    Send your comments please..

    More content

    Visit our website below

    www.chefsideacafe.food.blog

    www.facebook.com/Chefssentongo1

  • 7 FRENCH COOKING TECHNIQUES CHEFS NEED TO KNOW

    Author :chef ssentongo Geoffrey

    Preparing sauces and seasonings

    Blog : French cooking Techniques chefs Need to Know..

    Culinary arts has strong roots in French cuisine.

    Inspired by our namesake, Auguste Escoffier. Our cooking have a versatile foundation in French cooking that can be applied to advanced techniques from a variety of cultures!

    Here are some of the most useful French cooking techniques for an aspiring chef to hone.

    1 – The Foundational Mirepoix

    In French cuisine, it’s the miropoix, a finely diced blend of two parts onion, one part celery, and one part carrots, lightly cooked in butter or olive oil. To make perfect miropoix, you must cook your veggies slowly in order to release the flavors without browning or caramelizing them.

    Mise en place
    Mirepoix

    2 – The perfect Roux

    As a starting point for many of Mother sauces the roux is an indispensable French cooking techniques. A perfect roux helps to thicken a liquid, stock, or sauces.

    The ingredients for a roux couldn’t be simpler, made from equal parts Flour and fat—often butter. The trick is in the heat, the movement, and the timing.

    A roux should be cooked over medium heat, stirring frequently, until it’s just the right color.

    From the right : blonde roux, brown roux, and dark roux

    The only difference between a blonde roux, and a brown roux and dark roux is in the timing.

    3 – The Five Mother Sauces

    The Five “Mother sauces ” in French cuisine form the basis of dozens of additional sources.

    The four original mother sauces were Bechamel, Veloute, Espanole, and Tomate. These were selected by legendary French chef Marie-Antoine Careme, the man who developed the concept of Haute cuisine. Later, Hollandaise was added to the lineup by Auguste Escoffier himself. When you knows how to make these, a whole world of sauces opens up! These sauces and the secondary sauces can be found on Pastas, proteins, vegetables, and much more.

    The Five Mother sauces

    ° Bechamel : A roux of flour and butter with milk

    ° Hollandaise : Made from clarified butter, warm egg yolks, and an acid like vinegar or white wine

    ° Veloute : A white stock (chicken, or vegetables) flavored with mirepoix and thickened with a trademark blonde roux

    ° Espanole : A brown stock flavored with mirepoix and thickened with a roux

    ° Tomate : Made from rendered pork, a romantic veggies, tomatoes, stock, and ham bone for flavor

    4 – Delicate French Cuts

    In French cooking, you should have a specialty knife skills that can help you to make short work of their herbs and veggies. These techniques help cooks to reduce irregular foods into uniform shapes for even cooking.

    To julienne, for example, is to cut vegetables into small, uniform Matchsticks. These cook quickly and evenly and are perfect for a light Sautee.

    The Batonnet is similar in shape to julienne, but it’s a bit shorter and thicker.

    A Brunoise is a fine dice, often used in sauces as their small size releases flavor quickly. A small dice is a slightly larger cube than a Brunoise.

    The Chiffonade is a method of cutting herbs and leafy vegetables into fine stripes.

    The differences between these various cuts can be subtle, but they’re important distinctions in French cuisine!

    From left to right : Brunoise, julienne, small Batonnet

    5 – Flavorful Deglacer

    Much of French cooking comes down to simplicity. Rather than adding additional ingredients or seasonings for extra flavor.

    Getting flavorful food

    One way to do that is with the method of deglacer, or deglazing. To deglaze is to release the browned juices and fats from the bottom of your pan by adding a bit of stock, water, or wine and heating to a low simmer.

    Deglazing

    Deglazing pulls the concentrated flavors and fats from the pan which can then be re-use for a delicious pan sauce or Demi-Glace to pour over the protein that you’ve just cooked!

    6 – Cooking “En Papillote”

    A great deal of modern cooking terminology is in French, which can make simple concepts sound complicated. But it simply means cook “in paper”. It’s ideal for tender proteins like fish, chicken and veggies and a romantics atop your protein to impart their flavors to the finished dish. For example..

    Vegetables en Papillote

    7 – The Bouquet Garni

    In some French recipes, herbs impart a bit of their flavor to a stew, sauce, or stock… but they’re not meant to be eaten.

    So How can you remove individual ingredients from the greater whole?

    The answer is the bouquet garni, a common method of adding a ” garnish bouquet” to a dish thet let’s you take it out after cooking.

    This is a perfect way to get peppercorn flavor in your dish without biting into one!

    A bundle of loose herbs in cheesecloth.

    French Cuisine Has Spread Worldwide

    Why focus on the techniques you find in French cooking?

    Is Hospitality management a Good Career Choice for You?

    Become chef insractor

    Please, if you’ve find this article helpful, please, comment, share to your friends or visit the website,

    just tap on the link below

    http://www.chefsideacafe.food.blog

Design a site like this with WordPress.com
Get started