Creating Recipes Connected to Inventory: A Comprehensive Guide
Understanding Recipe-Inventory Integration
Connecting recipes to your inventory system allows for automatic ingredient tracking, cost calculations, and stock management. This integration is essential for restaurants, food manufacturers, and meal prep services.
Step 1: Set Up Your Inventory System
Before linking recipes:
Catalog all inventory items with unique identifiers (SKUs)
Establish measurement units (grams, liters, each, etc.)
Input current stock levels
Set up supplier information and reorder points
Step 2: Recipe Creation with Inventory Links
Basic Structure for Each Recipe:
Recipe Name
Portion Size/Yield
Ingredients List (linked to inventory items)
Preparation Steps
Nutritional Information (optional)
Cost Analysis
Step 3: Ingredient Mapping
For each ingredient in your recipe:
Select from inventory database (don’t create duplicates)
Specify exact quantity using consistent units
Account for waste/processing loss (peeling, trimming, etc.)
Set alternative ingredients where applicable
Step 4: Automated Calculations
Your system should automatically:
Calculate cost per recipe based on current ingredient costs
Determine cost per portion
Track inventory depletion when recipes are produced
Flag low stock ingredients
Step 5: Integration with Production
Connect your recipes to:
Production schedules
Menu planning systems
POS systems (for restaurants)
Purchasing systems
Recommended Software Solutions
Restaurant/Food Service:
Toast Inventory
Upserve
MarketMan
Manufacturing:
ERP systems like SAP or Oracle
Food Manufacturing-specific software like Aptean Food & Beverage ERP
Small Business/Meal Prep:
Mealtime
ChefTec
SimpleOrder
Best Practices
Standardize all measurements across recipes
Regularly update ingredient costs
Conduct physical inventory counts to verify accuracy
Train staff on proper usage of the system
Review recipe yields periodically for accuracy
Troubleshooting Common Issues
Mismatched units: Ensure all recipes use the same unit of measure as inventory
Duplicate items: Consolidate similar ingredients in your database
Outdated costs: Set reminders to update prices quarterly or when major changes occur
Waste discrepancies: Adjust yield percentages based on actual results
Would you like me to elaborate on any specific aspect of this process, such as particular software recommendations or implementation strategies for your specific business type?
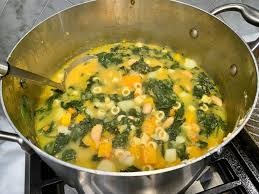
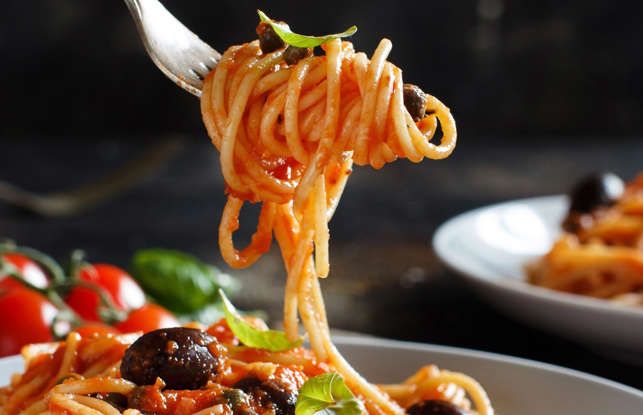
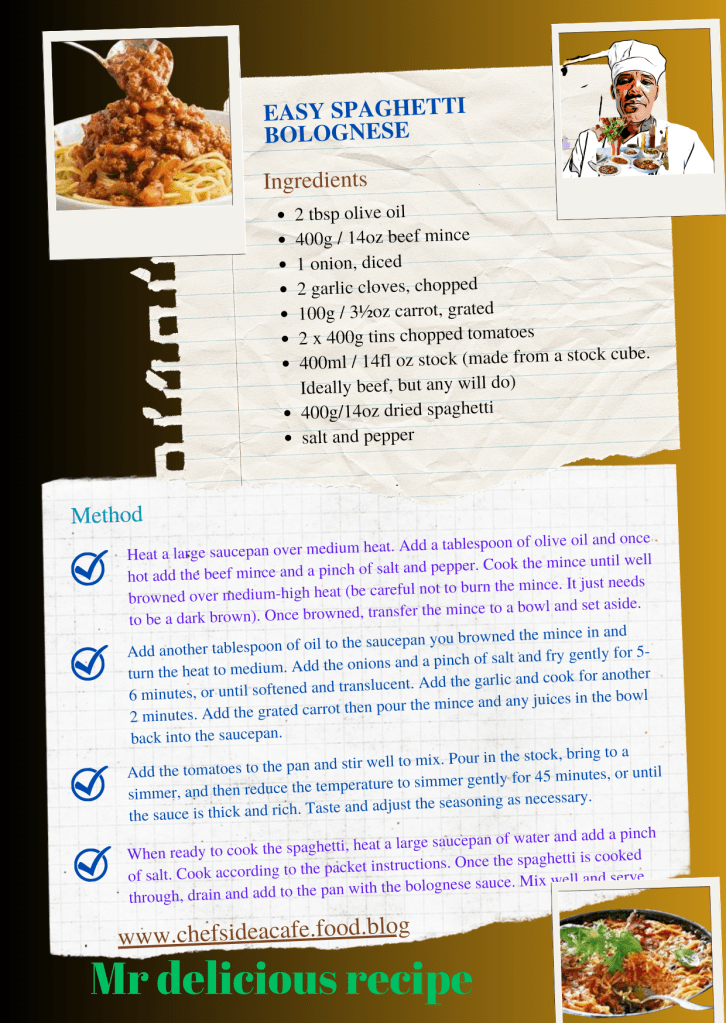
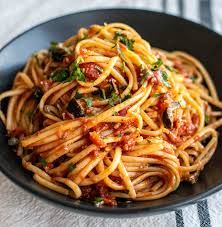
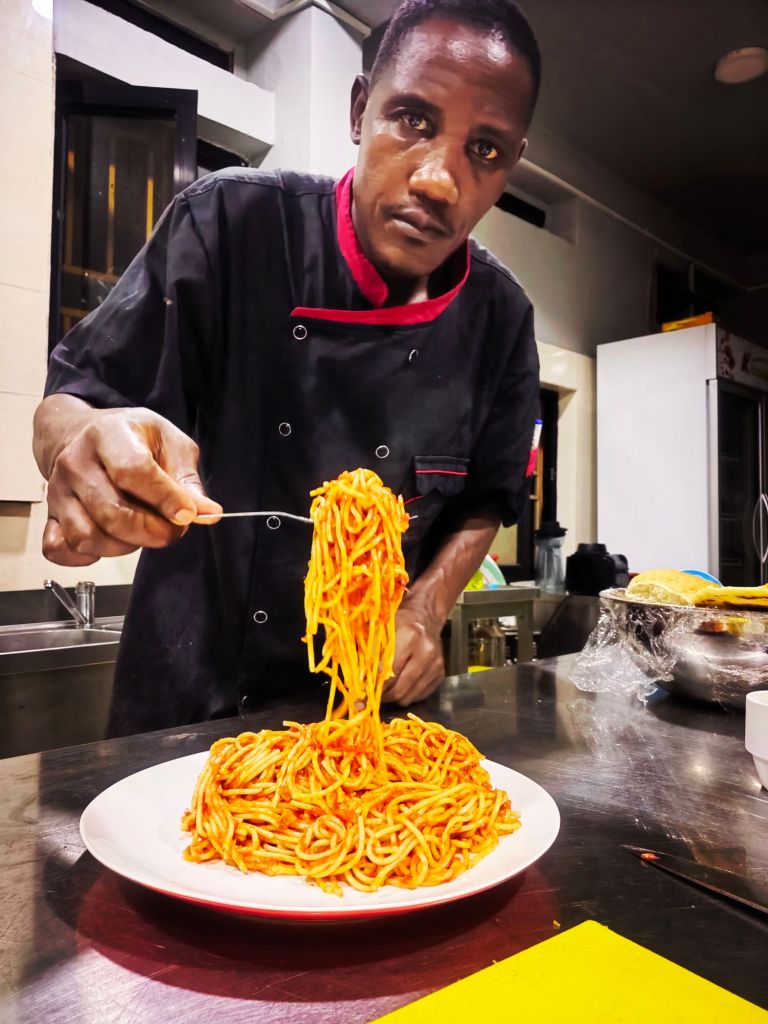
Delicious Pasta Recipes to Try 1-Pappardelle Ragu & and mushroom sauce, 2- Dilalini minestrone soup, 3- Spaghetti Alla Puttanesca sauce. Recipes Guide step by step Cooking
By : chef ssentongo Geoffrey
From : Mr Easy Recipes
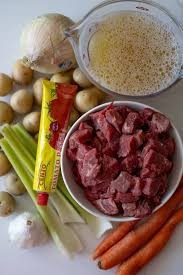
Here’s a step-by-step guide to three delicious pasta recipes: Pappardelle with Ragù & Mushroom Sauce, Ditalini Minestrone Soup, and Spaghetti Alla Puttanesca.
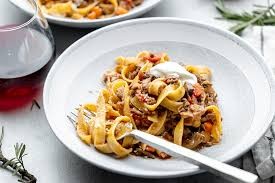
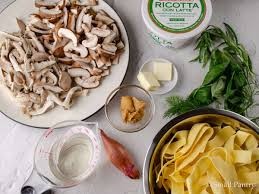
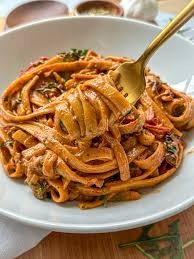
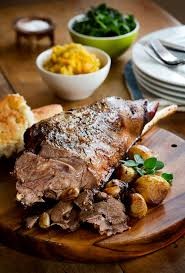
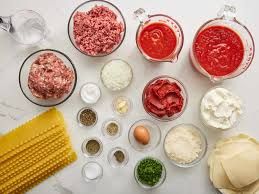
1. Pappardelle with Ragù & Mushroom Sauce
Ingredients:
250g pappardelle pasta
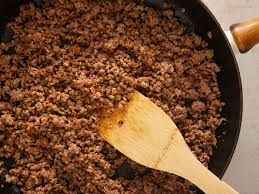
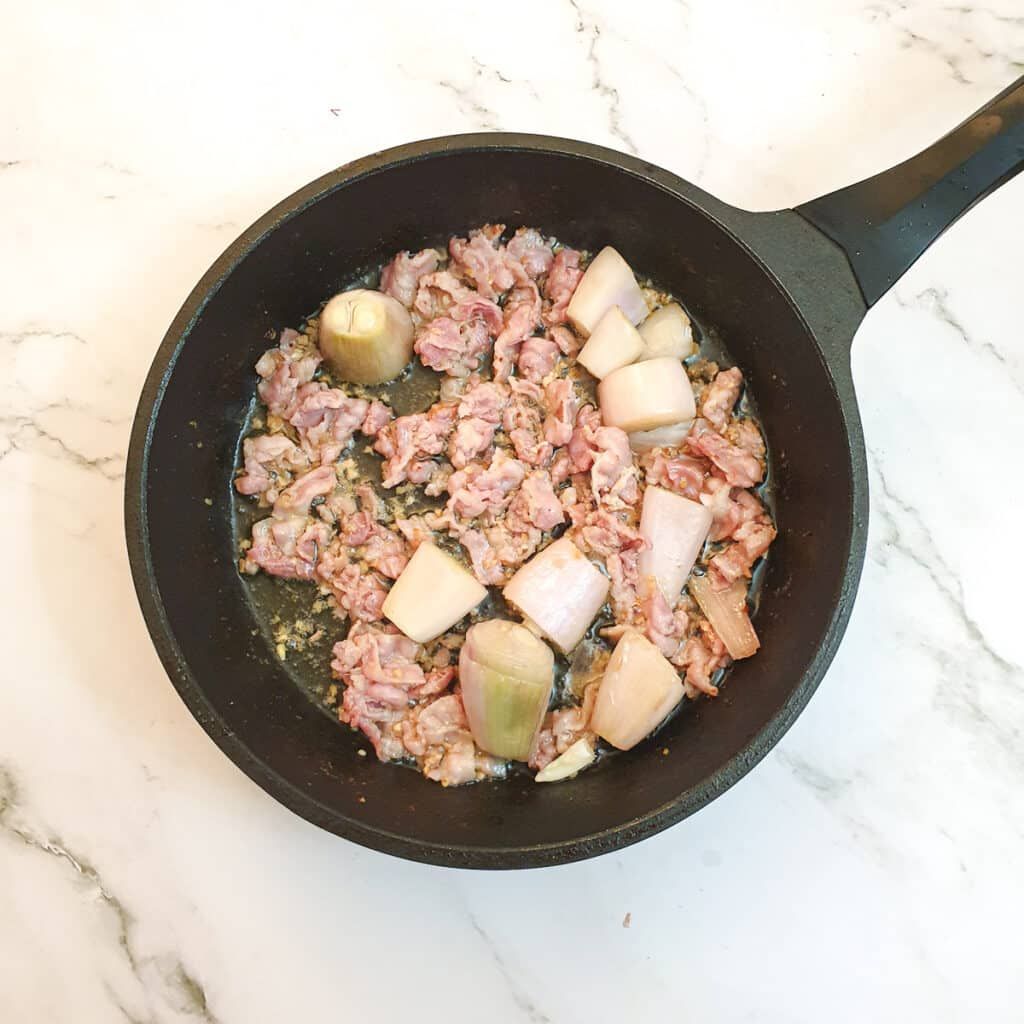
300g ground beef (or a mix of beef and pork)
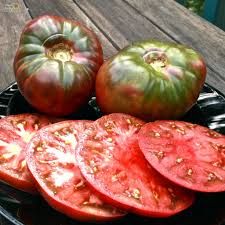
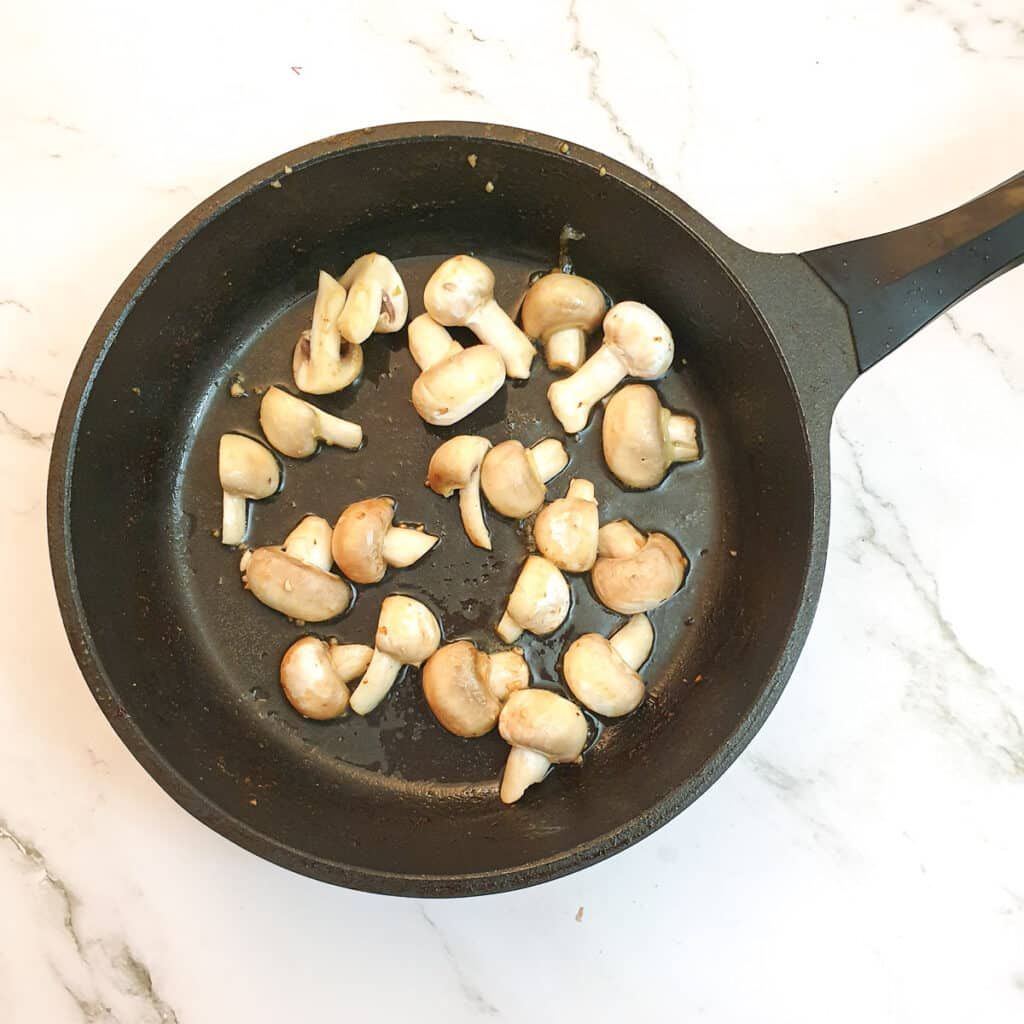
200g mushrooms (cremini or porcini), sliced
1 onion, finely chopped
1 carrot, finely diced
1 celery stalk, finely diced
2 garlic cloves, minced
400g canned tomatoes (crushed or puréed)
1 cup red wine (optional)
2 tbsp tomato paste
1 tsp dried oregano
1 bay leaf
Olive oil, salt, pepper
Grated Parmesan (for serving)
Instructions:
Sauté Vegetables: Heat olive oil in a large pot. Add onion, carrot, celery, and garlic. Cook until soft (5-7 mins).
Brown Meat: Add ground meat, breaking it up. Cook until browned. Pour in red wine (if using) and let it reduce.
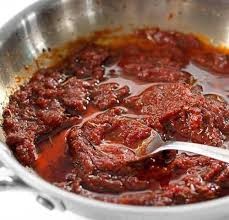
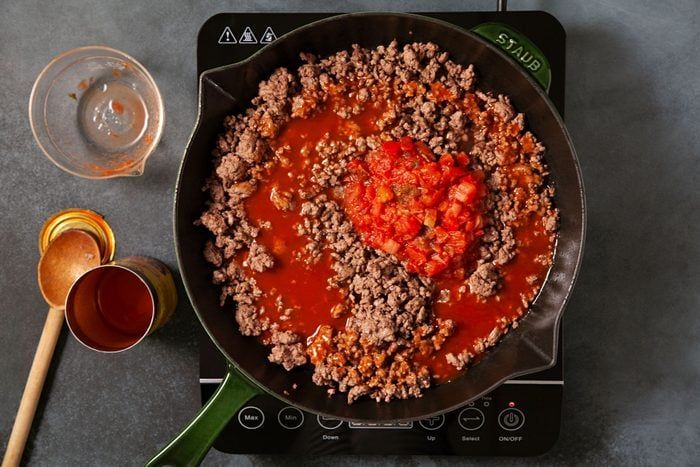
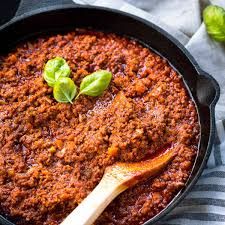
Simmer Sauce: Stir in tomatoes, tomato paste, oregano, bay leaf, salt, and pepper. Simmer on low heat for 1.5–2 hours, stirring occasionally.
Cook Mushrooms: In a separate pan, sauté mushrooms in olive oil until golden. Add to the ragù in the last 30 minutes.
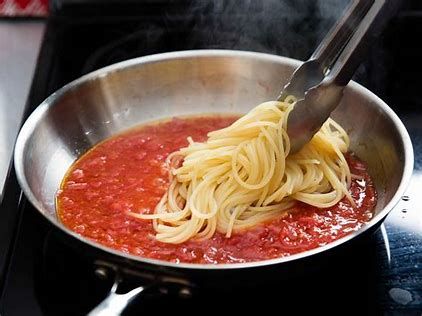
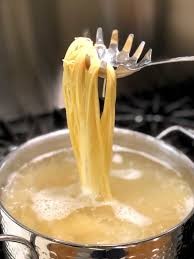
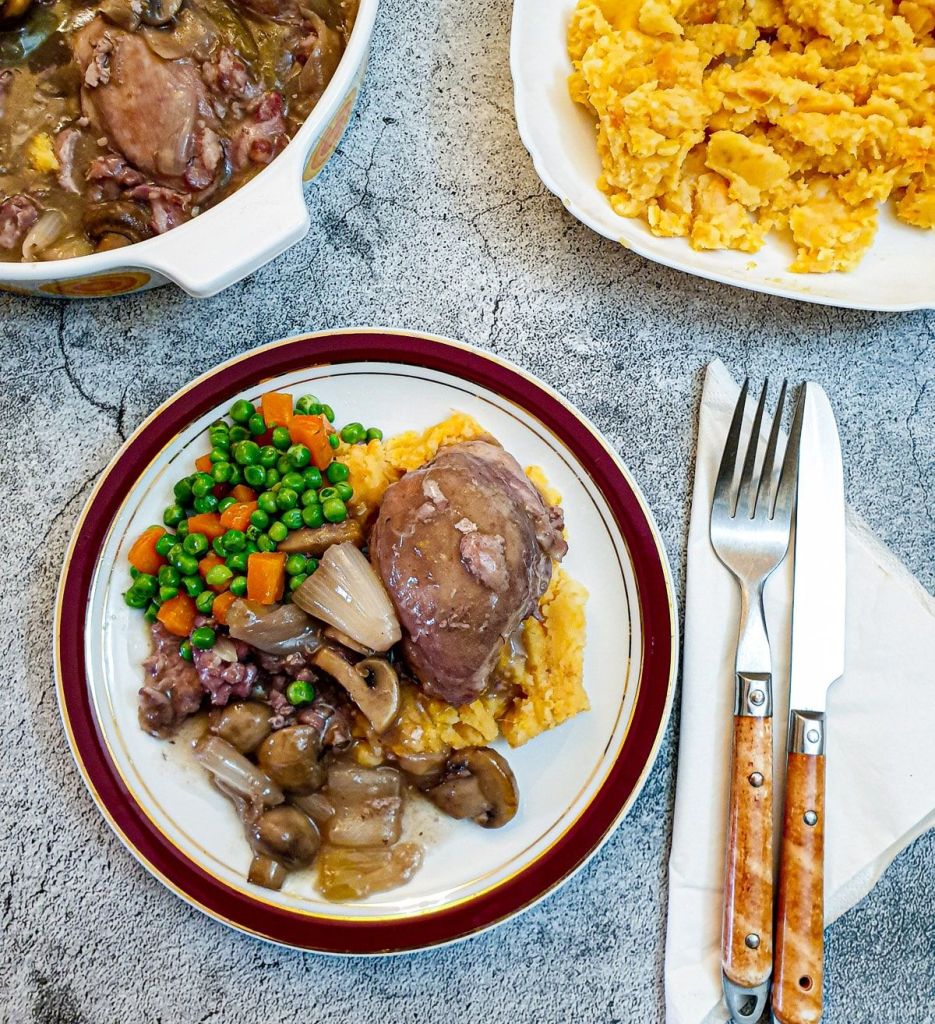
Cook Pasta: Boil pappardelle in salted water until al dente. Drain and toss with the sauce.
Serve: Top with grated Parmesan and fresh herbs.
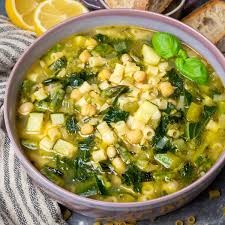
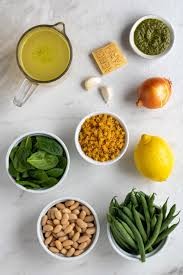
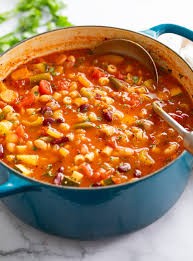
2. Ditalini Minestrone Soup
Ingredients:
1 cup ditalini pasta (or small shells)
1 onion, diced
2 carrots, diced
2 celery stalks, diced
2 garlic cloves, minced
1 zucchini, diced
1 can (400g) diced tomatoes
1 can (400g) cannellini beans, drained
4 cups vegetable or chicken broth
1 tsp dried basil
1 tsp dried oregano
2 tbsp olive oil
Salt, pepper
Grated Pecorino or Parmesan (optional)
Instructions:
Sauté Vegetables: Heat olive oil in a pot. Add onion, carrots, celery, and garlic. Cook for 5 mins.
Add Veggies & Broth: Stir in zucchini, tomatoes, beans, broth, basil, oregano, salt, and pepper. Simmer for 20 mins.
Cook Pasta: Add ditalini and cook for 8–10 mins (or per package instructions).
Adjust Seasoning: Add more broth if too thick.
Serve: Top with grated cheese and a drizzle of olive oil.
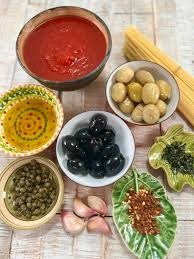
3. Spaghetti Alla Puttanesca
Ingredients:
300g spaghetti
3 garlic cloves, minced
4 anchovy fillets (optional, but traditional)
1/2 tsp red chili flakes
400g canned tomatoes (crushed)
2 tbsp capers, rinsed
1/2 cup pitted Kalamata olives, sliced
2 tbsp olive oil
Fresh parsley, chopped
Instructions:
Cook Pasta: Boil spaghetti in salted water until al dente. Reserve 1/2 cup pasta water.
Make Sauce: Heat olive oil in a pan. Add garlic, anchovies (if using), and chili flakes. Sauté until fragrant.
Add Tomatoes & Extras: Stir in tomatoes, capers, and olives. Simmer for 10 mins.
Combine: Toss spaghetti with the sauce, adding pasta water as needed.
Garnish: Sprinkle with parsley and serve immediately.
Enjoy these hearty and flavorful pasta dishes! Let me know if you’d like any variations or tips. 😊🍝
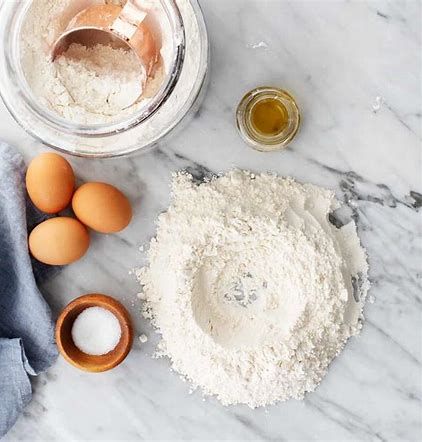
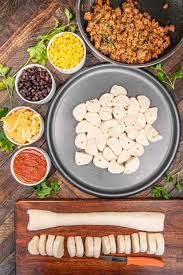
Today, Chinese dumplings are well known around the world as popular, healthful foods. By definition, dumplings are pieces of dough that have been wrapped around various fillings and cooked. More often than not, you’ll find that dumpling dough is made of all-purpose flour, with water and salt included. Each of these ingredients is key to giving these bites their texture and delicious taste.
While many dumplings today include shrimp, beef, pork, and other meat products, alternate versions are available for vegans and vegetarians. For those interested in meat-free, plant-based diets, dumplings with onion and mushroom fillings have become increasingly popular.
Many Chinese dumplings come in bao or gao forms. While bao dumplings are purse-shaped and round, gao dumplings are shaped like crescents. Both are mouthwatering and a treat to indulge in.
From Pragmatic Medicine to Appetizing Cuisine: The Fascinating History of Chinese Dumplings
The history of Chinese dumplings is both rich and fascinating, tracing back to the Han Dynasty around 206 B.C. to 220 A.D. During this time, the renowned medical practitioner Zhang Zhongjing observed many in his community suffering from frostbite, particularly around their ears during the harsh winter. Inspired to help, Zhang created a food that would not only nourish but also symbolize warmth and healing. He crafted dumplings filled with mutton, herbs, and chili, shaping them to resemble ears, in line with the traditional belief that like cures like—a common concept in many ancient medical practices.
As centuries passed, the dumpling evolved beyond its medicinal origins. It became a staple for preserving meat during colder months and making efficient use of surplus grains. The culinary techniques and cultural significance of Chinese dumplings continued to grow, influencing and being influenced by neighboring regions through trade and cultural exchange.
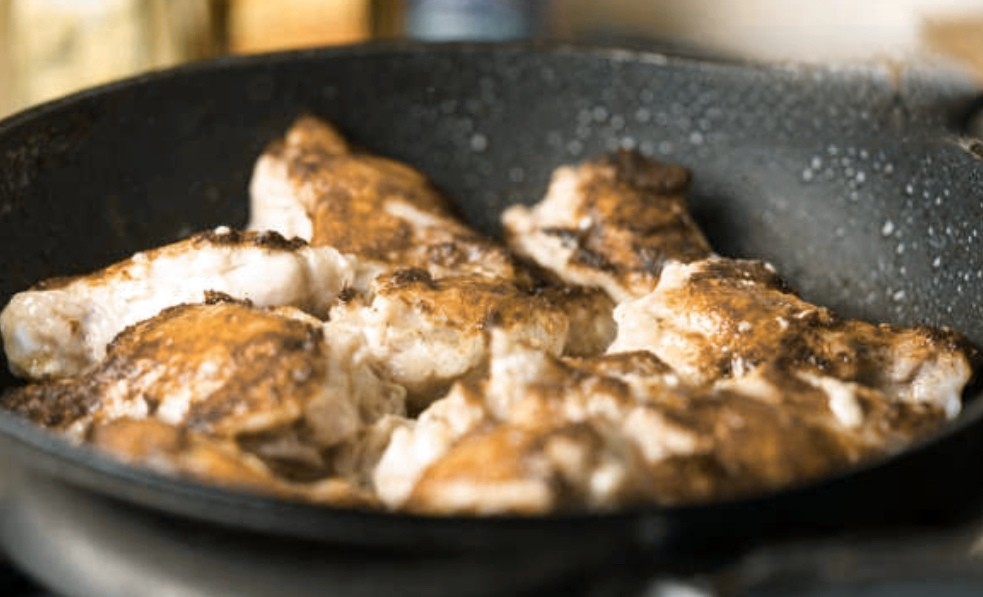
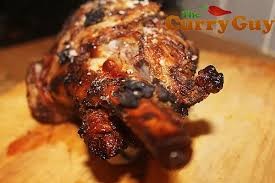
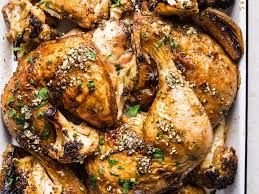
30 Ways You’ve Been Cooking Chicken WRONG All This Time – Step-by-Step Guide
Chicken is a versatile and popular protein, but many home cooks make mistakes that lead to dry, bland, or unsafe dishes. Here’s a step-by-step guide to fixing the most common chicken-cooking errors.
1. Not Patting Chicken Dry Before Cooking
Why? Moisture prevents proper browning. Fix: Pat chicken dry with paper towels before seasoning.
2. Skipping the Brine
Why? Brining keeps chicken juicy. Fix: Soak chicken in saltwater (1/4 cup salt + 4 cups water) for 30 min–2 hours.
3. Overcrowding the Pan
Why? Steaming instead of searing. Fix: Cook in batches or use a larger pan.
4. Cooking Cold Chicken Straight from the Fridge
Why? Uneven cooking. Fix: Let chicken sit at room temp for 15–30 minutes before cooking.
5. Not Seasoning Under the Skin
Why? Flavor stays on the surface. Fix: Lift skin and rub seasoning directly on the meat.
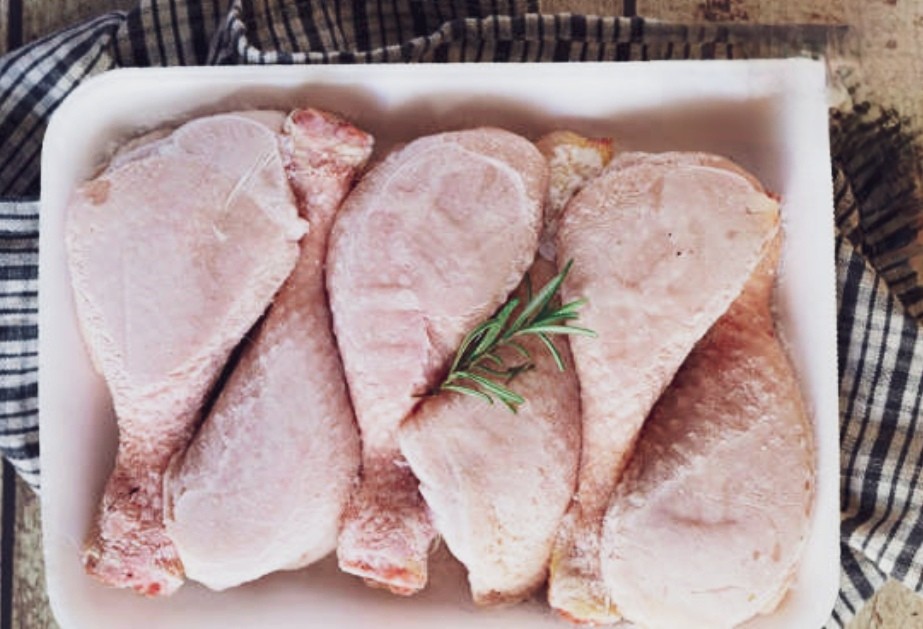
6. Using Only Boneless, Skinless Breasts
Why? They dry out easily. Fix: Try thighs, drumsticks, or bone-in cuts for more flavor.
7. Not Using a Meat Thermometer
Why? Overcooking leads to dryness. Fix: Cook to 165°F (74°C) at the thickest part.
8. Cutting Chicken Too Soon After Cooking
Why? Juices escape, leaving meat dry. Fix: Let it rest for 5–10 minutes before slicing.
9. Flipping Chicken Too Often
Why? Prevents a good sear. Fix: Let it cook undisturbed for a few minutes per side.
10. Not Preheating the Pan/Oven
Why? Uneven cooking. Fix: Always preheat before adding chicken.
11. Cooking at Too High Heat
Why? Burns outside, raw inside. Fix: Medium heat for pan-frying, 375°F (190°C) for baking.
12. Not Scoring Thick Cuts
Why? Uneven cooking. Fix: Make shallow cuts in thicker parts for even doneness.
13. Using Non-Stick Pan for Searing
Why? Doesn’t develop a good crust. Fix: Use cast iron or stainless steel.
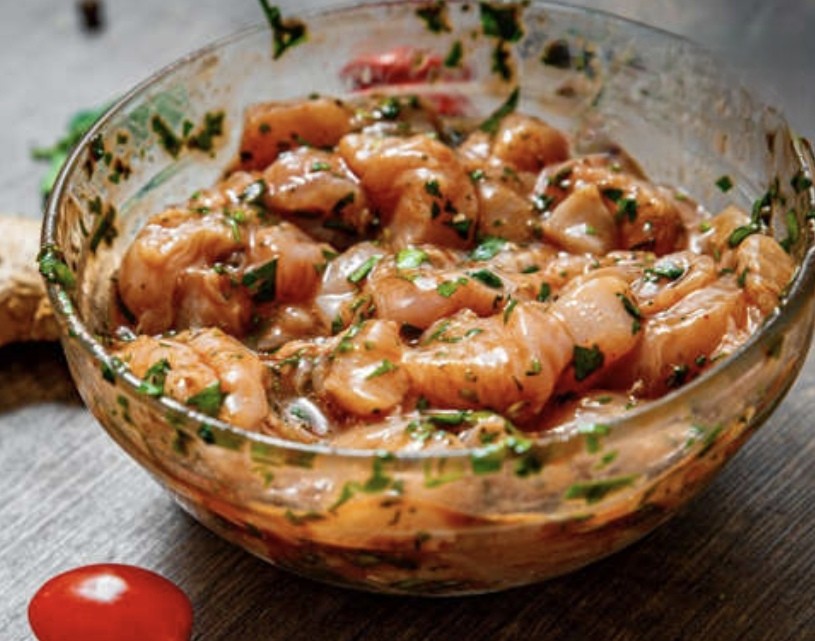
14. Ignoring Marinade Times
Why? Too short = no flavor; too long = mushy meat. Fix: Marinate breasts 30 min–2 hrs, thighs 2–12 hrs.
15. Boiling Chicken for Shredding
Why? Dilutes flavor. Fix: Bake or simmer in broth instead.
16. Not Using a Wire Rack for Baking
Why? Bottom gets soggy. Fix: Place chicken on a wire rack over a baking sheet.
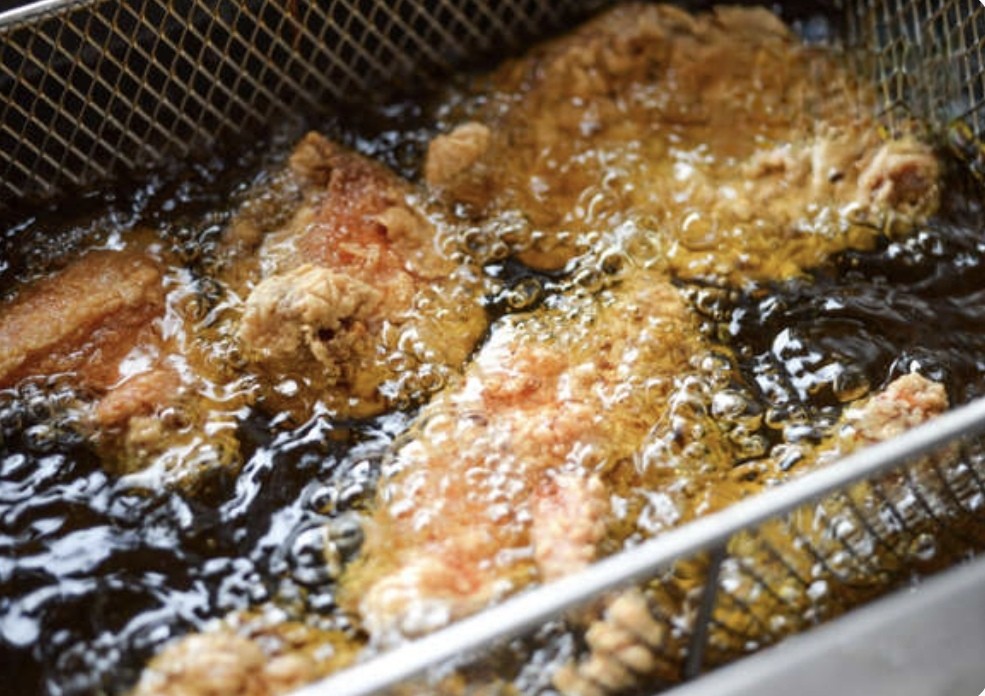
17. Over-Breading Chicken
Why? Coating falls off. Fix: Flour → egg → breadcrumbs, then let sit 5 min before frying.
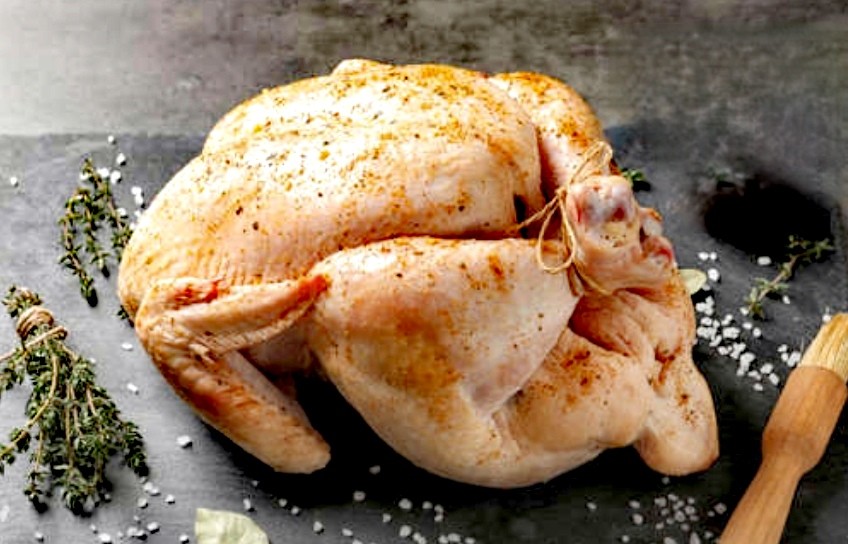
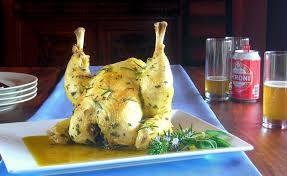
18. Not Spatchcocking a Whole Chicken
Why? Takes longer to cook. Fix: Remove backbone and flatten for even roasting.
19. Cooking Frozen Chicken Without Thawing
Why? Uneven cooking. Fix: Thaw in fridge overnight or use cold water method.
20. Not Using Enough Oil
Why? Sticking and uneven browning. Fix: Use enough oil to coat the pan.
21. Only Using Salt & Pepper
Why? Bland flavor. Fix: Experiment with spices (paprika, garlic powder, cumin, etc.).
22. Not Glazing at the Right Time
Why? Sauce burns. Fix: Add glaze in the last 10–15 minutes of cooking.
23. Not Trimming Excess Fat/Skin
Why? Chewy or greasy texture. Fix: Trim excess fat before cooking.
24. Reusing Marinade as Sauce
Why? Risk of bacteria. Fix: Boil marinade for 5+ minutes if reusing.
25. Not Using Buttermilk for Fried Chicken
Why? Less tender. Fix: Soak chicken in buttermilk before breading.
26. Not Tenting with Foil While Resting
Why? Heat escapes. Fix: Cover loosely with foil to retain warmth.
27. Cooking Chicken Straight from the Package
Why? Excess moisture. Fix: Rinse, pat dry, and season properly.
28. Not Using a Press for Even Cooking
Why? Uneven thickness. Fix: Pound breasts to even thickness.
29. Not Adding Acid for Tenderness
Why? Tough meat. Fix: Use lemon juice, vinegar, or yogurt in marinades.
30. Not Saving Bones for Stock
Why? Wasted flavor. Fix: Simmer bones with veggies for homemade stock.
Final Tips:
✅ Always check internal temp (165°F). ✅ Rest before cutting. ✅ Experiment with flavors & techniques.
By fixing these mistakes, your chicken dishes will be juicier, more flavorful, and perfectly cooked every time! 🍗🔥
Would you like a recipe breakdown for any of these methods?
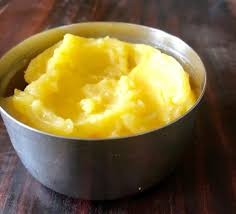
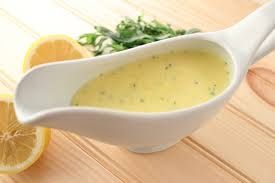
The Difference Between Ghee and Butter—and When to Use Each?
GheeButter
By : chef ssentongo Geoffrey
From : Mr Easy Recipes
Ghee and butter are both dairy products, but they have distinct differences in composition, flavor, and cooking applications.
Key Differences
Composition: Butter contains about 80% butterfat, with the rest being water and milk solids. Ghee, on the other hand, is 100% butterfat because the milk solids and water are removed during the clarification process43dcd9a7-70db-4a1f-b0ae-981daa162054.
Flavor: Butter has a creamy, slightly sweet taste, while ghee has a rich, nutty, and slightly caramelized flavor due to the browning of milk solids during its preparation43dcd9a7-70db-4a1f-b0ae-981daa162054.
Ghee has a higher smoke point (around 482°F) compared to butter (around 350°F), making it ideal for high-heat cooking methods like frying, roasting, and sautéing43dcd9a7-70db-4a1f-b0ae-981daa162054.
Shelf Life: Ghee has a longer shelf life and does not require refrigeration due to its low moisture content43dcd9a7-70db-4a1f-b0ae-981daa162054.
When to Use Each
Ghee Butter
Use Butter for baking, spreading on toast, and making creamy sauces.
Use Ghee for frying, roasting, and adding depth to Indian and Middle Eastern dishes.
Would you like some recipe ideas using ghee or butter? 😊
Chicken Biryan and Chicken Pilau masala Recipes, What is the difference between the two?
By : chef ssentongo Geoffrey
From : Mr Easy Recipes
Great question!
While Chicken Biryani and Chicken Pilau Masala are both delicious rice-based dishes with bold flavors, they differ significantly in preparation, ingredients, and overall taste.
Chicken Biryani vs. Chicken Pilau Masala
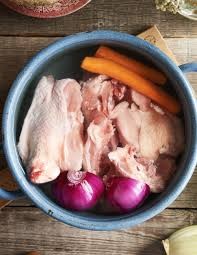
Chicken Biryani Chicken Pilau Masala
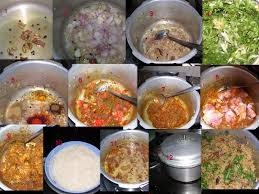
1. Cooking Method:
Chicken Biryani is a layered dish where the rice and chicken are cooked separately before being combined, often in a “dum” style (slow cooking with steam).
Chicken Pilau Masala is a one-pot dish where the chicken, rice, and spices are cooked together, allowing the flavors to fully infuse into the rice.
2. Use of Spices:
Biryani typically uses a complex blend of spices, including cloves, cardamom, cinnamon, bay leaves, star anise, nutmeg, and saffron (optional), giving it a more aromatic and layered flavor.
Pilau Masala has a simpler spice blend, often using pilau masala powder, cumin, black pepper, coriander, and sometimes cinnamon.
3. Rice Variety:
Biryani is traditionally made with long-grain Basmati rice for its fluffiness and distinct texture.
Pilau Masala can also be made with Basmati or other varieties of rice, but it tends to be softer since it absorbs all the cooking liquid.
4. Preparation Style:
Biryani often includes marinated chicken and sometimes yogurt-based sauces, with layers of rice and meat alternated before slow cooking.
Pilau Masala is cooked more straightforwardly, with rice simmered alongside the chicken and spices.
5. Garnishes and Accompaniments:
Biryani is commonly garnished with fried onions, boiled eggs, nuts, and saffron-infused milk.
Pilau Masala is typically simpler, sometimes served with fresh herbs or fried onions, but without the elaborate garnishing of biryani.
Both dishes have rich flavors and are loved across different cultures, but if you’re looking for something rich and layered in taste, Biryani is your go-to. If you prefer a simpler, well-seasoned one-pot dish, Pilau Masala is perfect!
Would you like a recipe for either? I’d be happy to help!
How to bake a wedding cake, recipe and decorations
Baking a wedding cake is a significant undertaking, but with a clear recipe and decoration guide, you’ll be well on your way to creating a stunning and delicious cake for the special day.
Recipe: Classic Vanilla Wedding Cake Ingredients: For the cake:
3 cups (375g) cake flour
2 1/4 cups (285g) granulated sugar
3 teaspoons baking powder
1 teaspoon salt
1 cup (235ml) whole milk, at room temperature
2 large eggs, at room temperature
2 teaspoons pure vanilla extract
For the buttercream:
2 cups (400g) unsalted butter, softened
4 cups (400g) powdered sugar
2 teaspoons pure vanilla extract
2-4 tablespoons whole milk
Instructions:
Preheat and prepare pans: Preheat the oven to 350°F (175°C). Grease and flour six 8-inch (20cm) round cake pans.
Make the cake: In a medium bowl, whisk together flour, sugar, baking powder, and salt. In a large bowl, whisk together milk, eggs, and vanilla extract. Gradually add the dry ingredients to the wet ingredients and mix until smooth.
Divide and bake: Divide the batter evenly among the prepared pans. Bake for 20-25 minutes or until a toothpick inserted in the center comes out clean.
Make the buttercream: Beat the softened butter until creamy. Gradually add the powdered sugar, beating until smooth and creamy. Add vanilla extract and mix until combined. Add milk as needed to achieve the desired consistency.
Assemble the cake: Place one cake layer on a serving plate or cake stand. Spread a thin layer of buttercream on top. Repeat with the remaining cake layers, creating a stacked cake.
Decoration Ideas:
Classic Buttercream: Frost the outside of the cake with a thin layer of buttercream. Use a piping bag and tip to create decorative borders and flowers.
Fresh Flowers: Arrange fresh flowers, such as roses or peonies, on top of the cake in a decorative pattern.
Sugar Flowers: Create sugar flowers in various colors and arrange them on top of the cake.
Piping Designs: Use a piping bag and tip to create intricate designs, such as scrollwork or lace patterns, on the outside of the cake.
Cake Toppers: Use a decorative cake topper, such as a bride and groom or a floral arrangement, to add a personal touch to the cake.
Tips and Variations:
Use a cake turntable: Display the cake on a cake turntable to make it easier to decorate and serve.
Add flavorings: Add different flavorings, such as almond or coconut extract, to the cake and buttercream for a unique taste.
Use different types of milk: Use different types of milk, such as almond or soy milk, to create a non-dairy version of the cake.
Add a drizzle: Drizzle a flavored glaze, such as caramel or chocolate, over the top of the cake for added flavor and visual appeal.
By following this recipe and decoration guide, you’ll be able to create a stunning and delicious wedding cake that will impress your guests and make the special day even more unforgettable.
PumpkinAlfredoWithChickenRecipeStep-by-StepGuide
A delicious and seasonal Pumpkin Alfredo with Chicken recipe! Here’s a step-by-step guide to making this comforting dish:
Ingredients:
1 pound boneless, skinless chicken breast or thighs, cut into bite-sized pieces
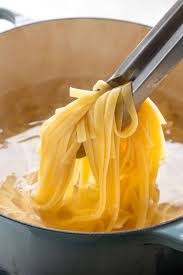
Bring a pot of salted water to a boil: Fill a large pot with salted water and bring to a boil.
Cook fettuccine noodles: Add fettuccine noodles to the boiling water and cook until al dente, about 8-10 minutes.
Reserve 1 cup of pasta water: Before draining the noodles, reserve 1 cup of pasta water for later use.
Step 2: Cook Chicken and Onion (5-6 minutes)
Melt butter in a skillet: Melt 1 tablespoon of butter in a large skillet over medium-high heat.
Cook chicken: Add chicken to the skillet and cook until browned and cooked through, about 5-6 minutes.
Add onion and cook: Add diced onion to the skillet and cook until softened, about 2-3 minutes.
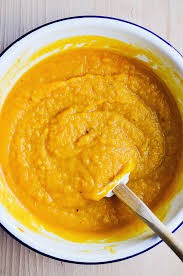
Step 3: Make Pumpkin Alfredo Sauce (10-12 minutes)
Add garlic and cook: Add minced garlic to the skillet and cook for 1 minute, until fragrant.
Add pumpkin puree and heavy cream: Add pumpkin puree and heavy cream to the skillet. Stir to combine and bring to a simmer.
Reduce heat and let simmer: Reduce heat to medium-low and let the sauce simmer for 5-7 minutes, stirring occasionally, until it thickens slightly.
Stir in Parmesan cheese and sage: Stir in grated Parmesan cheese and dried sage until the cheese is melted and the sauce is smooth. Season with salt and pepper to taste.
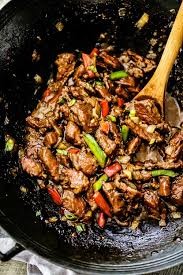
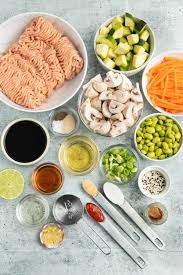
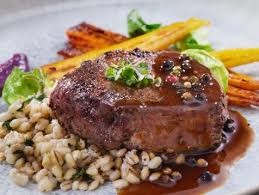
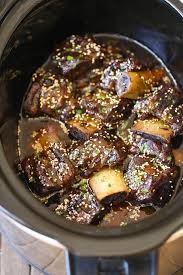
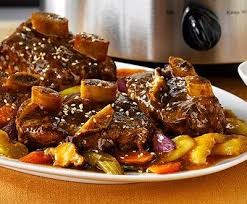
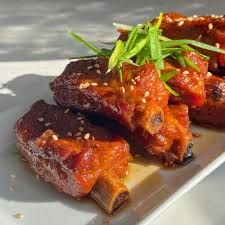
Tender, flavorful, and easy to make, this Slow-Cooker Mongolian Beef is a delicious twist on the classic takeout dish. The beef cooks until melt-in-your-mouth tender in a sweet and savory sauce. Serve over rice for a perfect meal!
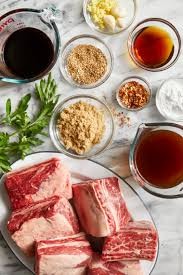
Ingredients
1.5 lbs flank steak or sirloin, thinly sliced against the grain
¼ cup cornstarch
2 tbsp olive oil (for searing, optional)
½ cup low-sodium soy sauce
½ cup water or beef broth
½ cup brown sugar
¼ cup hoisin sauce
3 garlic cloves, minced
1 tsp fresh ginger, grated
½ tsp red pepper flakes (optional, for heat)
1 cup shredded carrots (optional)
3 green onions, sliced (for garnish)
Sesame seeds (for garnish)
Instructions
Step 1: Prepare the Beef
Slice the beef thinly against the grain for tenderness.
Toss the beef in cornstarch until fully coated (this helps thicken the sauce).
Step 2: Searing (Optional but Recommended)
Heat olive oil in a skillet over medium-high heat.
Sear the beef in batches for 1-2 minutes per side until lightly browned (don’t cook through).
Transfer to the slow cooker.
Step 3: Make the Sauce & Slow Cook
In a bowl, whisk together:
Soy sauce
Water or beef broth
Brown sugar
Hoisin sauce
Garlic
Ginger
Red pepper flakes (if using)
Pour the sauce over the beef in the slow cooker.
Add shredded carrots (if using).
Stir gently to coat.
Step 4: Cook
Low heat: 3-4 hours
High heat: 1.5-2 hours (Avoid overcooking—beef should be tender but not mushy.)
Step 5: Thicken the Sauce (Optional)
If the sauce is too thin, mix 1 tbsp cornstarch + 2 tbsp water and stir into the slow cooker.
Cook on High for 10-15 minutes until thickened.
Step 6: Serve
Garnish with green onions and sesame seeds.
Serve over steamed rice or noodles.
Tips
✔ For extra veggies: Add bell peppers or broccoli in the last 30 minutes. ✔ Make it gluten-free: Use tamari instead of soy sauce. ✔ Storage: Keeps in the fridge for 3-4 days or freeze for up to 3 months.
Enjoy your homemade Mongolian Beef—better than takeout! 🍚🥢
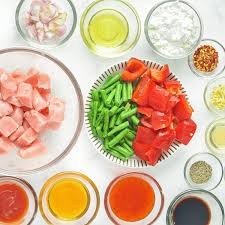
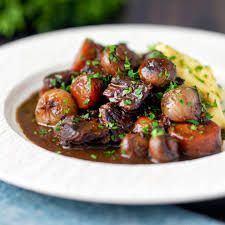
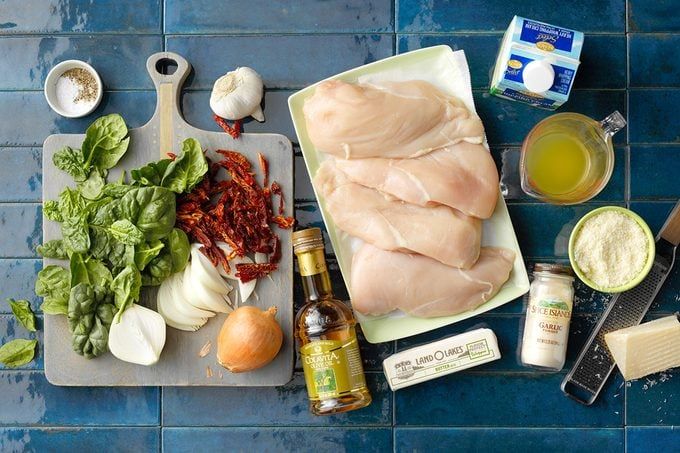
Brazilian Chicken Stroganoff (Estrogonofe de Frango) Recipe
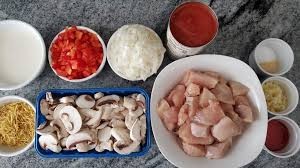
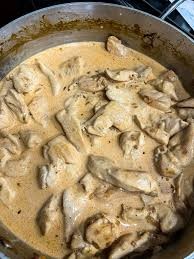
Creamy, savory, and slightly tangy, Brazilian Chicken Stroganoff is a beloved comfort food in Brazil. Unlike the Russian version, this dish features a rich tomato and cream sauce, often served with rice and potato sticks for a delightful crunch.
Ingredients
For the Stroganoff:
1.5 lbs (700g) boneless, skinless chicken breasts or thighs, cubed
2 tbsp olive oil
1 medium onion, finely chopped
2 garlic cloves, minced
1 cup button mushrooms, sliced (optional but traditional)
1 tbsp tomato paste
1 cup ketchup (Brazilian-style if available)
1 cup heavy cream (or table cream—”creme de leite” in Brazil)
1 tbsp Worcestershire sauce
1 tbsp Dijon mustard (optional)
Salt & black pepper to taste
1 pinch paprika or cayenne (optional, for heat)
For Serving:
White rice, cooked
Batata palha (fried potato sticks)
Fresh parsley, chopped (for garnish)
Instructions
Step 1: Cook the Chicken
Heat olive oil in a large skillet or Dutch oven over medium-high heat.
Season the chicken with salt & pepper, then sauté until lightly browned (about 5-6 minutes). Remove and set aside.
Step 2: Sauté Aromatics & Mushrooms
In the same pan, add onion and cook until translucent (3-4 minutes).
Add garlic and mushrooms (if using), cooking until mushrooms soften (about 3 minutes).
Step 3: Make the Sauce
Stir in tomato paste, then add ketchup, Worcestershire sauce, and mustard (if using). Mix well.
Return the chicken to the pan and simmer for 5 minutes to blend flavors.
Step 4: Add Cream & Simmer
Reduce heat to low and slowly stir in heavy cream.
Simmer gently for 5-7 minutes (do not boil, or cream may curdle).
Adjust seasoning with salt, pepper, and paprika if needed.
Step 5: Serve
Garnish with fresh parsley.
Serve hot over white rice, topped with batata palha (potato sticks).
Tips
✔ For a tangier taste: Add a splash of white wine when cooking the onions. ✔ No heavy cream? Substitute with sour cream or coconut milk (for a dairy-free version). ✔ Make ahead: The sauce thickens when refrigerated—reheat gently with a splash of milk.
Enjoy this creamy, comforting Brazilian classic! 🇧🇷🍗
Here’s a delicious and hearty recipe for Gnocchi with White Beans that’s creamy, flavorful, and easy to make!
Creamy Gnocchi with White Beans & Spinach
Prep Time: 5 mins | Cook Time: 15 mins | Total Time: 20 mins Servings: 4
Ingredients:
1 lb (450g) potato gnocchi (store-bought or homemade)
1 (15-oz) can white beans (cannellini or Great Northern), drained & rinsed
2 cups fresh baby spinach (or kale)
3 cloves garlic, minced
1 small shallot or onion, finely diced
½ cup vegetable or chicken broth
½ cup heavy cream (or coconut milk for dairy-free)
¼ cup grated Parmesan cheese (plus extra for serving)
1 tsp Italian seasoning
½ tsp red pepper flakes (optional, for heat)
2 tbsp olive oil
Salt & black pepper to taste
Fresh parsley or basil for garnish
Instructions:
Cook the gnocchi: Bring a pot of salted water to a boil. Add gnocchi and cook until they float (about 2-3 mins). Drain and set aside.
Sauté aromatics: In a large skillet, heat olive oil over medium heat. Add shallot/onion and sauté until soft (2-3 mins). Add garlic, Italian seasoning, and red pepper flakes, cooking for 1 min until fragrant.
Add beans & spinach: Stir in white beans and spinach, cooking until spinach wilts (1-2 mins).
Make the sauce: Pour in broth and heavy cream, stirring well. Simmer for 2-3 mins until slightly thickened.
Combine with gnocchi: Add cooked gnocchi and Parmesan cheese, tossing gently to coat. Season with salt & pepper.
Serve: Garnish with fresh herbs and extra Parmesan. Enjoy warm!
Variations:
Protein boost: Add cooked chicken, sausage, or crispy bacon.
Vegan option: Use coconut milk and nutritional yeast instead of cream & Parmesan.
Extra veggies: Try sun-dried tomatoes, mushrooms, or roasted bell peppers.
This dish is creamy, comforting, and packed with protein and fiber from the beans. Perfect for a quick weeknight meal! Let me know if you’d like any modifications. 😊
15 Healthy Egg Breakfast Recipes to Make This Morning
Here are 15 healthy egg breakfast recipes packed with protein, veggies, and whole-food ingredients to start your day right!
1. Veggie-Packed Scrambled Eggs
Ingredients: Eggs, spinach, bell peppers, mushrooms, avocado, olive oil, salt & pepper. Quick Tip: Cook veggies first, then scramble eggs for extra flavor.
2. Avocado & Egg Toast
Ingredients: Whole-grain toast, mashed avocado, poached or fried eggs, chili flakes, sea salt. Boost: Add microgreens or smoked salmon.
3. Spinach & Feta Omelet
Ingredients: Eggs, fresh spinach, crumbled feta, cherry tomatoes, oregano. Make it fluffy: Whisk eggs with a splash of milk.
4. Greek Yogurt Scramble
Ingredients: Eggs scrambled with Greek yogurt (for creaminess), chives, smoked salmon. Protein hack: ½ cup yogurt per 2 eggs.
The terms leader, manager, and operator describe distinct roles in an organization, each with different focuses and responsibilities. Here’s a breakdown of their key differences:
1. Leader
Focus: Vision, inspiration, and long-term direction.
A bartender is a professional who prepares, serves, and sometimes creates alcoholic and non-alcoholic beverages in bars, restaurants, nightclubs, and other venues where drinks are sold. They play a crucial role in the customer experience by providing quality service, a welcoming atmosphere, and often a lively social interaction.
Key Skills of a Bartender:
1.Mixology Knowledge: Understanding recipes for a wide variety of cocktails and drinks, including classic and contemporary options.
2.Customer Service: Strong communication skills and the ability to engage with customers effectively. Good bartenders are friendly, approachable, and attentive.
3.Physical Stamina: Bartending can be physically demanding, requiring long hours on your feet and the ability to lift heavy items (like kegs and boxes of supplies).
4.Memory: A good bartender should remember drink preferences of regular customers and be able to recall recipes quickly.
5.Attention to Detail: Precision in measuring ingredients, garnishing drinks, and adhering to recipes to ensure consistency in taste and presentation.
6.Creativity: The ability to invent new cocktails and create visually appealing presentations can enhance the customer experience.
7.Multitasking: The capacity to handle multiple orders simultaneously while maintaining a high level of service.
8.Cash Handling and Math Skills: Being comfortable with processing payments, handling cash, and providing correct change.
9.Knowledge of Alcohol Laws: Understanding local, state, and federal regulations regarding the sale of alcohol and responsible serving practices.
10.Cleanliness and Organization: Maintaining a clean bar area and following health and safety regulations.
Common Tools and Equipment Used by Bartenders:
1.Shaker: Typically a Boston shaker or a cobbler shaker, used for mixing drinks that require shaking.
2.Strainer: Used to separate the liquid from ice or other solids when pouring cocktails.
3.Jigger: A measuring tool that allows bartenders to pour precise amounts of alcohol.
4.Muddler: A tool used to mash herbs and fruits in cocktails, such as mint for a mojito.
5.Bar Spoon: A long-handled spoon used for stirring drinks and building cocktails in the glass.
6.Ice Tools: This includes ice buckets, tongs, and often an ice scoop for serving ice.
7.Blender: Used for making frozen cocktails and smoothies.
8.Garnishing Tools: Includes items like zesters, channel knives, and knife sets for cutting fruits and herbs used as garnishes.
9.Glassware: Various types of glasses for serving different drinks like cocktails, wine, beer, and highballs.
10.Speed Rack: A shelf behind the bar where frequently used spirits and mixers are easily accessible.
11.Tap Handles: For dispensing draft beer.
12.Bottle Openers and Corkscrews: Essential tools for opening beer bottles and wine bottles.By combining their skills with the proper tools, bartenders create a variety of beverages and craft an enjoyable experience for their customers.
WHAT IS A BARTENDER MAXIOLOGIST, HIS SKILLS AND TOOLS
A bartending mixologist is a bartender who specializes in the art and science of mixing drinks. While all bartenders serve drinks and may have some knowledge of mixology, a mixologist goes further by not only mastering beverage preparation but also focusing on the creativity, presentation, and intricacies involved in crafting cocktails. This can include experimenting with flavors, creating unique recipes, and understanding the subtleties of spirits and mixers.Key Skills of a Bartending Mixologist:
1.Advanced Mixology Knowledge: In-depth understanding of cocktail recipes, flavor pairings, and the characteristics of different spirits, liqueurs, and mixers.
2.Creativity: Ability to invent new cocktails and innovate traditional recipes to offer unique and memorable drink experiences.
3.Tasting and Sensory Skills: A developed palate to understand how different ingredients interact and contribute to the overall flavor profile of a drink.
4.Presentation Skills: Knowledge of garnishing, glassware selection, and serving techniques that enhance the visual appeal of cocktails.
5.Customer Engagement: Strong interpersonal skills to educate customers about the cocktails, ingredients, and the inspiration behind their creations.
6.Attention to Detail: Precision in measuring, mixing, and plating drinks, ensuring consistency in quality and taste.
7.Knowledge of Spirits and Ingredients: Comprehensive knowledge of different types of spirits, mixers, bitters, and fresh ingredients; understanding how to balance flavors.
8.Multi-tasking: Ability to manage several orders simultaneously while maintaining high standards of service and quality.
9.Problem-solving Skills: Ability to adapt and improvise when ingredients are unavailable or when customers have unique requests.
10.Cocktail Events and Demonstrations: Skills in presenting cocktails at events or tastings, including providing detailed information about the drinks.
Common Tools and Equipment Used by a Bartending Mixologist:
1.Shaker: A Boston shaker or cobbler shaker, essential for mixing cocktails that require shaking.
2.Strainer: A fine mesh or Hawthorne strainer used to separate chilled liquids from ice or solids during the pouring process.
3.Jigger: A precise measuring tool for pouring exact amounts of spirits and mixers.
4.Muddler: A tool for crushing herbs and fruits to release their flavors.
5.Bar Spoon: A long-handled spoon for stirring cocktails or layering drinks.
6.Blender: Handy for making frozen cocktails or smoothies.
7.Ice Tools: Ice buckets, tongs, and ice molds for crafting specialty ice shapes and providing ice for drinks.
8.Garnish Tools: Zesters, peelers, and knife sets for preparing fresh garnishes, such as citrus twists, herbs, and other decorative elements.
9.Flavor Infusing Tools: Such as infusers or vacuum sealers for creating flavored spirits or syrups.
10.Bitters and Syrups: Knowledge of and access to different types of bitters and syrups for enhancing cocktails.
11.Glassware: A variety of glassware specific to different types of cocktails, including coupe glasses, highball glasses, and specialty glasses.
12.Speed Rack: An organized section for easily accessible and commonly used spirits and mixers.
13.Cocktail Book: Reference manuals for cocktail recipes, techniques, and trends in mixology.By mastering the skills and utilizing the tools of a mixologist, bartenders can craft exceptional and innovative beverages that elevate the overall drinking experience for patrons. This profession often involves a passion for craftsmanship, creativity, and a deep appreciation of flavors.
Here are the 10 advantages and disadvantages of being a bartender versus a mixologist:
Advantages of Being a Bartender:
Job Security: Bartenders are in high demand, and jobs are often readily available.
Flexibility: Bartending shifts can be flexible, allowing for part-time or full-time work.
Social Interaction: Bartenders interact with customers, making it a great job for those who enjoy socializing.
Tips and Earnings: Bartenders can earn good tips, increasing their overall earnings.
Opportunities for Advancement: Experienced bartenders can move into management or ownership roles.
Variety: Bartenders work with different customers, drinks, and situations, keeping the job exciting and varied.
Opportunities for Creativity: While not as extensive as mixology, bartenders can still experiment with new drinks and recipes.
Less Pressure: Bartenders may feel less pressure to constantly innovate and create new recipes.
More Job Opportunities: Bartending jobs are more plentiful than mixology positions.
Easier Entry: Bartending often requires less training and experience than mixology.
Disadvantages of Being a Bartender:
Physical Demands: Bartending can be physically demanding, with long hours on your feet.
High Stress: Bartending can be stressful, especially during peak hours or when dealing with difficult customers.
Limited Career Growth: While bartenders can advance to management or ownership, career growth may be limited.
Repetitive Tasks: Bartending involves repetitive tasks, such as pouring drinks and handling cash.
Late Nights: Bartenders often work late nights, which can disrupt personal and family life.
Advantages of Being a Mixologist:
Creative Freedom: Mixologists have the freedom to create new and innovative recipes.
Career Growth: Mixology offers opportunities for career growth, with top mixologists becoming celebrities in their field.
Higher Earnings: Mixologists can earn higher salaries and consulting fees.
Respect and Recognition: Mixologists are respected for their expertise and creativity.
Opportunities for Education: Mixologists can attend workshops, seminars, and competitions to continue learning and growing.
Disadvantages of Being a Mixologist:
High Pressure: Mixologists face pressure to constantly innovate and create new recipes.
Limited Job Opportunities: Mixology jobs are less plentiful than bartending positions.
Higher Expectations: Mixologists are expected to have extensive knowledge and skills.
Continuous Education: Mixologists must continually update their skills and knowledge to stay current.
Unpredictable Income: Mixologists may experience unpredictable income, with fluctuating consulting fees and competition prizes.
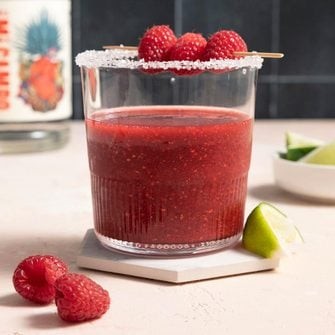
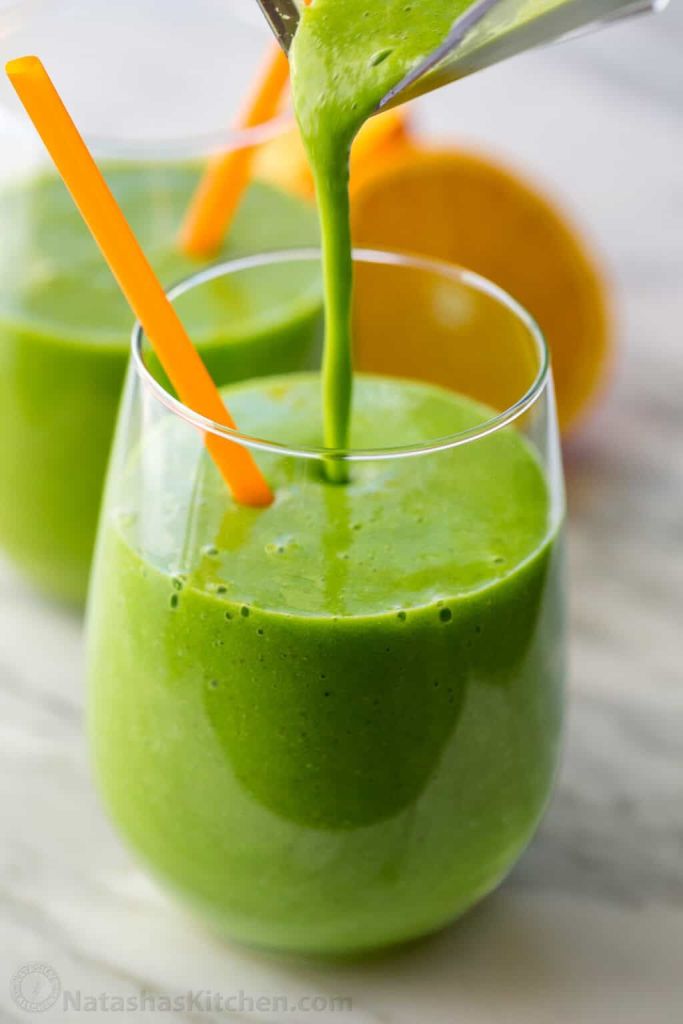
Here are 15 healthy smoothie recipes packed with nutrients, fiber, and protein—perfect for weight management, energy boosts, and balanced blood sugar. These smoothies are diabetic-friendly, low in added sugars, and great for breakfast or snacks!
1. Green Power Smoothie (Low-Sugar)
Ingredients:
1 cup spinach
½ avocado
½ cucumber
1 tbsp chia seeds
1 cup unsweetened almond milk
½ lemon (juiced)
Stevia or monk fruit (optional)
Benefits: High in fiber, healthy fats, and hydration.
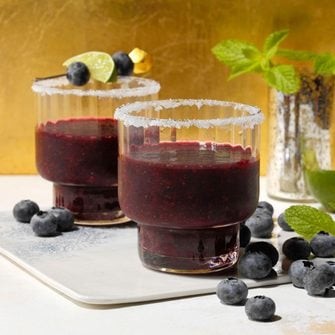
2. Berry Antioxidant Blast (Low-Glycemic)
Ingredients:
½ cup mixed berries (strawberries, blueberries, raspberries)
½ cup Greek yogurt (unsweetened)
1 tbsp flaxseeds
1 cup water or unsweetened coconut milk
½ tsp cinnamon
Benefits: Rich in antioxidants, probiotics, and omega-3s.
3. Chocolate Peanut Butter Protein Smoothie
Ingredients:
1 scoop chocolate protein powder (sugar-free)
1 tbsp natural peanut butter (no sugar added)
½ frozen banana (or avocado for lower sugar)
1 cup unsweetened almond milk
Ice cubes
Benefits: High protein, healthy fats, and satisfies sweet cravings.
4. Tropical Turmeric Immunity Booster
Ingredients:
½ cup frozen mango (or pineapple)
½ banana
½ tsp turmeric
1 tsp ginger
1 cup coconut water
1 tbsp hemp seeds
Benefits: Anti-inflammatory, hydrating, and vitamin C-rich.
5. Oatmeal Cookie Smoothie (Fiber-Rich)
Ingredients:
¼ cup rolled oats
½ tsp cinnamon
1 tbsp almond butter
½ tsp vanilla extract
1 cup unsweetened almond milk
Ice
Benefits: Slow-digesting carbs, great for sustained energy.
6. Creamy Avocado-Kale Smoothie
Ingredients:
½ avocado
1 cup kale
½ green apple (optional for sweetness)
1 tbsp hemp seeds
1 cup coconut milk (unsweetened)
Benefits: Healthy fats, fiber, and iron.
7. Vanilla Chai Protein Smoothie
Ingredients:
1 scoop vanilla protein powder
½ tsp cinnamon
¼ tsp cardamom
1 cup unsweetened almond milk
½ cup ice
Benefits: Warm spices help regulate blood sugar.
8. Pumpkin Spice Smoothie (Low-Carb)
Ingredients:
½ cup pumpkin puree (unsweetened)
½ tsp pumpkin spice
1 tbsp almond butter
1 cup unsweetened almond milk
Stevia to taste
Benefits: High in vitamin A and fiber.
9. Coffee Banana Protein Shake
Ingredients:
½ frozen banana
½ cup cold brew coffee
1 scoop vanilla protein powder
1 cup unsweetened almond milk
Ice
Benefits: Natural caffeine + protein for energy.
10. Blueberry Almond Smoothie
Ingredients:
½ cup blueberries
1 tbsp almond butter
½ cup Greek yogurt
1 cup unsweetened almond milk
1 tsp cinnamon
Benefits: Brain-boosting antioxidants + protein.
11. Matcha Green Tea Energy Smoothie
Ingredients:
1 tsp matcha powder
½ banana
1 cup spinach
1 cup unsweetened almond milk
Ice
Benefits: Antioxidants + gentle caffeine lift.
12. Cinnamon Roll Smoothie
Ingredients:
½ cup cauliflower rice (steamed & frozen)
1 tbsp cashew butter
½ tsp cinnamon
½ tsp vanilla
1 cup unsweetened almond milk
Benefits: Sneaky veggie boost with dessert-like flavor.
13. Strawberry Cheesecake Smoothie
Ingredients:
½ cup strawberries
¼ cup cottage cheese (or Greek yogurt)
½ tsp vanilla
1 cup unsweetened almond milk
Ice
Benefits: High protein, creamy texture.
14. Carrot Cake Smoothie
Ingredients:
½ cup carrots (steamed & cooled)
½ banana
½ tsp cinnamon
1 tbsp walnuts
1 cup unsweetened almond milk
Benefits: Vitamin A + healthy fats.
15. Chocolate Avocado Mousse Smoothie
Ingredients:
½ avocado
1 tbsp cocoa powder
1 cup unsweetened almond milk
Stevia to taste
Ice
Benefits: Rich in healthy fats, no added sugar.
Tips for Diabetic-Friendly Smoothies:
✅ Use low-glycemic fruits (berries, green apple, avocado). ✅ Add protein (Greek yogurt, protein powder, nut butter). ✅ Include fiber (chia seeds, flaxseeds, oats). ✅ Avoid fruit juices & sweetened milks. ✅ Balance carbs with fats/protein to slow sugar absorption.
Would you like any modifications or specific nutritional info for these? Let me know! 😊
A crêpe (pronounced krep or krape) is a thin, delicate pancake originating from France. Made from a simple batter of flour, eggs, milk, and butter, crêpes can be served sweet (crêpes sucrées) or savory (crêpes salées), depending on the filling.
How Are Crêpes Different from Pancakes?
Crêpes Pan cakes
While both crêpes and pancakes are made from similar ingredients, they differ in several ways: Feature Crêpes Pancakes Thickness Very thin Thick & fluffy Leavening No baking powder/soda Uses leavening agents Texture Soft, slightly chewy Light & airy Serving Style Rolled or folded Stacked Fillings Often filled with sweet (Nutella, fruit) or savory (cheese, ham) ingredients Typically topped with syrup, butter, or fruit
A Brief History of Crêpes
Crêpes date back to 13th-century Brittany (France), where they were made using buckwheat flour. They became a staple food due to their affordability and versatility. Today, crêpes are enjoyed worldwide, with variations like:
Galettes (savory buckwheat crêpes from Brittany)
Blini (Russian mini crêpes)
Palatschinken (Austrian/Hungarian crêpes)
How to Make Classic French Crêpes
Ingredients (for ~10 crêpes):
1 cup (125g) all-purpose flour
2 large eggs
1½ cups (360ml) milk
2 tbsp (30g) melted butter + extra for cooking
1 tbsp sugar (for sweet crêpes) or ½ tsp salt (for savory)
1 tsp vanilla extract (optional, for sweet crêpes)
Instructions:
Mix the batter: Whisk flour, eggs, milk, melted butter, and sugar/salt until smooth. Let rest 30 mins (for best texture).
Heat the pan: Use a non-stick skillet or crêpe pan over medium heat. Lightly butter it.
Cook: Pour ~¼ cup batter, swirl to coat the pan. Cook 1-2 mins until edges lift, then flip and cook 30 secs more.
Serve: Fill with Nutella, jam, cheese, ham, or fresh fruit. Fold or roll and enjoy!
Tips for Perfect Crêpes:
Batter consistency should be like heavy cream.
Let the batter rest for a smoother texture.
Use a thin spatula for easy flipping.
Would you like a specific filling recipe?
How to Make Crêpes
With a simple batter and a few basic techniques, you can create thin, delicate crêpes that rival those served in a French café right from your home kitchen.
Non-stick crêpe pan or seasoned cast iron pan (or a crepe maker)
T-spreader (or spatula) for even batter distribution
Add the eggs and just enough of the milk to make a soft paste with the flour, mix until lump free.
Slowly add the rest of the milk and oil. The batter should be the consistency of heavy cream. If it is too thick, thin batter with a little water. If it’s lumpy, strain it.
Let the batter rest for at least 2 hours or overnight.
Brush a 6-8” non stick pan lightly with oil or butter and heat over medium until hot.
Remove from the heat and pour in 3-4 tbsp. of batter and quickly swirl the pan to cover the bottom with a thin layer of batter.
Return to the heat for about 1-1.5 minutes until the bottom is lightly browned.
Flip crepe and brown on the other side.
Crêpes too thick? Use minimal batter to achieve thin crêpes. Pour a small amount into the pan, swirling quickly for an even spread. If the batter is too thick, add a little milk to thin it out.
Crêpes tearing easily? Try letting the batter rest longer to improve the elasticity. Also ensure the pan is properly greased to prevent sticking.
Crêpes have an uneven texture? To achieve a smoother consistency, try whisking the batter thoroughly to remove any lumps. You can also use a blender to achieve an even mixture.
With practice and keeping these tips in mind, you can turn out consistent crêpes in no time!
Types and Variations of Crêpes
Whether you’re savoring a classic French galette or looking for a more modern twist, there’s a crêpe for every occasion and taste.
Sweet Crêpes
Sweet crêpes, made with white wheat flour and a touch of sugar, are light, delicate, and perfect for dessert or breakfast.
Classic Fillings:
Lemon and Sugar: A traditional choice, offering a balance of tart and sweet flavors.
Nutella and Bananas: A rich, indulgent favorite that’s loved worldwide.
Fresh Fruit and Cream: Strawberries, raspberries, or blueberries with whipped cream or mascarpone.
Modern Twists:
Salted Caramel and Pecans: A decadent pairing of sweet and salty with a satisfying crunch.
Coconut Cream and Mango: A tropical twist with creamy coconut and juicy mango slices.
Lavender Lemon Curd: Add a floral and tangy element for a sophisticated dessert option.
Savory Crêpes (Galettes)
Savory crêpes, traditionally made with buckwheat flour, are earthy, hearty, and naturally gluten-free. They are typically served as a main dish as opposed to a dessert.
Classic Fillings:
Ham, Cheese, and Egg: The iconic Breton combination, often called La Complète.
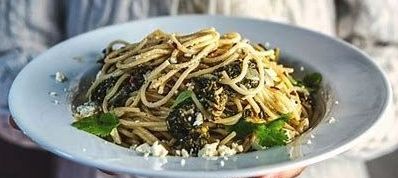
Spinach and Goat Cheese: A vegetarian favorite with a creamy, tangy filling.
Smoked Salmon and Crème Fraîche: A luxurious option with a touch of dill.
Modern Twists:
Avocado, Bacon, and Tomato: A fresh take on the BLT, complete with creamy avocado.
Pulled Pork and Coleslaw: A fusion of classic barbecue and French cuisine.
Buffalo Chicken and Blue Cheese: A spicy and bold option for fans of zesty combinations.
Can I make vegan crêpes?
Yes, you can make vegan crêpes! Replace eggs with a flaxseed or chia seed egg (1 tablespoon seeds + 2.5 tablespoons water per egg) and use plant-based milk, such as almond or oat milk. Coconut oil or vegan butter works well for greasing the pan.
A traditional Spanish omelette recipe, also known as Tortilla Española! Here’s a step-by-step guide to making this delicious dish:
Ingredients:
4 large eggs
1 large onion, thinly sliced
2-3 large potatoes, peeled and thinly sliced
2 cloves garlic, minced
1 tablespoon olive oil
Salt and pepper, to taste
Optional: 1/4 cup diced ham or chorizo
Instructions: Step 1: Prepare the Potatoes and Onion (15 minutes)
Heat oil in a pan: Heat the olive oil in a large skillet over medium heat.
Add potatoes and onion: Add the sliced potatoes and onion to the pan. Cook, stirring occasionally, for 15 minutes or until they’re softened and lightly browned.
Step 2: Add Garlic and Cook (2 minutes)
Add garlic: Add the minced garlic to the pan and cook for 1-2 minutes, stirring constantly, until fragrant.
Step 3: Beat the Eggs (2 minutes)
Beat eggs: In a large bowl, beat the eggs with a fork until they’re lightly beaten. Season with salt and pepper to taste.
Step 4: Combine Eggs and Potato Mixture (2 minutes)
Combine eggs and potato mixture: Add the cooked potato and onion mixture to the bowl with the beaten eggs. Stir gently to combine.
Step 5: Cook the Tortilla (10-12 minutes)
Heat a non-stick pan: Heat a large non-stick skillet over medium heat.
Add egg mixture: Pour the egg and potato mixture into the pan.
Cook until set: Cook, stirring occasionally, for 10-12 minutes or until the eggs are almost set and the tortilla is lightly browned on the bottom.
Step 6: Flip and Cook the Other Side (2-3 minutes)
Flip the tortilla: Use a plate or a spatula to carefully flip the tortilla over.
Cook the other side: Cook for an additional 2-3 minutes or until the other side is lightly browned.
Step 7: Serve and Enjoy!
Slice and serve: Slice the tortilla into wedges and serve hot or cold.
Optional: Add diced ham or chorizo: If using, sprinkle diced ham or chorizo on top of the tortilla before serving.
Tips and Variations:
Use high-quality potatoes that are high in starch, like Russet or Idaho potatoes, for a lighter and fluffier tortilla.
Add diced bell peppers or mushrooms to the potato and onion mixture for added flavor and nutrients.
Use leftover tortilla as a filling for sandwiches or as a topping for salads.
Enjoy your delicious traditional Spanish omelette!
WHAT IS THE DIFFERENCE BETWEEN SPANISH OMELETTE AND ENGLISH OMELETTE?
Spanish omelette (Tortilla Española) and English omelette are two distinct variations of omelettes, each with its own unique characteristics.
Spanish Omelette (Tortilla Española)
Thicker and denser: Spanish omelette is made with potatoes, onions, and sometimes ham or chorizo, which are slowly cooked in olive oil before being mixed with beaten eggs.
More filling-oriented: The filling ingredients are cooked until they’re soft and caramelized, which gives the omelette a rich, savory flavor.
Often served as a tapas: Spanish omelette is a staple in Spanish cuisine and is often served as a tapas dish, cut into small wedges.
English Omelette
Thinner and fluffier: English omelette is made with beaten eggs, salt, and pepper, and is cooked in a pan with butter or oil until the eggs are set.
More egg-oriented: The eggs are the main focus of the English omelette, and fillings like cheese, vegetables, or ham are added sparingly.
Often served as a breakfast dish: English omelette is a popular breakfast dish in the UK and is often served with toast, hash browns, or other breakfast items.
In summary, Spanish omelette is thicker, denser, and more filling-oriented, while English omelette is thinner, fluffier, and more egg-oriented.
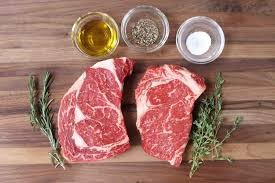
Welcome to 10 Delicious Beef Recipes: A Step-by-Step Guide! Whether you’re a seasoned chef or a beginner in the kitchen, this eBook is designed to help you create mouthwatering beef dishes that will impress your family and friends. From classic comfort food to exotic flavors, these recipes are easy to follow and packed with flavor. Let’s get cooking!
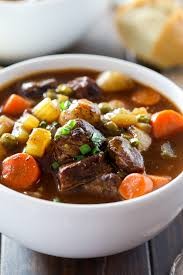
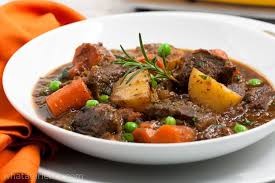
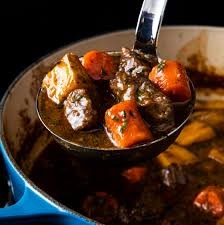
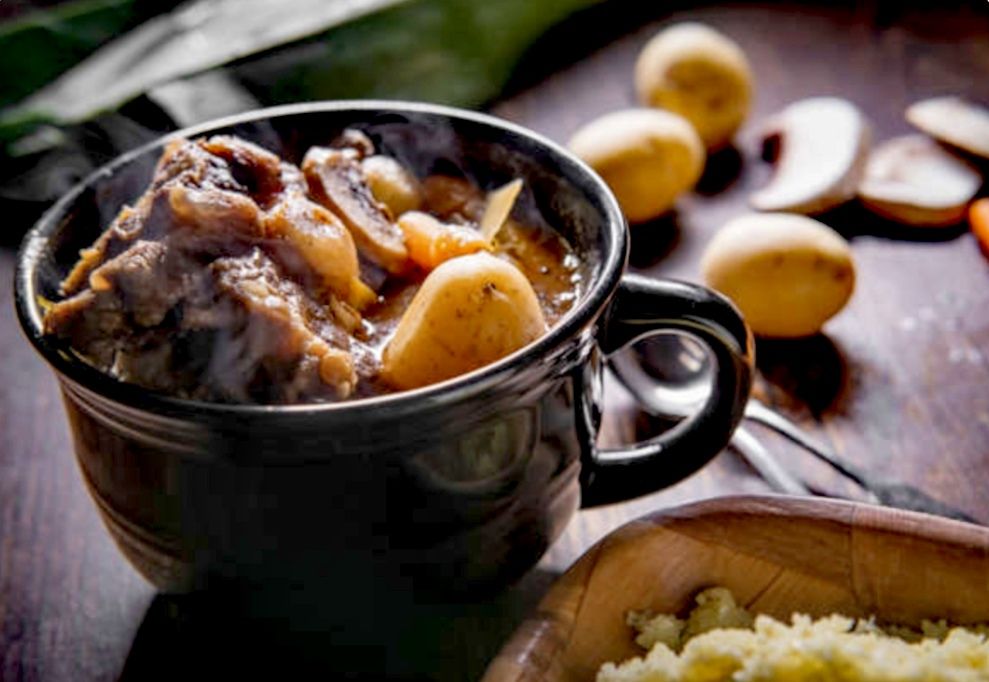
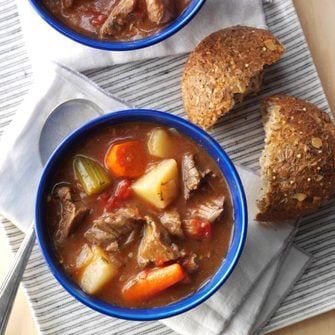
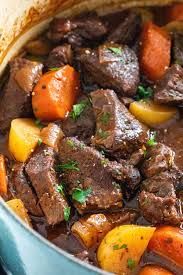
Recipe 1: Classic Beef Stew
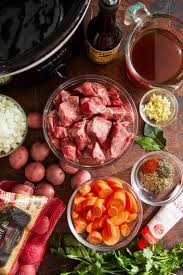
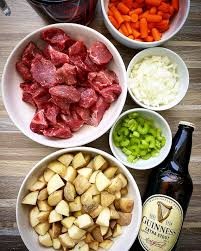
Ingredients:
2 lbs beef chuck, cut into cubes
2 tbsp olive oil
4 cups beef broth
3 carrots, sliced
3 potatoes, diced
1 onion, chopped
3 garlic cloves, minced
2 tbsp tomato paste
1 tsp thyme
1 tsp rosemary
Salt and pepper to taste
Instructions:
Heat olive oil in a large pot over medium heat. Brown the beef cubes on all sides, then remove and set aside.
In the same pot, sauté onions and garlic until fragrant.
Add tomato paste, thyme, rosemary, salt, and pepper. Stir to combine.
Return the beef to the pot and pour in the beef broth. Bring to a boil, then reduce heat to low and simmer for 1.5 hours.
Add carrots and potatoes. Cook for another 30 minutes or until vegetables are tender.
Serve hot with crusty bread.
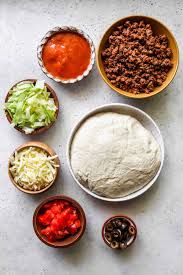
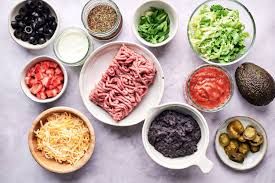
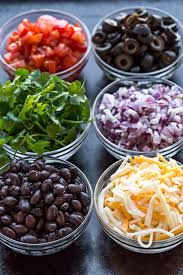
Recipe 2: Beef Tacos
Ingredients:
1 lb ground beef
1 packet taco seasoning
8 small tortillas
1 cup shredded lettuce
1 cup diced tomatoes
1/2 cup shredded cheese
1/4 cup sour cream
1/4 cup salsa
Instructions:
Cook ground beef in a skillet over medium heat until browned. Drain excess fat.
Add taco seasoning and water (as per packet instructions). Simmer for 5 minutes.
Warm tortillas in a dry skillet or microwave.
Fill each tortilla with beef, lettuce, tomatoes, cheese, sour cream, and salsa.
Serve immediately and enjoy!
Recipe 3: Beef and Broccoli Stir-Fry
Ingredients:
1 lb flank steak, thinly sliced
2 cups broccoli florets
3 tbsp soy sauce
2 tbsp oyster sauce
1 tbsp cornstarch
1 tbsp sesame oil
2 garlic cloves, minced
1 tsp ginger, minced
Cooked rice, for serving
Instructions:
In a bowl, mix soy sauce, oyster sauce, and cornstarch. Add beef slices and marinate for 15 minutes.
Heat sesame oil in a wok or skillet. Stir-fry garlic and ginger until fragrant.
Add beef and cook until browned. Remove and set aside.
Stir-fry broccoli for 3-4 minutes until tender-crisp.
Return beef to the wok and toss to combine. Serve over rice.
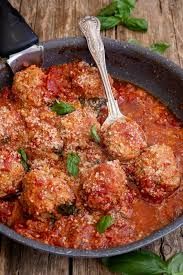
Recipe 4: Beef Meatballs in Marinara Sauce
Ingredients:
1 lb ground beef
1/2 cup breadcrumbs
1/4 cup grated Parmesan
1 egg
2 garlic cloves, minced
1 tsp Italian seasoning
2 cups marinara sauce
Salt and pepper to taste
Instructions:
Preheat oven to 375°F (190°C).
In a bowl, combine beef, breadcrumbs, Parmesan, egg, garlic, Italian seasoning, salt, and pepper. Mix well.
Shape into 1-inch meatballs and place on a baking sheet.
Bake for 20 minutes or until cooked through.
Heat marinara sauce in a skillet. Add meatballs and simmer for 10 minutes.
Serve with pasta or crusty bread.
Recipe 5: Beef Burgers
Ingredients:
1 lb ground beef
1 tsp garlic powder
1 tsp onion powder
Salt and pepper to taste
4 burger buns
Lettuce, tomato, cheese, and condiments of choice
Instructions:
Mix beef, garlic powder, onion powder, salt, and pepper in a bowl.
Form into 4 patties.
Grill or pan-fry patties for 4-5 minutes per side or until desired doneness.
Toast burger buns and assemble with patties, lettuce, tomato, cheese, and condiments.
Serve with fries or a side salad.
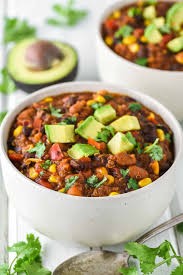
Recipe 6: Beef Chili
Ingredients:
1 lb ground beef
1 onion, chopped
2 garlic cloves, minced
1 bell pepper, diced
1 can kidney beans, drained
1 can diced tomatoes
2 tbsp chili powder
1 tsp cumin
Salt and pepper to taste
Instructions:
Brown ground beef in a large pot. Drain excess fat.
Add onion, garlic, and bell pepper. Cook until softened.
Stir in beans, tomatoes, chili powder, cumin, salt, and pepper.
Simmer for 30 minutes, stirring occasionally.
Serve with shredded cheese and sour cream.
Recipe 7: Beef Stroganoff
Ingredients:
1 lb sirloin steak, thinly sliced
2 tbsp butter
1 onion, sliced
8 oz mushrooms, sliced
1 cup beef broth
1 cup sour cream
1 tbsp Dijon mustard
Cooked egg noodles, for serving
Instructions:
Melt butter in a skillet. Cook steak until browned. Remove and set aside.
Sauté onion and mushrooms until tender.
Add beef broth and simmer for 5 minutes.
Stir in sour cream and Dijon mustard. Return beef to the skillet and heat through.
Serve over egg noodles.
Recipe 8: Beef Kebabs
Ingredients:
1 lb beef sirloin, cut into cubes
1 bell pepper, cut into chunks
1 red onion, cut into chunks
1/4 cup olive oil
2 tbsp lemon juice
2 garlic cloves, minced
1 tsp paprika
Salt and pepper to taste
Instructions:
In a bowl, mix olive oil, lemon juice, garlic, paprika, salt, and pepper. Add beef and marinate for 1 hour.
Thread beef, bell pepper, and onion onto skewers.
Grill kebabs for 8-10 minutes, turning occasionally.
Serve with rice or a fresh salad.
Recipe 9: Beef Pot Pie
Ingredients:
1 lb ground beef
1 cup frozen mixed vegetables
1 cup beef gravy
1 sheet puff pastry
1 egg, beaten
Instructions:
Preheat oven to 400°F (200°C).
Cook ground beef in a skillet until browned. Drain fat.
Stir in vegetables and gravy. Simmer for 5 minutes.
Transfer mixture to a pie dish. Cover with puff pastry and brush with beaten egg.
Bake for 20-25 minutes or until golden brown.
Recipe 10: Beef Birria Tacos
Ingredients:
2 lbs beef chuck roast
4 dried guajillo chilies
2 cups beef broth
1 tsp cumin
1 tsp oregano
1 onion, chopped
4 garlic cloves
Corn tortillas
Lime wedges and cilantro for garnish
Instructions:
Boil guajillo chilies in water for 10 minutes. Blend with broth, cumin, oregano, onion, and garlic to make a sauce.
Sear beef in a pot, then pour sauce over it. Simmer for 3 hours until tender.
Shred beef and dip tortillas in the sauce. Fill with beef and pan-fry until crispy.
Serve with lime wedges and cilantro.
Enjoy these delicious beef recipes and happy cooking! Don’t forget to share your creations with friends and family. Bon appétit!
1,Gnocchi with Spinach and Chicken Sausage, 2, Spanish Cheesy Quisadilla And 3, Chicken Sausage Stuffed Acon Squash Recipes Step By Step Guide
By: chef ssentongo Geoffrey
From : Mr Easy recipes
Finding healthy recipes the family will eat is a challenge.
Dinner is easy when I can use ingredients typically found in my fridge and pantry.
Here’s a step-by-step guide for the three recipes you mentioned:
1. Gnocchi with Spinach and Chicken Sausage
Ingredients:
1 package (16 oz) gnocchi
2 chicken sausages (sliced)
2 cups fresh spinach
2 cloves garlic (minced)
1/2 cup heavy cream
1/4 cup grated Parmesan cheese
1 tbsp olive oil
Salt and pepper to taste
Red pepper flakes (optional)
Instructions:
Cook Gnocchi: Boil gnocchi according to package instructions. Drain and set aside.
Cook Sausage: Heat olive oil in a large skillet over medium heat. Add sliced chicken sausage and cook until browned (about 5-7 minutes). Remove and set aside.
Sauté Spinach: In the same skillet, add minced garlic and sauté for 1 minute. Add spinach and cook until wilted.
Combine: Return the sausage to the skillet. Add cooked gnocchi, heavy cream, and Parmesan cheese. Stir to combine and heat through.
Season: Add salt, pepper, and red pepper flakes (if using). Serve warm.
2. Spanish Cheesy Quesadilla
Ingredients:
4 large flour tortillas
1 cup shredded cheese (cheddar, Monterey Jack, or a blend)
1/2 cup cooked chorizo or chicken sausage (optional)
1/4 cup diced bell peppers
1/4 cup diced onions
1/4 cup salsa
1 tbsp olive oil or butter
Instructions:
Prep Filling: In a bowl, mix shredded cheese, cooked chorizo or sausage, bell peppers, and onions.
Assemble Quesadilla: Place a tortilla on a flat surface. Sprinkle half of it with the cheese mixture. Fold the tortilla in half.
Cook: Heat olive oil or butter in a skillet over medium heat. Place the quesadilla in the skillet and cook for 2-3 minutes on each side, until golden brown and cheese is melted.
Serve: Cut into wedges and serve with salsa on the side.
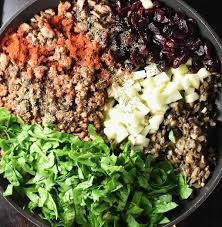
3. Chicken Sausage Stuffed Acorn Squash
Ingredients:
2 acorn squash (halved and seeded)
2 chicken sausages (casings removed)
1/2 cup cooked quinoa or rice
1/4 cup diced onions
1/4 cup diced celery
1/4 cup dried cranberries
1/4 cup chopped walnuts
1 tbsp olive oil
1 tsp dried thyme
Salt and pepper to taste
Instructions:
Roast Squash: Preheat oven to 400°F (200°C). Brush squash halves with olive oil, season with salt and pepper, and place cut-side down on a baking sheet. Roast for 25-30 minutes until tender.
Cook Filling: In a skillet, heat olive oil over medium heat. Add onions, celery, and chicken sausage. Cook until sausage is browned and vegetables are soft. Stir in cooked quinoa, cranberries, walnuts, thyme, salt, and pepper.
Stuff Squash: Flip the roasted squash halves cut-side up. Fill each half with the sausage mixture.
Bake Again: Return the stuffed squash to the oven and bake for another 10-15 minutes until heated through. Serve warm.
Enjoy your delicious meals! Let me know if you need further assistance. 😊
5 DAYS HEALTHY FOOD MENU RECIPES STEP BY STEP GUIDE
Here’s a 5-day healthy food menu with step-by-step recipes for breakfast, lunch, dinner, and snacks. This plan focuses on balanced meals with whole foods, lean proteins, healthy fats, and plenty of fruits and vegetables.
Day 1
Breakfast: Greek Yogurt Parfait
Ingredients: 1 cup Greek yogurt, 1/2 cup granola, 1/2 cup mixed berries, 1 tbsp honey.
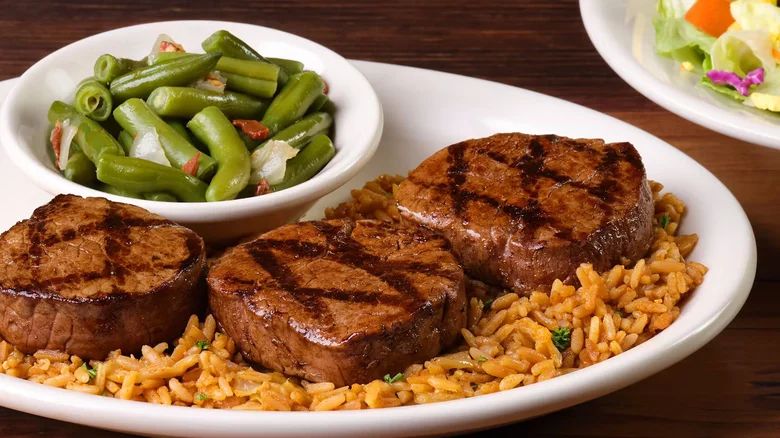
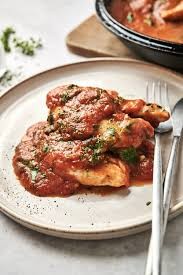
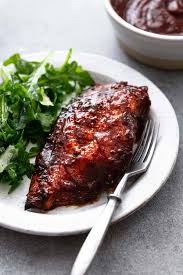
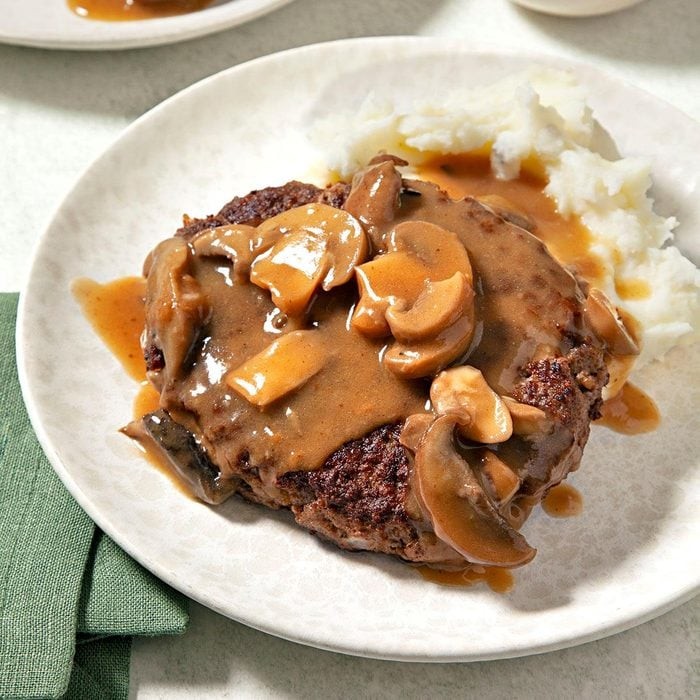
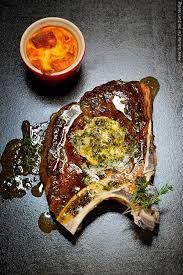
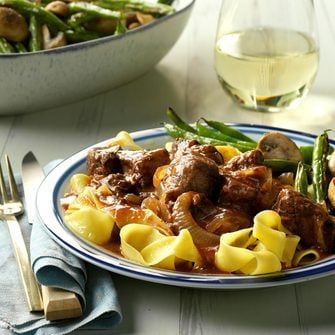
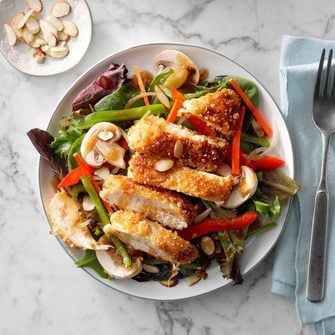
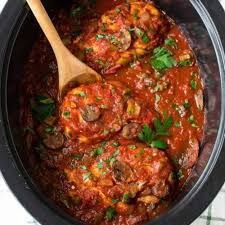
Salisbury steak makes an easy, cozy weeknight dinner. One whiff of the rich ground beef and savory mushroom sauce will bring the whole family to the table!
Here’s a classic recipe for Salisbury Steak with Onion Mushroom Sauce. It’s hearty, flavorful, and perfect for a comforting meal!
Salisbury Steak with Onion Mushroom Sauce
Ingredients:
For the Salisbury Steak:
1 lb (450g) ground beef (80/20 blend works well)
1/4 cup breadcrumbs
1 large egg
1/4 cup finely chopped onion
1 teaspoon Worcestershire sauce
1 teaspoon garlic powder
1/2 teaspoon salt
1/4 teaspoon black pepper
1 tablespoon olive oil (for cooking)
For the Onion Mushroom Sauce:
1 tablespoon butter
1 medium onion, thinly sliced
8 oz (225g) mushrooms, sliced
2 cloves garlic, minced
2 tablespoons all-purpose flour
1 1/2 cups beef broth
1 tablespoon Worcestershire sauce
1 teaspoon Dijon mustard (optional)
1/2 teaspoon salt (or to taste)
1/4 teaspoon black pepper
1/4 cup heavy cream or sour cream (optional, for richness)
Instructions:
1. Make the Salisbury Steak:
In a large bowl, combine ground beef, breadcrumbs, egg, chopped onion, Worcestershire sauce, garlic powder, salt, and pepper. Mix gently until just combined (avoid overmixing).
Shape the mixture into 4 oval-shaped patties, about 1/2-inch thick.
Heat olive oil in a large skillet over medium heat. Cook the patties for 4-5 minutes per side, or until browned and cooked through. Remove the patties from the skillet and set aside.
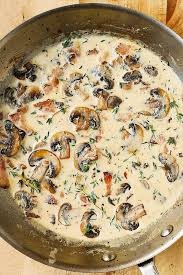
2. Make the Onion Mushroom Sauce:
In the same skillet, melt the butter over medium heat. Add the sliced onions and mushrooms, and cook for 5-7 minutes until softened and caramelized.
Add the minced garlic and cook for 1 minute until fragrant.
Sprinkle the flour over the onions and mushrooms, stirring to coat. Cook for 1-2 minutes to remove the raw flour taste.
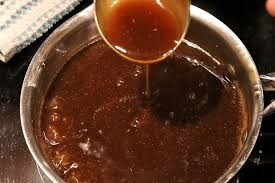
Gradually pour in the beef broth, stirring constantly to avoid lumps. Add Worcestershire sauce, Dijon mustard (if using), salt, and pepper. Bring to a simmer and cook for 3-5 minutes until the sauce thickens.
Stir in the heavy cream or sour cream (if using) for added richness. Taste and adjust seasoning if needed.
3. Combine and Serve:
Return the Salisbury steaks to the skillet, nestling them into the sauce. Simmer for 2-3 minutes to heat through.
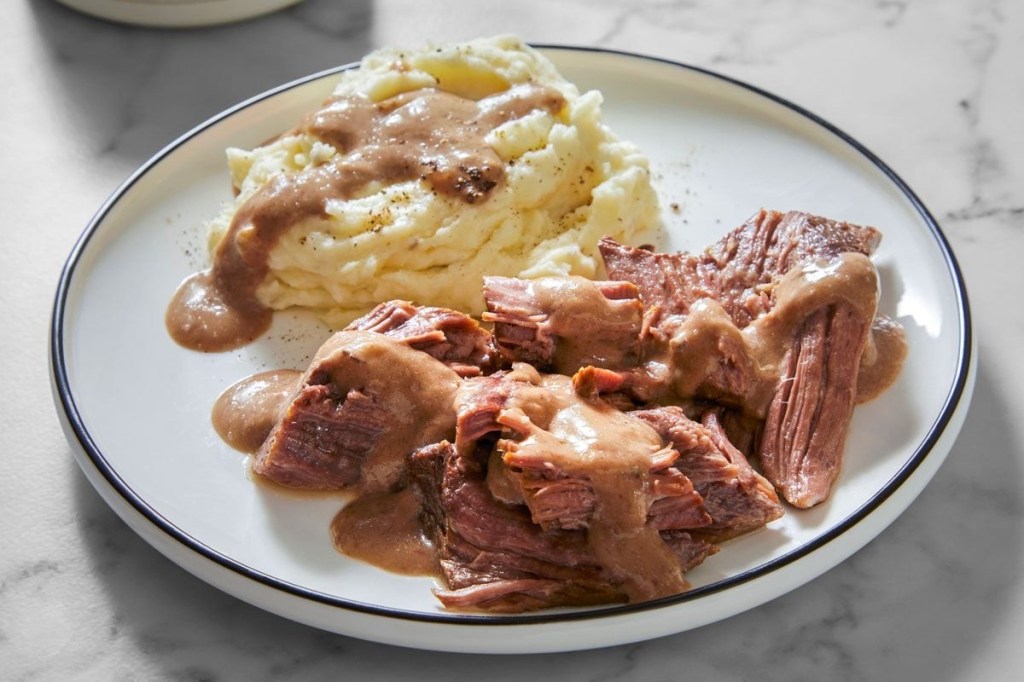
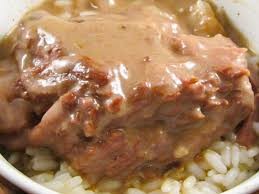
Serve hot, garnished with fresh parsley if desired. Pair with mashed potatoes, rice, or steamed vegetables.
Enjoy your homemade Salisbury Steak with Onion Mushroom Sauce! Let me know if you’d like any variations or additional tips. 😊
What is Salisbury steak?
Despite the name, Salisbury steak isn’t actually steak. It’s a well-seasoned ground beef patty sauteed and served in a rich onion-mushroom sauce. The patty itself is similar to a hamburger, and, in fact, some people do call this dish “hamburger steak.” While we think of it as comfort food today, it was actually invented as a health food back in the 1800s, when Dr. Salisbury proposed a meat-heavy diet for good health.
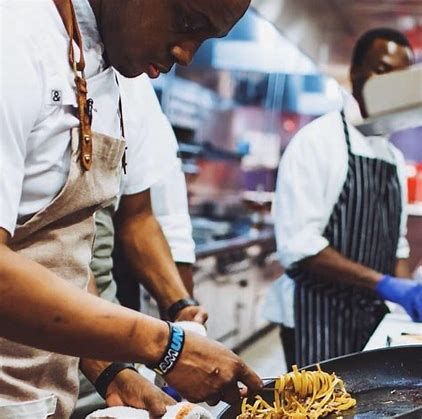
Yes, chefs can find balance in the demanding culinary industry, but it requires intentional effort, self-awareness, and prioritization. Here are some strategies that can help chefs achieve a healthier work-life balance:
1. Time Management
Prioritize Tasks: Focus on high-impact tasks and delegate when possible.
Set Boundaries: Define work hours and stick to them as much as possible.
Plan Ahead: Use schedules and prep lists to streamline kitchen operations.
2. Self-Care
Physical Health: Maintain a healthy diet, exercise regularly, and get enough sleep.
Mental Health: Practice mindfulness, meditation, or other stress-relief techniques.
Take Breaks: Step away from the kitchen during downtime to recharge.
3. Delegation and Teamwork
Empower Staff: Train and trust your team to handle responsibilities.
Collaborate: Share the workload to avoid burnout.
4. Work-Life Integration
Pursue Hobbies: Engage in activities outside of cooking to unwind.
Spend Time with Loved Ones: Make time for family and friends to maintain personal relationships.
Set Realistic Goals: Balance ambition with personal well-being.
5. Mindset Shift
Embrace Imperfection: Accept that not every service will be flawless.
Celebrate Small Wins: Acknowledge achievements, no matter how small.
Focus on Passion: Reconnect with the love of cooking to stay motivated.
6. Industry Changes
Advocate for Better Conditions: Push for fair hours, benefits, and support in the industry.
Seek Supportive Workplaces: Choose employers who value work-life balance.
7. Continuous Learning
Improve Efficiency: Learn new techniques or tools to save time and energy.
Stay Inspired: Attend workshops or explore new cuisines to keep creativity alive.
While the culinary industry is inherently demanding, chefs can find balance by prioritizing their well-being, building strong teams, and fostering a supportive work environment. It’s a journey, but with the right mindset and strategies, it’s achievable.
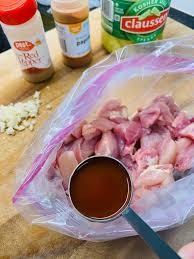
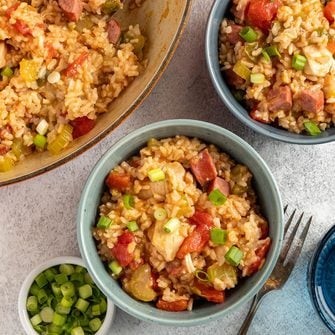
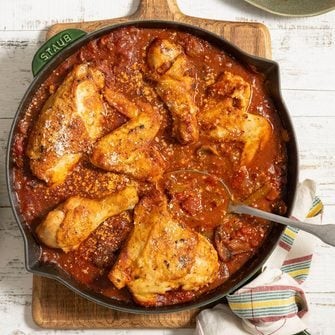
How To Make Chicken Jambaraya and Chicken Cacciatore Recipes Step by Step guide
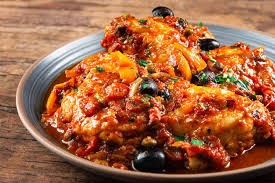
Here’s a step-by-step guide to making Chicken Jambalaya and Chicken Cacciatore. Both dishes are flavorful and hearty, but they come from different culinary traditions—Jambalaya is a Creole/Cajun dish, while Cacciatore is an Italian classic.
Chicken Jambalaya Recipe
Ingredients:
2 boneless, skinless chicken breasts, cut into bite-sized pieces
1 lb (450g) smoked sausage, sliced
1 large onion, diced
1 green bell pepper, diced
2 celery stalks, diced
3 garlic cloves, minced
1 can (14.5 oz) diced tomatoes
2 cups chicken broth
1 cup long-grain white rice
1 tbsp Cajun seasoning (adjust to taste)
1 tsp paprika
1 tsp dried thyme
1 tsp dried oregano
2 tbsp olive oil or vegetable oil
Salt and pepper to taste
Optional: 1/2 lb shrimp (peeled and deveined) for added flavor
Instructions:
Prepare the Ingredients: Dice the chicken, sausage, onion, bell pepper, and celery. Mince the garlic.
Cook the Meat: Heat oil in a large pot or Dutch oven over medium heat. Add the chicken and sausage, and cook until browned (about 5-7 minutes). Remove and set aside.
Sauté the Vegetables: In the same pot, add the onion, bell pepper, and celery. Cook until softened (about 5 minutes). Add the garlic and cook for another minute.
Add Seasonings and Rice: Stir in the Cajun seasoning, paprika, thyme, oregano, salt, and pepper. Add the rice and stir to coat it in the spices.
Combine Ingredients: Return the chicken and sausage to the pot. Add the diced tomatoes and chicken broth. Stir well.
Simmer: Bring the mixture to a boil, then reduce the heat to low. Cover and simmer for 20-25 minutes, or until the rice is cooked and the liquid is absorbed.
Optional Shrimp: If using shrimp, add them in the last 5 minutes of cooking.
Serve: Taste and adjust seasoning if needed. Serve hot, garnished with chopped parsley or green onions if desired.
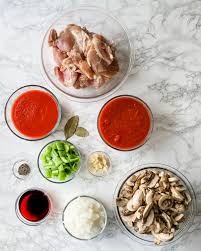
Chicken Cacciatore Recipe
Ingredients:
4 chicken thighs (bone-in, skin-on) or 2 chicken breasts, cut in half
1 large onion, sliced
1 red bell pepper, sliced
1 green bell pepper, sliced
3 garlic cloves, minced
1 cup mushrooms, sliced
1 can (14.5 oz) diced tomatoes
1/2 cup chicken broth
1/2 cup dry white wine (optional, substitute with broth)
2 tbsp tomato paste
1 tsp dried oregano
1 tsp dried basil
1/2 tsp red pepper flakes (optional)
2 tbsp olive oil
Salt and pepper to taste
Fresh parsley or basil for garnish
Instructions:
Prepare the Chicken: Season the chicken thighs or breasts with salt and pepper.
Brown the Chicken: Heat olive oil in a large skillet or Dutch oven over medium-high heat. Add the chicken, skin-side down, and cook until golden brown (about 5 minutes per side). Remove and set aside.
Sauté the Vegetables: In the same skillet, add the onion, bell peppers, and mushrooms. Cook until softened (about 5 minutes). Add the garlic and cook for another minute.
Deglaze the Pan: If using wine, pour it into the skillet and scrape up any browned bits from the bottom. Let it simmer for 2-3 minutes.
Add Tomatoes and Seasonings: Stir in the diced tomatoes, tomato paste, chicken broth, oregano, basil, and red pepper flakes. Mix well.
Simmer the Chicken: Return the chicken to the skillet, nestling it into the sauce. Cover and simmer on low heat for 25-30 minutes (or until the chicken is cooked through and tender).
Garnish and Serve: Sprinkle with fresh parsley or basil. Serve hot over pasta, rice, or with crusty bread.
Enjoy your Chicken Jambalaya and Chicken Cacciatore! Both dishes are perfect for family dinners or entertaining guests. Let me know if you need further assistance!
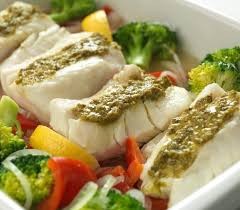
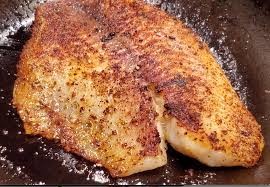
In cooking, the term broil refers to a method of cooking food using high, direct heat, typically from above. This technique is commonly used in ovens that have a broil setting. When you broil food, it is exposed to intense heat, which quickly cooks the surface, creating a browned or crispy exterior while keeping the inside moist.
Broiling is similar to grilling, but instead of the heat coming from below (as with a grill), the heat comes from above. It is often used for cooking thinner cuts of meat, fish, or vegetables, and is ideal for achieving a caramelized or charred finish.
Key tips for broiling:
Preheat the broiler before placing food in the oven.
Use a broiler pan or a baking sheet lined with foil to catch drippings.
Keep a close eye on the food, as broiling can cause it to cook (or burn) very quickly.
Adjust the oven rack to the recommended distance from the broiler element (usually 3-6 inches, depending on the recipe).
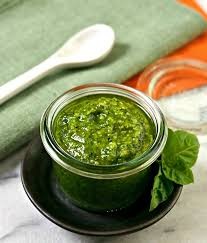
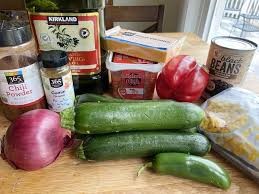
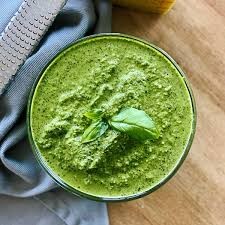
Grilled Vegetable Pesto Sandwiches and Pinto Beans Zucchini Cheese Boats Recipes Step by Step guide
Here’s a step-by-step guide to preparing Grilled Vegetable Pesto Sandwiches and Pinto Beans Zucchini Cheese Boats. These recipes are healthy, flavorful, and perfect for a satisfying meal.
Grilled Vegetable Pesto Sandwiches
Ingredients:
1 red bell pepper, sliced
1 zucchini, sliced lengthwise
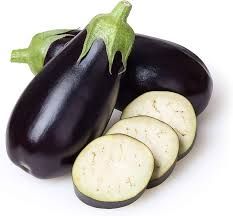
1 eggplant, sliced
1 red onion, sliced
4 ciabatta or whole-grain rolls
4 tbsp pesto (store-bought or homemade)
4 slices mozzarella or provolone cheese
Olive oil
Salt and pepper to taste
Balsamic glaze (optional)
Instructions:
Prepare the Vegetables:
Slice the bell pepper, zucchini, eggplant, and red onion into even pieces.
Brush the slices lightly with olive oil and season with salt and pepper.
Grill the Vegetables:
Preheat a grill or grill pan over medium-high heat.
Grill the vegetables for 3-4 minutes per side until tender and slightly charred. Remove and set aside.
Assemble the Sandwiches:
Slice the ciabatta rolls in half and lightly toast them on the grill or in a toaster.
Spread 1 tbsp of pesto on the bottom half of each roll.
Layer the grilled vegetables on top of the pesto.
Add a slice of cheese on top of the vegetables.
Drizzle with balsamic glaze if desired, then top with the other half of the roll.
Serve:
Serve immediately while warm. Enjoy!
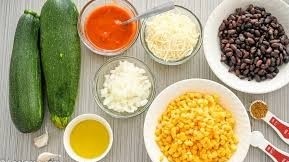
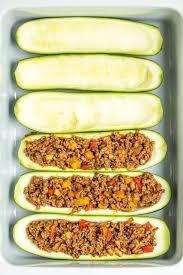
Pinto Beans Zucchini Cheese Boats
Ingredients:
4 medium zucchinis
1 cup cooked pinto beans (canned or homemade)
1/2 cup diced tomatoes
1/4 cup diced onion
1/2 cup shredded cheese (cheddar, mozzarella, or pepper jack)
1 tsp cumin powder
1 tsp chili powder
1 tbsp olive oil
Salt and pepper to taste
Fresh cilantro or parsley for garnish (optional)
Instructions:
Prepare the Zucchinis:
Preheat the oven to 375°F (190°C).
Cut the zucchinis in half lengthwise and scoop out the center flesh, leaving a 1/4-inch thick shell. Reserve the scooped flesh.
Prepare the Filling:
Dice the reserved zucchini flesh.
Heat olive oil in a pan over medium heat. Add diced onion and cook until translucent.
Add the diced zucchini flesh, pinto beans, diced tomatoes, cumin, chili powder, salt, and pepper. Cook for 5-7 minutes until the mixture is well combined and heated through.
Fill the Zucchini Boats:
Place the zucchini halves on a baking sheet lined with parchment paper.
Spoon the pinto bean mixture evenly into each zucchini boat.
Top with shredded cheese.
Bake:
Bake in the preheated oven for 20-25 minutes, or until the zucchinis are tender and the cheese is melted and bubbly.
Serve:
Garnish with fresh cilantro or parsley if desired. Serve warm as a main dish or side.
Enjoy your delicious and wholesome meal! Let me know if you need further assistance. 😊
Here’s a step-by-step guide to preparing regional Italian breakfast foods from different parts of Italy. These recipes highlight the diversity of Italian cuisine and are perfect for starting your day with an authentic Italian touch.
1. Cornetto (Northern and Central Italy)
A sweet, flaky pastry similar to a croissant, often filled with jam, custard, or Nutella.
Ingredients:
2 1/4 cups (280g) all-purpose flour
1/4 cup (50g) sugar
1 packet (7g) dry yeast
1/2 cup (120ml) warm milk
1/4 cup (60g) butter, softened
1 egg
Pinch of salt
Filling: jam, Nutella, or custard
Steps:
Dissolve the yeast in warm milk and let it sit for 5 minutes.
In a bowl, mix flour, sugar, and salt. Add the yeast mixture, egg, and softened butter. Knead until smooth.
Let the dough rise for 1-2 hours until doubled in size.
Roll out the dough and cut it into triangles. Add a spoonful of filling at the wide end and roll into a crescent shape.
Bake at 375°F (190°C) for 15-20 minutes until golden brown.
2. Pane e Olio (Tuscany)7
A simple yet satisfying breakfast of crusty bread dipped in high-quality olive oil.
Ingredients:
Fresh Tuscan bread (unsalted)
High-quality extra virgin olive oil
Optional: sprinkle of salt or honey
Steps:
Slice the bread and toast it lightly.
Drizzle generously with olive oil.
Add a pinch of salt or a drizzle of honey for extra flavor.
3. Sfogliatella (Campania)
A flaky, shell-shaped pastry filled with ricotta and citrus.
Ingredients:
2 cups (250g) all-purpose flour
1/2 cup (120g) butter, cold
1/2 cup (120ml) water
1 cup (250g) ricotta cheese
1/2 cup (100g) sugar
Zest of 1 orange and 1 lemon
1 egg yolk
Steps:
Mix flour and water to form a dough. Roll it out thinly and brush with melted butter. Fold and roll repeatedly to create layers.
For the filling, mix ricotta, sugar, and citrus zest.
Cut the dough into circles, add a spoonful of filling, and fold into a shell shape.
Brush with egg yolk and bake at 400°F (200°C) for 20-25 minutes.
4. Panzerotti (Puglia)
Fried or baked dough pockets filled with tomato and mozzarella.
Ingredients:
2 cups (250g) all-purpose flour
1/2 cup (120ml) warm water
1 packet (7g) dry yeast
1/2 cup (100g) tomato sauce
1/2 cup (100g) mozzarella, diced
Salt and pepper to taste
Oil for frying
Steps:
Dissolve yeast in warm water and mix with flour to form a dough. Let it rise for 1 hour.
Roll out the dough and cut into small circles.
Add a spoonful of tomato sauce and mozzarella to each circle. Fold and seal the edges.
Fry in hot oil until golden brown or bake at 375°F (190°C) for 15-20 minutes.
5. Biscotti e Vin Santo (Tuscany)
A traditional pairing of almond cookies and sweet wine.
Ingredients for Biscotti:
2 cups (250g) all-purpose flour
1 cup (200g) sugar
1 cup (150g) almonds, toasted
3 eggs
1 tsp baking powder
1 tsp vanilla extract
Steps:
Mix flour, sugar, baking powder, and almonds. Add eggs and vanilla to form a dough.
Shape into logs and bake at 350°F (175°C) for 25 minutes.
Slice the logs diagonally and bake again for 10-15 minutes until crisp.
Serve with Vin Santo for dipping.
6. Frittelle (Veneto)
Sweet fried dough balls, often enjoyed during Carnival but also for breakfast.
Ingredients:
2 cups (250g) all-purpose flour
1/2 cup (100g) sugar
1/2 cup (120ml) milk
1 egg
1 packet (7g) dry yeast
Zest of 1 lemon
Oil for frying
Powdered sugar for dusting
Steps:
Dissolve yeast in warm milk. Mix with flour, sugar, egg, and lemon zest to form a dough.
Let the dough rise for 1 hour.
Heat oil and drop small spoonfuls of dough into it. Fry until golden brown.
Dust with powdered sugar before serving.
7. Maritozzo (Lazio)
A sweet bun filled with whipped cream, popular in Rome.
Ingredients:
2 cups (250g) all-purpose flour
1/4 cup (50g) sugar
1 packet (7g) dry yeast
1/2 cup (120ml) warm milk
1/4 cup (60g) butter, softened
1 egg
Pinch of salt
Whipped cream for filling
Steps:
Dissolve yeast in warm milk and let it sit for 5 minutes.
Mix flour, sugar, and salt. Add the yeast mixture, egg, and softened butter. Knead until smooth.
Let the dough rise for 1-2 hours until doubled in size.
Shape into buns and bake at 375°F (190°C) for 15-20 minutes.
Slice the buns and fill with whipped cream.
These recipes offer a delicious glimpse into Italy’s regional breakfast traditions. Buon appetito! 🍴
What Are The Differences Between American Breakfast, English Breakfast And French Breakfast Recipes And Step By Step Guides
By : chef ssentongo Geoffrey
Breakfast traditions vary widely across cultures, and American, English, and French breakfasts are distinct in their ingredients, preparation, and presentation. Below is a breakdown of each, including recipes and step-by-step guides.
1. American Breakfast
American breakfast is often hearty and includes a mix of sweet and savory dishes. Common items include pancakes, bacon, eggs, toast, and cereal.
Typical American Breakfast Recipe: Pancakes, Bacon, and Scrambled Eggs
Mix 1 cup flour, 2 tbsp sugar, 1 tbsp baking powder, and a pinch of salt.
In another bowl, whisk 1 cup milk, 1 egg, and 2 tbsp melted butter.
Combine wet and dry ingredients to form a batter.
Heat a non-stick pan, pour batter to form pancakes, and cook until bubbles form on top. Flip and cook the other side.
Bacon:
Place bacon strips in a cold skillet and cook over medium heat until crispy. Drain on paper towels.
Scrambled Eggs:
Whisk 2-3 eggs with a splash of milk, salt, and pepper.
Melt butter in a pan, pour in the eggs, and stir gently until cooked but still soft.
2. English Breakfast
The English breakfast, also known as a “full English,” is a hearty, savory meal. It typically includes eggs, sausages, bacon, baked beans, tomatoes, mushrooms, and toast.
Cook sausages in a pan over medium heat until browned and cooked through.
In the same pan, cook bacon until crispy.
Tomatoes and Mushrooms:
Halve tomatoes and cook them cut-side down in the pan.
Sauté mushrooms in butter until tender.
Baked Beans:
Heat canned baked beans in a small saucepan.
Eggs:
Fry eggs in the pan until the whites are set but the yolks are still runny.
Toast:
Toast bread and spread with butter.
Serve: Plate all components together.
3. French Breakfast
French breakfast, or “petit déjeuner,” is typically light and sweet. It often includes croissants, baguettes with butter and jam, and coffee or hot chocolate.
Typical French Breakfast Recipe: Croissants with Butter and Jam
Ingredients:
Croissants, butter, jam, coffee or hot chocolate.
Step-by-Step Guide:
Croissants:
Purchase or bake fresh croissants. If store-bought, warm them slightly in the oven.
Butter and Jam:
Slice croissants horizontally and spread with butter and your favorite jam.
Coffee or Hot Chocolate:
Brew a cup of coffee or prepare hot chocolate.
Serve: Enjoy the croissants with your beverage.
Key Differences:
American Breakfast: Hearty, mix of sweet and savory, often includes pancakes, bacon, and eggs.
English Breakfast: Savory and filling, includes sausages, bacon, eggs, beans, tomatoes, and mushrooms.
French Breakfast: Light and sweet, typically features croissants, bread, butter, jam, and coffee.
Each breakfast reflects its cultural preferences and traditions, offering a unique start to the day!
This easy roast beef and gravy recipe requires only four simple ingredients and a slow cooker. It’s classic comfort food that begs for mashed potatoes and soft dinner rolls.
A classic Roast Beef with Gravy recipe! Here’s a step-by-step guide to making this mouthwatering dish:
Ingredients: For the Roast Beef:
3-4 pound beef roast (prime rib, top round, or rump roast)
2 tbsp olive oil
1 tsp salt
1 tsp black pepper
1 tsp dried thyme
1 tsp dried rosemary
2 cloves garlic, minced
For the Gravy:
2 cups beef broth
1 cup red wine (optional)
2 tbsp all-purpose flour
2 tbsp butter
Instructions: Step 1: Preheat and Prep Roast (15 minutes)
Preheat oven to 325°F (160°C).
Rinse the beef roast and pat it dry with paper towels.
Season the roast with salt, black pepper, thyme, rosemary, and garlic.
Step 2: Sear the Roast (10 minutes)
Heat olive oil in a large Dutch oven or oven-safe skillet over high heat.
Sear the roast on all sides until browned, about 2-3 minutes per side.
Step 3: Roast the Beef (2-3 hours)
Transfer the Dutch oven or skillet to the preheated oven.
Roast the beef for 2-3 hours, or until it reaches your desired level of doneness.
Use a meat thermometer to check for internal temperatures:
Rare: 130-135°F (54-57°C)
Medium-rare: 135-140°F (57-60°C)
Medium: 140-145°F (60-63°C)
Medium-well: 145-150°F (63-66°C)
Well-done: 150-155°F (66-68°C)
Step 4: Make the Gravy (15 minutes)
Remove the roast from the oven and transfer it to a cutting board.
Pour the beef broth and red wine (if using) into the Dutch oven or skillet.
Bring the liquid to a boil over high heat, scraping up any browned bits from the bottom.
Reduce heat to medium and simmer for 5-7 minutes or until the gravy thickens.
Stir in the flour and butter to thicken the gravy further.
Step 5: Slice and Serve (10 minutes)
Slice the roast beef against the grain.
Serve with the warm gravy spooned over the top.
Tips and Variations:
Use a meat thermometer to ensure the roast reaches a safe internal temperature.
Let the roast rest for 15-20 minutes before slicing to allow the juices to redistribute.
For a richer gravy, use more beef broth or add a little bit of beef bouillon.
Experiment with different herbs and spices, such as bay leaves or paprika, to add more flavor to the roast and gravy.
Enjoy your perfectly cooked Roast Beef with Gravy!
Personal chefs spend their days cooking for their clients, stretching their creative culinary muscles while making a good living. It requires time management, organization, and a little courage to put yourself out there. But in return, you get to be your own boss and set your own hours.
Read on for a few tips on becoming a personal chef, or request a personal chef career plan to explore the ins and outs of this flexible and creative career choice.
The Difference Between a Personal Chef and a Private Chef
Before we explain how to become a personal chef, let’s clear up a common source of confusion—the difference between a personal chef and a private chef.
A personal chef prepares meals for a number of clients throughout the week. These are often pre-made meals that the client can then heat-and-eat. A private chef works for a single client or family and attends to all their culinary needs. They may travel with the client and some even live in the client’s house.
Both professions are a great way to make a living in the culinary arts, but a personal chef has more control over their schedule and menus.
So, here is how to become a personal chef:
1. Research the Local Market
To best serve your community, you need to know who will need (and want) your services. Take time to figure out who will be looking for a personal chef in your market. Working moms? Bachelors? Busy families? Young professionals?
Market research will guide your business model—and help you cater to the clients you want to serve. It’s wise to figure out the need in your market, but it’s also a great idea to pick a niche and customize your service to attract a certain kind of clientele. Some personal chefs cater to specific groups.
5 Tips For How To Become a Personal Chef
Jumping into a career as a personal chef? Here are five tips to help you set your new business up for success, from marketing to networking.
How to Become a Chef: Get the Career guide!
Have your sights set on wearing the chef’s hat? Discover the steps that may be required to start your culinary career and earn the title of ‘chef’.
Personal chefs spend their days cooking for their clients, stretching their creative culinary muscles while making a good living. It requires time management, organization, and a little courage to put yourself out there. But in return, you get to be your own boss and set your own hours.
Read on for a few tips on becoming a personal chef, or request a personal chef career plan to explore the ins and outs of this flexible and creative career choice.
This article discusses how to become a personal chef. For a complete step-by-step guide to becoming a professional chef including requirements, salaries, career paths, and more, see: How to Become a Chef: The Complete Guide.
The Difference Between a Personal Chef and a Private Chef
Before we explain how to become a personal chef, let’s clear up a common source of confusion—the difference between a personal chef and a private chef.
A personal chef prepares meals for a number of clients throughout the week. These are often pre-made meals that the client can then heat-and-eat. A private chef works for a single client or family and attends to all their culinary needs. They may travel with the client and some even live in the client’s house.
Both professions are a great way to make a living in the culinary arts, but a personal chef has more control over their schedule and menus.
So, here is how to become a personal chef:
1. Research the Local Market
To best serve your community, you need to know who will need (and want) your services. Take time to figure out who will be looking for a personal chef in your market. Working moms? Bachelors? Busy families? Young professionals?
Market research will guide your business model—and help you cater to the clients you want to serve. It’s wise to figure out the need in your market, but it’s also a great idea to pick a niche and customize your service to attract a certain kind of clientele. for example, specializes in plant-based cuisine in his personal chef business.
2. Brand Yourself – Then Share Your Brand
Make it easy for your clients to find you and learn what services you offer when they do. Much of your new business is going to come from online searches–Google, Yelp, Facebook–so be sure your brand is clear and accessible.
You’ll need a high-quality website and solid marketing strategy so that you’re connecting with the people in your target market. Share your new business on social media and ask your friends and family to spread the word. You can also reach out to fellow students and mentors from culinary school or former colleagues to ask if they have any referrals for you.
As you start to build a client base, you can share pictures of your food and testimonials from happy clients to prove the quality of your services. You could also provide an incentive to current clients to help build your business. (Like for every successful referral, maybe the client can receive 10% off the next month’s services.
3. Build Your Customer Service Skills
Personal chefs are both professional cooks and service providers. While some will be happy for you to come up with their meals, others may have specific requests, favorite dishes, or dietary requirements. As the chef, it’s not your job to argue or try to change their minds. It’s your job to deliver what they expect of you.
Be sure to lay out your services very clearly—it will help you avoid confusion or disappointment down the road. And be prepared to take feedback with grace. They are the customer, and while they may not always be right, the chef should always be polite.
4. Don’t Forget the Business End
As a personal chef, you’re running your own small business. This means you’ll be responsible for all of its financial, legal, and operational aspects.
You can receive some instruction in entrepreneurship and business management that can be invaluable to the personal chef.
The other important business detail as a personal chef will be setting your pricing. There are plenty of good software options to help you with costing. They’ll take into account the price of your ingredients and the number of patrons you serve.
Be sure to build equipment into your budget. You’ll have to buy and maintain pots, pans, knives, to-go containers, and more to keep your business afloat.
5. Join a Professional Organization
In the United States, there are two primary professional organizations for personal chefs.
These groups can be fantastic resources while you start your new business, and they help add legitimacy to your company.
Be Your Own Boss With Low Startup Risk
Working as a personal chef is challenging, but extremely rewarding. And unlike starting a restaurant or food truck, you can hang out your shingle without spending thousands of dollars to get off the ground.
If you like the idea of working for yourself, cooking professionally, and want the opportunity to stretch your culinary muscles as an entrepreneur.
Read more about food entrepreneurship in the next article.
If you find it useful drop your comment or follow us
What Is Fond and Why You Should Use It and How to Use It Step by Step Guide
Fond, the secret to elevating your dishes to the next level! Fond, also known as “fond de cuisine” or “culinary foundation,” refers to the flavorful liquid left over after cooking meat, fish, or vegetables. This rich, savory liquid is packed with umami flavor and can be used to enhance the taste of various dishes.
WhyUseFond?
Depth of flavor: Fond adds a rich, complex flavor profile to dishes, making them more engaging and satisfying.
Moisture and texture: Fond can help retain moisture in cooked meats and vegetables, keeping them tender and juicy.
Versatility: Fond can be used in a variety of dishes, from soups and stews to sauces and braising liquids.
HowtoUseFond : A Step-by-Step Guide
Step 1: Collect Fond
After cooking meat, fish, or vegetables, strain the cooking liquid through a fine-mesh sieve or cheesecloth into a clean container.
Discard any solids and reserve the liquid.
Step 2: Reduce Fond (Optional)
If the fond is too thin, you can reduce it by simmering it over low heat until it reaches your desired consistency.
This step concentrates the flavors and thickens the fond.
Step 3: Use Fond in Recipes
Soups and stews: Add fond to soups and stews for added depth of flavor.
Sauces and braising liquids: Use fond as a base for sauces or braising liquids to enhance the flavor of meats and vegetables.
Gravies and jus: Fond can be used to make rich, savory gravies and jus to serve alongside roasted meats.
Risottos and paellas: Add fond to risottos and paellas for added moisture and flavor.
Step 4: Store Fond (Optional)
If you don’t plan to use the fond immediately, you can store it in the refrigerator for up to 3 days or freeze it for up to 3 months.
When you’re ready to use the fond, simply thaw it and reheat it before using.
Tips and Variations:
Mix and match: Combine fond from different cooking processes to create a unique, complex flavor profile.
Concentrate fond: Reduce fond to a glaze-like consistency for a intense, savory flavor.
Use fond in place of stock: Fond can be used as a substitute for stock in many recipes, adding a richer, more complex flavor.
Now that you know the secret of fond, start experimenting and elevating your dishes to the next level!
27 Best Margarita cocktail Recipes to Get the Party Started step by step guide
By: chef ssentongo Geoffrey
Here’s a step-by-step guide to creating 27 Best Margarita Cocktail Recipes to get the party started.
Margaritas are versatile, refreshing, and perfect for any occasion. Let’s dive into the recipes, starting with the classic and exploring creative variations.
1. Classic Margarita
Ingredients:
2 oz tequila
1 oz lime juice (freshly squeezed)
1 oz triple sec or Cointreau
Salt for rimming (optional)
Lime wedge for garnish
Instructions:
Rim a glass with salt by rubbing a lime wedge around the edge and dipping it in salt.
Fill a shaker with ice.
Add tequila, lime juice, and triple sec.
Shake well and strain into the glass over fresh ice.
Garnish with a lime wedge.
2. Frozen Margarita
Ingredients:
2 oz tequila
1 oz lime juice
1 oz triple sec
1 cup ice
Instructions:
Blend all ingredients in a blender until smooth.
Pour into a salt-rimmed glass.
Garnish with a lime wedge.
3. Spicy Margarita
Ingredients:
2 oz tequila
1 oz lime juice
1 oz triple sec
2-3 slices of jalapeño
Salt or chili powder for rimming
Instructions:
Muddle jalapeño slices in a shaker.
Add ice, tequila, lime juice, and triple sec.
Shake well and strain into a rimmed glass.
Garnish with a jalapeño slice.
4. Strawberry Margarita
Ingredients:
2 oz tequila
1 oz lime juice
1 oz triple sec
4-5 fresh strawberries
1 cup ice
Instructions:
Blend strawberries, tequila, lime juice, triple sec, and ice until smooth.
Pour into a glass and garnish with a strawberry.
5. Mango Margarita
Ingredients:
2 oz tequila
1 oz lime juice
1 oz triple sec
1/2 cup mango puree
1 cup ice
Instructions:
Blend mango puree, tequila, lime juice, triple sec, and ice until smooth.
Pour into a glass and garnish with a mango slice.
6. Watermelon Margarita
Ingredients:
2 oz tequila
1 oz lime juice
1 oz triple sec
1 cup fresh watermelon chunks
1 cup ice
Instructions:
Blend watermelon, tequila, lime juice, triple sec, and ice until smooth.
Pour into a glass and garnish with a watermelon wedge.
7. Pineapple Margarita
Ingredients:
2 oz tequila
1 oz lime juice
1 oz triple sec
1/2 cup pineapple juice
1 cup ice
Instructions:
Blend pineapple juice, tequila, lime juice, triple sec, and ice until smooth.
Pour into a glass and garnish with a pineapple slice.
8. Cucumber Margarita
Ingredients:
2 oz tequila
1 oz lime juice
1 oz triple sec
4-5 cucumber slices
1 cup ice
Instructions:
Muddle cucumber slices in a shaker.
Add ice, tequila, lime juice, and triple sec.
Shake well and strain into a glass.
Garnish with a cucumber slice.
9. Coconut Margarita
Ingredients:
2 oz tequila
1 oz lime juice
1 oz triple sec
1 oz coconut cream
1 cup ice
Instructions:
Blend coconut cream, tequila, lime juice, triple sec, and ice until smooth.
Pour into a glass and garnish with shredded coconut.
10. Blueberry Margarita
Ingredients:
2 oz tequila
1 oz lime juice
1 oz triple sec
1/2 cup fresh blueberries
1 cup ice
Instructions:
Blend blueberries, tequila, lime juice, triple sec, and ice until smooth.
Pour into a glass and garnish with blueberries.
11. Raspberry Margarita
Ingredients:
2 oz tequila
1 oz lime juice
1 oz triple sec
1/2 cup fresh raspberries
1 cup ice
Instructions:
Blend raspberries, tequila, lime juice, triple sec, and ice until smooth.
Pour into a glass and garnish with raspberries.
12. Peach Margarita
Ingredients:
2 oz tequila
1 oz lime juice
1 oz triple sec
1/2 cup peach puree
1 cup ice
Instructions:
Blend peach puree, tequila, lime juice, triple sec, and ice until smooth.
Pour into a glass and garnish with a peach slice.
13. Grapefruit Margarita
Ingredients:
2 oz tequila
1 oz lime juice
1 oz triple sec
1 oz grapefruit juice
1 cup ice
Instructions:
Shake all ingredients with ice.
Strain into a glass and garnish with a grapefruit slice.
14. Blackberry Margarita
Ingredients:
2 oz tequila
1 oz lime juice
1 oz triple sec
1/2 cup fresh blackberries
1 cup ice
Instructions:
Blend blackberries, tequila, lime juice, triple sec, and ice until smooth.
Pour into a glass and garnish with blackberries.
15. Lavender Margarita
Ingredients:
2 oz tequila
1 oz lime juice
1 oz lavender syrup
1 oz triple sec
1 cup ice
Instructions:
Shake all ingredients with ice.
Strain into a glass and garnish with lavender sprigs.
16. Hibiscus Margarita
Ingredients:
2 oz tequila
1 oz lime juice
1 oz hibiscus syrup
1 oz triple sec
1 cup ice
Instructions:
Shake all ingredients with ice.
Strain into a glass and garnish with dried hibiscus flowers.
17. Mezcal Margarita
Ingredients:
1.5 oz mezcal
0.5 oz tequila
1 oz lime juice
1 oz triple sec
1 cup ice
Instructions:
Shake all ingredients with ice.
Strain into a glass and garnish with a lime wheel.
18. Smoky Margarita
Ingredients:
2 oz smoky tequila
1 oz lime juice
1 oz triple sec
1 cup ice
Instructions:
Shake all ingredients with ice.
Strain into a glass and garnish with a lime wedge.
19. Blood Orange Margarita
Ingredients:
2 oz tequila
1 oz lime juice
1 oz blood orange juice
1 oz triple sec
1 cup ice
Instructions:
Shake all ingredients with ice.
Strain into a glass and garnish with a blood orange slice.
20. Pomegranate Margarita
Ingredients:
2 oz tequila
1 oz lime juice
1 oz pomegranate juice
1 oz triple sec
1 cup ice
Instructions:
Shake all ingredients with ice.
Strain into a glass and garnish with pomegranate seeds.
21. Kiwi Margarita
Ingredients:
2 oz tequila
1 oz lime juice
1 oz triple sec
1 kiwi (peeled and sliced)
1 cup ice
Instructions:
Blend kiwi, tequila, lime juice, triple sec, and ice until smooth.
Pour into a glass and garnish with a kiwi slice.
22. Guava Margarita
Ingredients:
2 oz tequila
1 oz lime juice
1 oz guava nectar
1 oz triple sec
1 cup ice
Instructions:
Shake all ingredients with ice.
Strain into a glass and garnish with a lime wedge.
23. Passion Fruit Margarita
Ingredients:
2 oz tequila
1 oz lime juice
1 oz passion fruit puree
1 oz triple sec
1 cup ice
Instructions:
Shake all ingredients with ice.
Strain into a glass and garnish with passion fruit seeds.
24. Matcha Margarita
Ingredients:
2 oz tequila
1 oz lime juice
1 oz triple sec
1 tsp matcha powder
1 cup ice
Instructions:
Shake all ingredients with ice.
Strain into a glass and garnish with a lime wedge.
25. Chocolate Margarita
Ingredients:
2 oz tequila
1 oz lime juice
1 oz chocolate liqueur
1 oz triple sec
1 cup ice
Instructions:
Shake all ingredients with ice.
Strain into a glass and garnish with chocolate shavings.
26. Coffee Margarita
Ingredients:
2 oz tequila
1 oz lime juice
1 oz coffee liqueur
1 oz triple sec
1 cup ice
Instructions:
Shake all ingredients with ice.
Strain into a glass and garnish with coffee beans.
27. Ginger Margarita
Ingredients:
2 oz tequila
1 oz lime juice
1 oz ginger syrup
1 oz triple sec
1 cup ice
Instructions:
Shake all ingredients with ice.
Strain into a glass and garnish with a ginger slice.
Enjoy these 27 Margarita Recipes and get the party started! Cheers! 🍹
Location plays a crucial role in determining the success of a business. Here are some ways in which location can impact your business:
Accessibility and Visibility
Proximity to customers, suppliers, and partners
Visibility and foot traffic
Accessibility by car, public transportation, or on foot
Demographics and Market Research
Understanding local demographics, such as age, income, and lifestyle
Identifying target markets and customer segments
Analyzing competitors and market trends
Regulations and Zoning
Compliance with local regulations, such as zoning laws and health codes
Obtaining necessary permits and licenses
Understanding tax laws and incentives
Cost and Affordability
Rent or property costs
Labor costs and availability
Access to affordable utilities and services
Infrastructure and Logistics
Proximity to transportation hubs, such as airports, seaports, or highways
Access to reliable utilities, such as electricity, water, and internet
Quality of roads and public transportation
Talent and Workforce
Access to skilled and educated workforce
Labor market competitiveness
Quality of life and employee retention
Brand Image and Reputation
Aligning location with brand identity and values
Creating a positive and memorable customer experience
Building relationships with local community and stakeholders
Safety and Security
Crime rates and public safety
Access to emergency services
Natural disaster risks and preparedness
Environmental Factors
Climate and weather conditions
Access to natural resources
Environmental regulations and sustainability
Scalability and Flexibility
Room for expansion and growth
Flexibility to adapt to changing market conditions
Access to resources and support for innovation
By carefully considering these factors, businesses can choose a location that supports their goals, enhances their competitiveness, and drives long-term success.
Would you like me to elaborate on any of these points or provide more information on a specific aspect of location and business?
Smoke turkey breasts for 4-5 hours, or until cooked through.
Rest for 10 minutes before slicing.
A delicious and flaky grilled Tilapia recipe! Here’s a step-by-step guide to grilling the perfect Tilapia, along with some tasty side dish ideas:
Grilled Tilapia Recipe: Ingredients:
4 Tilapia fillets (6 oz each)
2 tbsp olive oil
2 tbsp freshly squeezed lemon juice
2 cloves garlic, minced
1 tsp dried parsley
Salt and pepper, to taste
Instructions:
Preheat grill: Preheat grill to medium-high heat (400°F).
Prepare Tilapia: Rinse Tilapia fillets under cold water, pat dry with paper towels.
Marinate: In a small bowl, whisk together olive oil, lemon juice, garlic, and parsley. Brush mixture evenly onto both sides of Tilapia fillets.
Season: Sprinkle salt and pepper to taste.
Grill: Place Tilapia fillets on grill, skin side down (if they have skin). Close grill lid and cook for 4-5 minutes or until skin is crispy and golden brown.
Flip and cook: Flip Tilapia over and cook for an additional 3-4 minutes or until cooked through.
Serve: Serve hot, garnished with lemon wedges and fresh parsley.
Side Dish Ideas:
Grilled Asparagus: Brush asparagus spears with olive oil, season with salt and pepper. Grill alongside Tilapia for 3-5 minutes or until tender.
Roasted Vegetables: Toss sliced vegetables (bell peppers, zucchini, cherry tomatoes) with olive oil, salt, and pepper. Roast in oven at 425°F for 15-20 minutes or until tender.
Cilantro Lime Rice: Cook white or brown rice according to package instructions. Mix in chopped cilantro, lime juice, and a pinch of salt.
Garlic Bread: Butter slices of bread, sprinkle with minced garlic. Grill or bake until crispy.
Mixed Greens Salad: Combine mixed greens, cherry tomatoes, cucumber slices, and a homemade vinaigrette for a refreshing side dish.
Tips and Variations:
Use a fish basket: If you’re worried about Tilapia sticking to the grill, use a fish basket or a piece of aluminum foil with holes poked in it.
Add flavor with herbs: Mix chopped herbs like dill, basil, or thyme into the marinade for added flavor.
Try different seasonings: Experiment with different seasoning blends like Cajun, Mediterranean, or Asian-inspired for a unique flavor profile.
Enjoy your perfectly grilled Tilapia with these delicious side dish ideas!
A Hearty, Conferting Cowboy Beef Stew Recipes!
Here’s a step-by-step guide to making this delicious dish:
Ingredients:
2 lbs beef stew meat (chuck or round)
2 tablespoons vegetable oil
1 large onion, chopped
3 cloves garlic, minced
2 medium carrots, peeled and chopped
2 medium potatoes, peeled and chopped
1 large red bell pepper, chopped
2 cups beef broth
1 cup red wine (optional)
1 teaspoon dried thyme
1 teaspoon dried rosemary
Salt and pepper, to taste
2 tablespoons all-purpose flour (for thickening)
Instructions: Step 1: Brown the Beef (10 minutes)
Heat oil in a large Dutch oven or pot over medium-high heat.
Add beef and cook until browned on all sides, about 5 minutes.
Remove browned beef from pot and set aside.
Step 2: Soften the Vegetables (10 minutes)
Reduce heat to medium and add chopped onion to pot.
Cook until onion is translucent, about 5 minutes.
Add minced garlic and cook for an additional minute.
Step 3: Add Remaining Vegetables and Liquid (10 minutes)
Add chopped carrots, potatoes, and red bell pepper to pot.
Pour in beef broth, red wine (if using), thyme, and rosemary.
Stir to combine and bring mixture to a boil.
Step 4: Simmer the Stew (1.5 hours)
Return browned beef to pot and cover with a lid.
Transfer pot to preheated oven (300°F) or continue simmering on stovetop.
Cook until beef is tender and vegetables are cooked through, about 1.5 hours.
Step 5: Thicken the Stew (10 minutes)
In a small bowl, mix flour and a splash of water to create a slurry.
Stir slurry into stew and continue simmering for an additional 10 minutes.
Step 6: Serve and Enjoy!
Serve hot, garnished with fresh herbs or crusty bread on the side.
Tips and Variations:
Use a slow cooker: Brown beef and cook vegetables in a skillet, then transfer everything to a slow cooker with remaining ingredients. Cook on low for 6-8 hours.
Add other vegetables: Consider adding diced zucchini, sliced mushrooms, or chopped celery to the stew.
Spice it up: Add a pinch of cayenne pepper or red pepper flakes for an extra kick.
Enjoy your hearty cowboy beef stew!
Try this recipe and let me know your thoughts in the comment section
15 Healthy Pasta Sauce Recipes for Well-Rounded Dinners
Here are 15 healthy pasta sauce recipes that can add a nutritious twist to your dinners. These sauces are packed with flavor and wholesome ingredients, making them perfect for well-rounded meals:
Ingredients: Roasted beets, goat cheese, garlic, olive oil, and a splash of balsamic vinegar.
Why it’s healthy: Beets are rich in nitrates and fiber, while goat cheese adds creaminess.
14. Coconut Curry Sauce
Ingredients: Coconut milk, curry powder, garlic, ginger, turmeric, and a touch of lime juice.
Why it’s healthy: Anti-inflammatory spices like turmeric and ginger boost immunity.
15. Kale and Cashew Sauce
Ingredients: Fresh kale, cashews, garlic, olive oil, and a splash of vegetable broth.
Why it’s healthy: Kale is a superfood rich in vitamins K and C, and cashews add creaminess and healthy fats.
These sauces can be paired with whole-grain, legume-based, or vegetable-based pastas for an even healthier meal. Enjoy experimenting with these recipes to create delicious, nutrient-packed dinners!
Here’s a curated list of 20 BBQ recipes perfect for feeding a crowd, complete with step-by-step instructions and tips to make your BBQ event a success. These recipes are easy to scale up and include a mix of mains, sides, and desserts to satisfy everyone.
Steps: Marinate chicken thighs in lemon juice, olive oil, garlic, and herbs for 2 hours. Thread onto skewers and grill for 10-12 minutes, turning occasionally. Serve with a side of yogurt dip .
Steps: Smoke the lemon curd, pour over a baked crust, and dust with powdered sugar .
Tips for Success
Plan Ahead: Marinate meats and prep sides the day before to save time .
Use a Two-Zone Grill: Create hot and cool zones for better control over cooking .
Keep It Simple: Focus on a few standout dishes rather than overwhelming variety .
For more detailed recipes and inspiration, check out the sources: #mreasyrecipes #mrkitchen #foodiesandspice #foodporn #bbq #bbqsteak #recipe #homecooks.
The name of goat meat is called “Chevon” or “Cabrito” depending on the age and type of goat.
Chevon: This term refers to the meat of a mature goat.
Cabrito: This term refers to the meat of a young goat, typically less than 6 months old.
In some countries, goat meat is also referred to as “mutton” or simply “goat meat”. However, technically speaking, “mutton” refers specifically to the meat of an adult sheep, while goat meat is, well, from a goat!
How do you Call A older Goat and The young one?
Meat of a mature goat is {Chevon}
I think I have the answer!
A male goat is called a “buck” or a “billy goat.” A female goat is called a “doe” or a “nanny goat.” A young goat, typically less than a year old, is called a “kid.”
In order to get the benefits from cooking, we need to make it a fun activity. This is not as daunting as it sounds.
In my experience as a chef, cooking becomes fun when we become proficient at it. Learning the basics such as simple knife skills and foundation recipes allows us to relax and enjoy the experience, rather than just wanting to get to the end result.
The end result, ie the meal served on the table, is one part of the cooking process. If we go into it with the attitude that we have to cook in order to feed ourselves we will struggle to enjoy it.
Learn a few simple recipes that you can replicate time and time again
Cooking any dish for the first time is likely to be difficult, don’t be discouraged. Try the same dish again a week later and you’ll be amazed how much easier it becomes.
Put a wet cloth under your chopping board to stop it moving. A board that is slipping and sliding around is my absolute pet hate, and a recipe for frustration. Find more tips on our chopping board article here.
Invest in one good knife. You need not rush out to buy a whole set of expensive knives. One good quality chefs knife will cover you for 90% of situations. Victorinox are a good quality budget brand which I would recommend (linked to their website here)
Get other people involved. Others do not have to actually help with the cooking but just being there in the kitchen for a chat makes the whole experience much more communal and fun.
In my opinion the communal aspect is really important. If you are slaving away in the kitchen whilst others are sat in front of the TV it is highly likely cooking will feel like a chore.
Chatting whilst cooking makes the whole evening special. The long slow cooking process becomes the process with the crescendo being enjoying the meal itself.
Does Cooking Make You Happy?
As a chef it will come as no surprise that cooking makes me happy. I find the whole process incredibly cathartic. No matter what kind of day I have had at work, it is my chance to slow down and take some time to do something I enjoy.
Do Most People Enjoy Cooking?
In my experience, most people enjoy cooking to some level. Many find cooking to be a therapeutic and enjoyable experience and discover taking pleasure in the simple things in life is a great route to happiness.
I asked some friends and family why they did or did not enjoy cooking. From my very unscientific survey I discovered some similarities in the two camps of people.
Some of those asked simply have no interest in food, whether cooking or eating it. This group of people are happy eating for sustenance and nothing more.
How Chefs Make Cooking So Much More Fun
Cooking is an incredibly divisive activity. Some people love spending their time in the kitchen, whilst others find it a monotonous chore.
You may feel that in order to become a chef you must find cooking to be great fun. In reality, before you start learning, the odds of cooking already being the love of your life are quite long.
Is Cooking A Hobby?
Cooking is no different to playing a sport or learning any other type of activity.
Cooking is a hobby because it is a set of skills that need to be learnt in order to progress and enjoy ourselves. Those that do not enjoy cooking tend to shy away from it, in the same way as any hobby which we start and discover is not for us.
Some may argue that as we have to cook in order to eat, cooking is not a hobby but rather a necessity for survival. This may have been better argued years ago.
With the increased availability of quick ready meals and doorstep deliveries those that do not want to cook can get through entire weeks avoiding the kitchen with surprising ease.
Having spent around 15 years working as a qualified chef in high end restaurants, my mission is to use this experience to help others as they begin their career in catering!
To read Next Follow, comment and share to your friends or visit our website and Facebook page
Trying to decide if a chef career is right for you is not easy, especially with all the misinformation out there. Here I share my personal view using my years of experience as a chef to answer the ultimate question, is being a chef a good career?
My experience as a chef taught me that being a chef is a good career for those that love to cook, enjoy meeting new people, are happy to work long hours and want the potential to work anywhere in the world.
Those who are looking for a career that is well paid or with lots of traditional job benefits may be better suited pursuing other career paths.
In this post I attempt to answer whether being a chef is a good career or not, with a fair and unbiased view, looking at all the factors a person would look at when considering any new career.
I could just give my overall option, but I am confident that many readers would like a more detailed breakdown so they can make their own decision! I wrote an article regarding why I want to leave this industry to another after many years which will make a great accompaniment to this article.
Do Chefs Have High Job Satisfaction?
In my experience, being a chef has high levels of job satisfaction. Those that choose a career in catering do so because they have a love of food and cooking. Our role as chefs allows us to spend each and every day doing what we love.
Do Chefs Have Good Career Progression
In my experience working in many kitchens, chefs are some of the most career focused people I know. The good news is that with hard work the career progression opportunities are unlimited for chefs.
The way a kitchen is set up to run, with it’s clear rank structure, makes it easy for all chefs to see the career ladder that they are able to climb.
As chefs move around jobs relatively frequently there are constantly new chef de partie and sous chef positions opening up for the new chefs to move into.
Do Chefs Get On Well With Other Chefs?
In my experience, most chefs get on very well with other chefs. In all the kitchens I have worked in, the camaraderie and team ethos is excellent. There are so many opportunities to make lifelong friends within the catering industry.
Chefs are notorious for spending their days off together and getting up to fun activities in their split shifts.
The work atmosphere in the kitchen itself is usually great as well. There is a shared vision where everyone has to truly work together as a team. This makes for a sometimes stressful, but more often than not, fun place to be – The banter among chefs is always great.
Do Chefs Receive Good Training?
In my experience as a chef, the training we receives is very much dependent on the places that we work, or where someone goes to culinary school. Being a chef has such a wide range of job roles that the training can vary greatly depending upon where you work.
For example, a person who works in a chain pub/restaurant may qualify as a chef but their training is clearly not going to be as good as a chef that has trained at the best restaurants around the world. (The difference between a chef and a cook)
An individual chef has a huge amount of control over where their career takes them.
As with most careers, location plays a large part in a chef’s ability to train to the standard that they would like. In order to find the best jobs and receive the best training a chef may have to travel quite far from home.
One negative of the training which I think is worth mentioning is the fact that being great chef is not really transferable outside of the hospitality industry. Other career experiences and qualifications can be used in many different industries.
For example, if a person trained as a lawyer and gained a law degree they can use this in multiple fields, as lots of employers recognise the value of this qualification. Chefs are a lot more pigeon holed into the hospitality sector.
However, The ability to carve out your own training path makes me believe that being a chef is a good career and should win the final point.
Being a chef is a great career with lots of positive points that are hard to find in any other industry.
The buzz of the kitchen and endless progression opportunities really are unparalleled . That being said, the trade-off for all these great factors is the unsociable and long hours that are the norm in the industry.
Cooking is an incredibly divisive activity. Some people love spending their time in the kitchen, whilst others find it a monotonous chore. You may feel that in order to become a chef you must find…
The path of how chefs get rated can be an extremely difficult road to navigate. Unfortunately, here is no one standardised system. Instead, we rely on several different factors for rating.
Having spent around 15 years working as a qualified chef in high end restaurants, my mission is to use this experience to help others as they begin their career in catering!
Thanks for reading this article and I’m looking forward to read your comments
Being a chef can be a rewarding and creative career choice for those who are passionate about cooking and the culinary arts. Here are some pros and cons to consider:
Pros:
Creative expression: As a chef, you have the freedom to create new dishes and menus, allowing you to express your creativity.
Variety: Every day is different in the kitchen, with new challenges and opportunities to learn.
Job satisfaction: Seeing customers enjoy your food can be incredibly fulfilling.
Career advancement: With experience, you can move up to executive chef, restaurant owner, or even food critic.
Flexibility: Chefs can work in various settings, from fine dining restaurants to catering companies, food trucks, or even as personal chefs.
Cons:
Physical demands: Working in a kitchen can be physically demanding, with long hours on your feet, high temperatures, and heavy lifting.
High pressure: Kitchens can be fast-paced and stressful, especially during peak hours or when dealing with difficult customers.
Long hours: Chefs often work long, irregular hours, including evenings, weekends, and holidays.
Low starting pay: Entry-level positions in kitchens may pay minimum wage or slightly higher.
Continuous learning: The culinary industry is constantly evolving, so chefs must stay up-to-date with new trends, techniques, and ingredients.
To succeed as a chef, consider the following:
Gain experience: Intern or volunteer in kitchens to build your skills and network.
Formal education: Consider attending culinary school to learn fundamental techniques and gain credibility.
Develop your skills: Focus on developing your cooking techniques, menu planning, and kitchen management skills.
Stay organized: Practice time management, multitasking, and attention to detail.
Be adaptable: Be prepared to adjust to changing menus, ingredients, and kitchen environments.
Ultimately, being a chef can be a rewarding career choice for those who are passionate about cooking, creative, and willing to put in the hard work.
Breakfast is the first meal of the day, typically eaten in the morning to help fuel the body for the day ahead. It’s a crucial meal that provides energy, satisfies hunger, and helps maintain concentration and focus.
Breakfast can vary greatly depending on cultural, regional, and personal preferences. Some common breakfast foods include:
Cereals and grains (oatmeal, cornflakes, rice)
Eggs (scrambled, fried, poached, boiled)
Meat and poultry (bacon, sausage, ham, chicken)
Fruits and vegetables (fresh, juiced, or smoothied)
Dairy products (milk, yogurt, cheese)
Baked goods (bread, muffins, pastries)
International dishes (tacos, sushi, croissants)
Breakfast can be simple, like toast with coffee, or elaborate, like a full English breakfast with multiple courses. It’s a meal that sets the tone for the day, providing sustenance and satisfaction.
Here’s a step-by-step guide to preparing a delicious breakfast:
Step 1: Plan Your Breakfast Decide what you want to make for breakfast. Consider your dietary preferences, ingredient availability, and cooking time.
Step 2: Gather Ingredients Collect all the necessary ingredients for your chosen breakfast dish.
Step 3: Prepare Ingredients Chop, slice, or dice ingredients as needed.
Step 4: Cook Your Breakfast Follow a recipe or cooking instructions to prepare your breakfast. This may involve frying, boiling, baking, or toasting.
Step 5: Assemble and Serve Combine cooked ingredients, add any final touches (e.g., condiments, toppings), and serve your breakfast hot.
Step 6: Clean Up Wash dishes, wipe down surfaces, and clean any cooking utensils or equipment.
Some popular breakfast ideas and their estimated cooking times:
When should you use fresh pasta vs. dry pasta? The answer makes a big difference in the taste and texture of the final dish, but fresh isn’t always better.
Fresh or dry pasta can be used in any recipe, but they have different flavors and textures that will affect the final dish. Here are the major differences between the two to help you decide which to use.
Dry Pasta: Ingredients
Dry pasta is made with water, semolina (a type of flour made from durum wheat) and sometimes egg. The ingredients are mixed together to create a crumbly dough. The dough is then pressed through an extruder fitted with a die to create the desired pasta shape, forming anything from long noodles to curly macaroni or tube-shaped ziti. Once formed, the pasta is dried for several days until the moisture evaporates, creating a shelf-stable product that’s good for several years.
Fresh pasta, on the other hand, is made with eggs and flour, usually a specialty type of flour called “00” flour. It also contains water or olive oil, and sometimes extra ingredients (like pureed spinach or spices like paprika) are added to give the dough a vibrant color. The dough is kneaded and passed through a cutting machine, or it can be hand-cut for rustic-style pasta. Because fresh pasta contains perishable ingredients, it must be cooked immediately or stored in the refrigerator.
Texture
Dry pasta is often cooked al dente, which means “to the tooth” in Italian. That gives dry pasta a tender-firm texture that’s perfectly chewy, and it holds up well to hearty sauces. Of course, if you continue to boil dry pasta past the al dente stage, it will eventually become soft and mushy, so you can choose the desired level of texture based on your preference.
Fresh pasta doesn’t give you any options when it comes to texture.
Fresh Pasta vs. Dry Pasta: What’s the Difference?
When should you use fresh pasta vs. dry pasta? The answer makes a big difference in the taste and texture of the final dish, but fresh isn’t always better.
Today, you don’t even need to put in the work to enjoy fresh pasta: It’s available in the refrigerated section at most grocery stores. But, despite my love of fresh pasta, I’ve learned it’s not necessarily better than dry pasta. Both are worthy of a restaurant-quality meal—the one you choose depends on the pasta sauce you pair it with.
What’s the Difference Between Fresh and Dry Pasta?
Fresh or dry pasta can be used in any recipe, but they have different flavors and textures that will affect the final dish. Here are the major differences between the two to help you decide which to use.
Fresh Pasta vs. Dry Pasta: Ingredients
Dry pasta is made with water, semolina (a type of flour made from durum wheat) and sometimes egg. The ingredients are mixed together to create a crumbly dough. The dough is then pressed through an extruder fitted with a die to create the desired pasta shape, forming anything from long noodles to curly macaroni or tube-shaped ziti. Once formed, the pasta is dried for several days until the moisture evaporates, creating a shelf-stable product that’s good for several years.
Fresh pasta, on the other hand, is made with eggs and flour, usually a specialty type of flour called “00” flour. It also contains water or olive oil, and sometimes extra ingredients (like pureed spinach or spices like paprika) are added to give the dough a vibrant color. The dough is kneaded and passed through a cutting machine, or it can be hand-cut for rustic-style pasta. Because fresh pasta contains perishable ingredients, it must be cooked immediately or stored in the refrigerator.
When making fresh pasta, you’ll need to cook about 2 ounces per person. With dried pasta, it’s sometimes easier to use a cup measurer per person. Here’s our chart showing how much pasta per person you should make.
Dry Pasta: Texture
Dry pasta is often cooked al dente, which means “to the tooth” in Italian. That gives dry pasta a tender-firm texture that’s perfectly chewy, and it holds up well to hearty sauces. Of course, if you continue to boil dry pasta past the al dente stage, it will eventually become soft and mushy, so you can choose the desired level of texture based on your preference.
Fresh pasta doesn’t give you any options when it comes to texture. In general, it’s smoother and softer than dried pasta, and it’s not possible to cook it to the al dente stage. Because the pasta isn’t dried through to the center, these noodles cook through in a matter of minutes, creating a uniform finish inside and out. The end result is a soft, springy texture.
Dry Pasta: Cooking Time
Dry pasta cooking time depends on the size and shape. Most pasta takes 10 to 12 minutes, but thin pasta like angel hair may be done in as little as 8 minutes. Refer to the cooking instructions on the box and taste the pasta about 2 minutes before the timer expires. If it’s tender enough to chew but still contains a bit of a bite, you’ve reached al dente. If it’s too firm for your liking, continue cooking it until it reaches the preferred level of doneness.
Fresh pasta cooks much, much more quickly! Depending on the pasta’s thickness, it may be done in less than 2 minutes. Watch for the noodles to begin floating to the top of the pot. To check for doneness, bite into a noodle and look for a tiny white dot in the center. If you see it, continue cooking until it disappears, testing another noodle every 20 seconds.
When to Use Dry Pasta
It’s best to use dry pasta with rich, hearty sauces, like a pasta puttanesca dish or a thick, meaty ragu. That’s because dry pasta can be cooked al dente, giving the pasta a chewy bite and thick texture that holds up to these hearty sauces. Dry pasta is also ideal for casseroles and soups because it can hold up to the extended cooking time.
When to Use Fresh Pasta
Fresh pasta shines with delicate sauces that accentuate its eggy flavor and chewy texture. Think carbonara, cacio e pepe or pasta tossed with simple sauces like butter, marinara or pesto. Using fresh pasta with a store-bought Alfredo sauce is an excellent way to elevate the canned sauce to something that tastes like it simmered away all day.
When it comes to pasta, there are two main types: fresh pasta and dry pasta. Here’s a breakdown of the differences:
Fresh Pasta
Made from scratch: Fresh pasta is typically made from scratch using eggs, flour, and water.
Soft and delicate texture: Fresh pasta has a soft, delicate texture and a more tender bite.
Short shelf life: Fresh pasta has a short shelf life (usually 1-2 days) and must be stored in the refrigerator.
More labor-intensive: Fresh pasta requires more labor and time to produce.
Better with light sauces: Fresh pasta pairs well with light, delicate sauces that won’t overpower its flavor.
Dry Pasta
Mass-produced: Dry pasta is mass-produced using a machine that extrudes the dough through a die.
Long shelf life: Dry pasta has a long shelf life (usually 1-2 years) and can be stored at room temperature.
Firm texture: Dry pasta has a firmer texture and a more robust bite.
Less labor-intensive: Dry pasta is easier and faster to produce.
Versatile with sauces: Dry pasta can handle a wide range of sauces, from light to heavy.
When to Choose Each
Fresh pasta: Opt for fresh pasta when you want a more delicate texture and flavor. It’s ideal for dishes like carbonara, cacio e pepe, or with light, oily sauces.
Dry pasta: Choose dry pasta when you want a more robust texture and a longer shelf life. It’s perfect for dishes like spaghetti Bolognese, pesto, or with hearty, meat-based sauces.
Ultimately, the choice between fresh and dry pasta comes down to personal preference, the type of dish you’re making, and the texture and flavor you desire.
Please don’t forget to drop your comment and follow.
Here’s a traditional Hungarian Beef Goulash recipe that’s hearty, flavorful, and easy to make:
Ingredients:
2 pounds beef, cut into bite-sized pieces (shank, short ribs, or chuck)
2 tablespoons vegetable oil
1 large onion, chopped
3 cloves garlic, minced
2 medium carrots, peeled and chopped
2 stalks celery, chopped
1 large can (28 oz) crushed tomatoes
2 cups beef broth
1 teaspoon paprika
1 teaspoon caraway seeds
Salt and black pepper, to taste
2 tablespoons chopped fresh parsley
Sour cream, for serving (optional)
Bread or noodles, for serving (optional)
Instructions:
Heat oil in a large pot: Heat the oil in a large Dutch oven or pot over medium-high heat.
Brown the beef: Add the beef to the pot and cook until browned on all sides, about 5 minutes. Remove the beef from the pot and set it aside.
Soften the onions: Reduce the heat to medium and add the chopped onion to the pot. Cook until the onion is softened and translucent, about 5 minutes.
Add the garlic, carrots, and celery: Add the minced garlic, chopped carrots, and chopped celery to the pot. Cook for 2-3 minutes, until the vegetables are slightly tender.
Add the paprika and caraway seeds: Stir in the paprika and caraway seeds. Cook for 1 minute, until fragrant.
Add the crushed tomatoes and beef broth: Add the crushed tomatoes and beef broth to the pot. Stir to combine, then add the browned beef back to the pot.
Simmer the goulash: Bring the goulash to a boil, then reduce the heat to low and simmer, covered, for 1 1/2 to 2 hours, or until the beef is tender.
Season and serve: Season the goulash with salt and black pepper to taste. Serve hot, garnished with chopped fresh parsley. Offer sour cream, bread, or noodles on the side, if desired.
Tips and Variations:
Use a slow cooker: Brown the beef and cook the vegetables in a skillet, then transfer everything to a slow cooker and cook on low for 6-8 hours.
Add other vegetables: Consider adding other vegetables, such as potatoes, bell peppers, or mushrooms, to the goulash.
Use different types of beef: While shank, short ribs, or chuck are traditional choices for goulash, you can also use other tougher cuts of beef, such as brisket or round.
Serve with egg noodles: In Hungary, goulash is often served with egg noodles (called “csipetke”). Try serving the goulash with egg noodles for a traditional touch.
Nutrition Information (approximate): Per serving:
Calories: 500-600
Protein: 35-40g
Fat: 25-30g
Saturated fat: 8-10g
Cholesterol: 60-70mg
Carbohydrates: 30-35g
Fiber: 5-6g
Sugar: 5-6g
Sodium: 800-1000mg.
How to Make Slow-Cooker Asian Short Ribs?
Here’s a recipe for Slow-Cooker Asian Short Ribs that’s tender, flavorful, and easy to make:
Ingredients:
4 pounds beef short ribs
1/4 cup soy sauce
1/4 cup Chinese rice wine (or dry sherry)
2 tablespoons brown sugar
2 tablespoons Gochujang (Korean chili paste)
2 tablespoons grated fresh ginger
2 cloves garlic, minced
1 tablespoon sesame oil
1/4 cup beef broth
1/4 cup water
1 tablespoon cornstarch
1/4 cup chopped green onions, for garnish
Sesame seeds, for garnish
Instructions:
Season the short ribs: Sprinkle the short ribs with salt and black pepper.
Sear the short ribs: Heat 2 tablespoons of sesame oil in a large skillet over medium-high heat. Sear the short ribs until browned on all sides, about 5 minutes per side. Remove the short ribs from the skillet and set them aside.
Soften the aromatics: In the same skillet, add the grated ginger and minced garlic. Cook until the aromatics are softened, about 1 minute.
Add the sauce ingredients: Add the soy sauce, Chinese rice wine, brown sugar, Gochujang, and beef broth to the skillet. Stir to combine and bring the mixture to a boil.
Transfer to the slow cooker: Transfer the short ribs and sauce mixture to a 6-quart slow cooker.
Cook low and slow: Cook the short ribs on low for 8-10 hours or on high for 4-6 hours.
Thicken the sauce: In a small bowl, whisk together the cornstarch and water. Stir the cornstarch mixture into the sauce and continue to cook for an additional 30 minutes.
Garnish and serve: Garnish the short ribs with chopped green onions and sesame seeds. Serve the short ribs with steamed rice or noodles.
Tips and Variations:
Use a slow cooker with a sauté function to brown the short ribs and cook the aromatics.
Add sliced carrots, bell peppers, or mushrooms to the slow cooker for added flavor and nutrition.
Substitute beef broth with chicken or vegetable broth for a lighter flavor.
Serve the short ribs with kimchi or pickled ginger for an added burst of flavor.
Nutrition Information (approximate): Per serving:
Calories: 500-600
Protein: 35-40g
Fat: 30-35g
Saturated fat: 10-12g
Cholesterol: 60-70mg
Carbohydrates: 20-25g
Fiber: 2-3g
Sugar: 10-12g
Sodium: 800-1000mg
If you’ve liked this recipes comment and share to your friends
Please your free to ask questions and you’ll be answered thanks.
How do you Culculate the markup price Executing Task:
calculate the cost, labor cost, and selling price per one plate
Executing Task:
calculate the cost, labor cost, and selling price per one plate
How do you Culculate the markup price Executing Task:
calculate the cost, labor cost, and selling price per one plate
Executing Task:
How Do you Calculate Profit margin?
Certainly! The profit margin is a crucial financial ratio that measures a company’s profitability. It indicates how efficiently a business generates profit relative to its revenue. There are three types of profit margins:
Gross Profit Margin (GPM):
Definition: The gross profit margin compares the gross profit (revenue minus cost of goods sold) to total revenue.
(\text{{Net Income}}) = Profit after all expenses (including debts, taxes, etc.)
(\text{{Revenue}}) = Total revenue
Interpretation: Net profit margin reflects the overall profitability of the business.
Remember:
Higher profit margins are generally desirable, but a high gross margin along with a small net margin may warrant further investigation.
Profit margins vary by industry, so compare them to those of similar companies.
You can use tools like Microsoft Excel to calculate profit margins easily1
CAN YOU GIVE ME AN EXAMPLE OF A BUSINESS STRATEGY THAT AFFECTS MARKUP PERCENTAGE?
Certainly! The markup percentage is a critical factor in pricing strategies, and it can vary based on different business contexts. Here are some examples of how business strategies impact the markup percentage:
Market Positioning:
High-End Luxury Brands: Businesses that position themselves as high-end or luxury often use higher markup percentages. Their customers perceive value in exclusivity and are willing to pay a premium.
Discount Retailers: On the other hand, discount retailers focus on volume sales. They keep their markup percentages lower to attract price-sensitive customers.
Competition:
Competitive Markets: In highly competitive markets, businesses may opt for lower markup percentages to stay competitive. Lower prices can attract more customers.
Niche Markets: In niche markets with fewer competitors, businesses can afford higher markup percentages due to limited alternatives for customers.
Product Lifecycle:
Introduction Stage: During product launch, businesses may set lower markup percentages to encourage initial adoption.
Maturity Stage: As products mature, businesses may increase markup percentages to maximize profits.
Cost Structure:
High Overhead Costs: Businesses with significant fixed costs (rent, salaries, etc.) may need higher markup percentages to cover expenses.
Low Variable Costs: Businesses with low variable costs (e.g., digital products) can afford lower markup percentages.
Brand Perception:
Premium Brands: Brands known for quality and prestige can command higher markup percentages.
Remember, the right markup percentage depends on your business type, industry, and overall strategy. It’s a delicate balance between profitability and customer perception.
Value Brands: Brands emphasizing affordability may keep markup percentages lower.
Target Audience:
B2B vs. B2C: Business-to-business (B2B) transactions often involve negotiated prices, affecting markup. Business-to-consumer (B2C) pricing may be more standardized.
Demographics: Understanding customer demographics helps tailor markup percentages. Luxury goods for affluent customers vs. budget-friendly items for students, for example.
Economic Conditions:
Inflation: During inflation, businesses may adjust markup percentages to maintain real profits.
Recession: In tough economic times, businesses may reduce markup percentages to stimulate sales.
How do you Culculate the markup percentage?
Certainly! Calculating the markup percentage involves determining the additional amount you want to add to the cost price of a product or service to arrive at the selling price. Here’s how you can calculate it:
Cost Price (CP): This is the original price at which you acquire or produce the product. Let’s denote it as (CP).
Selling Price (SP): This is the price at which you intend to sell the product. Let’s denote it as (SP).
Markup Amount (M): The difference between the selling price and the cost price is the markup amount: [ M = SP – CP ]
Markup Percentage (MP): To express the markup as a percentage, divide the markup amount by the cost price and multiply by 100: [ MP = \frac{M}{CP} \times 100% ]
For example, if you have a product with a cost price of $10 and you want to apply a 20% markup, the calculation would be:
So, the selling price with a 20% markup would be $12.
Remember that the markup percentage can vary based on factors like market demand, competition, and your business strategy. Adjust it accordingly to achieve your desired profit margin.
That’s a great question! I admire many professions, but one that stands out to me is chefs. Their ability to transform simple ingredients into extraordinary dishes is truly remarkable. Chefs combine creativity, precision, and passion to create culinary experiences that bring joy to people. They also work incredibly hard, often under intense pressure, to ensure every meal is perfect.
Given your interest in cooking and recipes, do you have a favorite chef or a particular cuisine you admire?
To me as chef i like to Explore all the cuisines around the world, and i admire all the chefs No specific one, but I appreciate their dedication and work.
No specific chef, but I appreciate their dedication.
Absolutely, the dedication and hard work chefs put into their craft is truly inspiring. They often work long hours, constantly innovate, and strive for perfection in every dish they create. It’s a profession that requires not just skill, but also a deep passion for food and a commitment to providing memorable dining experiences.
Since you enjoy cooking, is there a particular dish or cuisine you’re currently interested in exploring or perfecting? Maybe I can help with a recipe or some tips!
Visit our website or Facebook pages in the name of mr Delicious
Begin with a clear brand strategy before diving into design.
A well-defined strategy ensures consistency and purpose.
Lack of Differentiation:
Failing to set your brand apart from competitors leads to a generic image.
Identify your unique selling points and emphasize them.
Inconsistent Branding:
Maintain consistency across all touchpoints—logo, messaging, and visuals.
Inconsistency confuses customers and weakens brand recall.
Straying Too Far From the Origin:
Evolving is essential, but drastic shifts can alienate loyal customers.
Balance innovation with staying true to your brand’s essence.
Ignoring Proper Logo Usage:
Ensure your logo is used correctly in all contexts.
Misusing logos can dilute brand recognition.
Remember, effective branding requires thoughtful planning and a deep understanding of your company’s identity. Avoid these pitfalls to build a strong, memorable brand!
How can I create a brand style guide?
Explore
Creating a brand style guide is essential for maintaining consistency and ensuring that your brand’s identity remains cohesive across various platforms. Let’s dive into the steps to create an effective brand style guide:
Define Your Brand Identity:
Before creating the style guide, understand your brand’s mission, values, and target audience.
Craft a mission statement that encapsulates your brand’s purpose.
Develop Buyer Personas:
Create buyer personas—fictional representations of your ideal customers.
Understand their demographics, challenges, and preferences.
Elements of a Brand Style Guide:
Logos: Include full logos, secondary logos, and icons.
Color Palette: Define primary and secondary colors.
Typography: Specify font styles, sizes, and spacing.
Imagery: Set guidelines for photos, illustrations, and artwork.
Voice and Tone: Describe how your brand uses language and conveys emotion.
Design Your Brand Logo:
Create a memorable brand logo.
Establish guidelines for its placement and usage.
Choose a Brand Color Palette:
Select colors that resonate with your brand’s personality.
Define primary and secondary colors.
Select Brand Fonts:
Choose fonts that reflect your unique identity.
Specify font styles for headings, body text, and other elements.
Branded Iconography:
Pick icons that represent your niche or industry.
Ensure consistency in style and usage.
Photography Style Guidelines:
Define the visual style for photos.
Provide a library of brand-approved images.
Web-Specific Elements:
Include web-specific elements like illustrations, animations, and stickers.
Create Shareable Guidelines:
Compile all brand elements into a shareable format.
Include instructions for usage.
Don’t forget to weave your brand story throughout the guide.
Remember, a brand style guide ensures that everyone in your team communicates your brand consistently. It’s the glue that holds your brand identity together!
For more branding ideas, you can ask we will answer you.
Keep an eye on this metric to optimize your restaurant’s profitability!
What are some other operational costs to consider?
Beyond labor costs, there are several other operational expenses to consider when managing a restaurant. Here are some key ones:
Food Costs: These include the cost of ingredients, food storage, and spoilage. Regularly review supplier contracts and negotiate better prices. Implement portion control and minimize waste to optimize food costs.
Rent and Utilities: Rent or lease payments for the restaurant space, as well as utility bills (electricity, water, gas), are significant expenses. Consider energy-efficient appliances and monitor usage to reduce costs.
Marketing and Advertising: Promoting your restaurant through advertising, social media, and events requires a budget. Allocate funds for marketing campaigns and track their effectiveness.
Insurance: Restaurant insurance covers liability, property damage, workers’ compensation, and other risks. Shop around for competitive rates and ensure adequate coverage.
Equipment Maintenance and Repairs: Regular maintenance of kitchen equipment, HVAC systems, and other machinery is essential. Budget for unexpected repairs as well.
Inventory and Supplies: Track inventory levels to prevent overstocking or shortages. Efficient inventory management reduces waste and ensures freshness.
Licenses and Permits: Obtain necessary licenses (health, alcohol, business) and renew them as required. Factor in associated fees.
Credit Card Processing Fees: If you accept credit cards, be aware of transaction fees charged by payment processors.
Cleaning and Pest Control: Regular cleaning services and pest control are essential for maintaining hygiene and compliance.
Training and Development: Invest in staff training, certifications, and professional development to enhance skills and service quality.
Remember to create a detailed budget that accounts for all these costs to run a successful and profitable restaurant!.
Please follow us on Facebook page or WordPress website
Finish roasting: Remove the foil and increase the oven temperature to 200°C (390°F). Roast for an additional 20-30 minutes to get a nice, crispy exterior.
Rest and serve: Let the meat rest for about 10 minutes before carving. Serve with your favorite sides, like roasted vegetables or potatoes.
Enjoy your roasted goat meat! Do you have any specific sides or flavors you like to pair with roasted meats?
What are some alternative seasonings for goat meat?
There are many wonderful seasonings you can use to enhance the flavor of goat meat. Here are a few alternatives:
Mediterranean Style:
Lemon zest and juice: Adds a fresh, tangy flavor.
Oregano and basil: Classic Mediterranean herbs that pair well with goat.
Olive oil and garlic: A simple yet flavorful combination.
Indian Style:
Yogurt and turmeric: Tenderizes the meat and adds a beautiful color.
Garam masala: A blend of spices including cumin, coriander, and cardamom.
Ginger and garlic paste: Adds depth and warmth to the dish.
Caribbean Style:
Allspice and thyme: Common in Caribbean cooking, these spices add a unique flavor.
Scotch bonnet peppers: For a spicy kick.
Coconut milk: Adds richness and a slight sweetness.
Middle Eastern Style:
Cumin and coriander: Earthy and aromatic spices.
Sumac: Adds a tangy, lemony flavor.
Mint and parsley: Fresh herbs that brighten the dish.
African Style:
Berbere spice: A blend of chili peppers, garlic, ginger, basil, and fenugreek.
Paprika and cayenne: For a smoky and spicy flavor.
Peanut butter: Adds a rich, nutty taste.
Feel free to mix and match these seasonings to create your own unique flavor profile! Do you have a particular cuisine or flavor profile in mind that you’d like to explore further?
Steaks are most commonly made from beef, but they can also come from other animals like bison, buffalo, camel, goat, horse, kangaroo, sheep, ostrich, pigs, turkey, and deer.
There are various types of steak cuts, each with its own unique flavor and texture. Some popular cuts include:
Ribeye: Known for its rich flavor and marbling.
Sirloin: A leaner cut with a balance of flavor and tenderness.
Filet Mignon: Extremely tender and lean.
T-bone: Combines the flavors of the tenderloin and the strip steak.
Please do for me a little favour to ask your question, like and comment to grow this website or page
Do you have a favorite type of steak or a preferred way to cook it?
What’s the best way to cook a steak?
Cooking the perfect steak involves a few key steps to ensure it’s juicy, flavorful, and cooked to your liking. Here are some tips to help you achieve that:
Choose the Right Cut: Popular cuts include ribeye, sirloin, filet mignon, and T-bone. Each has its own unique flavor and texture.
Bring to Room Temperature: Take the steak out of the fridge about 30 minutes before cooking. This helps it cook more evenly.
Season Generously: Season both sides with salt and pepper. You can also add other spices or herbs to your liking.
Preheat Your Pan: Use a heavy-based frying pan or griddle and heat it until it’s very hot. This helps to sear the steak and lock in the juices.
Do you have a preferred cut or a specific way you like to season your steak?
What’s the best way to season a steak?
Seasoning a steak well can elevate its flavor significantly. Here are some tips to help you get the best results:
Basic Seasoning:
Salt: Use coarse salt like kosher or sea salt. Salt helps to enhance the natural flavors of the meat.
Pepper: Freshly ground black pepper adds a nice kick and complements the steak’s flavor.
Timing:
Before Cooking: Season the steak generously with salt and pepper at least 30 minutes before cooking. This allows the salt to penetrate the meat, enhancing its flavor and tenderness.
Just Before Cooking: If you prefer, you can season the steak just before it hits the pan or grill. This method works well too, especially if you’re short on time.
Additional Seasonings:
Garlic Powder: Adds a subtle, savory flavor.
Onion Powder: Enhances the umami taste.
Paprika: Adds a mild sweetness and a bit of color.
Herbs: Fresh or dried herbs like thyme, rosemary, or oregano can add a fragrant touch.
Marinades:
If you prefer a more complex flavor, you can marinate the steak for a few hours or overnight. Common marinade ingredients include olive oil, soy sauce, Worcestershire sauce, garlic, and herbs.
Finishing Touches:
Butter Basting: During the last minute of cooking, add a pat of butter to the pan along with some crushed garlic cloves and fresh herbs. Spoon the melted butter over the steak for added richness.
Resting: After cooking, let the steak rest for a few minutes. This allows the juices to redistribute, making the steak more flavorful and tender.
Do you have any favorite herbs or spices you like to use when seasoning your steak?
Here’s a step-by-step guide to making Chicken Aloha at home:
Ingredients:
6 boneless, skinless chicken breast halves (about 4 ounces each)
1 bottle (14 ounces) ketchup
1 can (10 3/4 ounces) condensed tomato soup, undiluted
1 medium green pepper, coarsely chopped
1/3 cup cider vinegar
1/4 cup packed brown sugar
1 teaspoon ground mustard
1 can (8 ounces) pineapple chunks, undrained
Hot cooked rice (for serving)
Instructions:
Preheat the Oven: Preheat your oven to 375°F (190°C).
Prepare the Baking Dish: Grease a 13×9-inch baking dish.
Arrange the Chicken: Place the chicken breasts in a single layer in the prepared baking dish.
Mix the Sauce: In a small bowl, combine the ketchup, tomato soup, green pepper, cider vinegar, brown sugar, and ground mustard. Stir in the undrained pineapple chunks.
Pour the Sauce: Pour the sauce mixture evenly over the chicken breasts.
Bake: Bake the chicken, uncovered, in the preheated oven for 25-35 minutes, or until the chicken reaches an internal temperature of 165°F (74°C).
Serve: Serve the Chicken Aloha over hot cooked rice.
Would you like any tips on variations or side dishes to go with this recipe?
What are some traditional Hawaiian ingredients?
Hawaiian cuisine is known for its unique blend of flavors, influenced by the diverse cultures that have settled in the islands. Here are some traditional Hawaiian ingredients that are commonly used:
Fruits:
Pineapple: A symbol of Hawaii, used in both savory and sweet dishes.
Coconut: Used in various forms, including coconut milk, coconut water, and shredded coconut.
Banana: Often used in desserts and snacks.
Mango: A popular fruit in salads, desserts, and beverages.
Papaya: Commonly eaten fresh or used in salads and smoothies.
Vegetables and Starches:
Taro: The root is used to make poi, a traditional Hawaiian staple.
Sweet Potato: Known locally as ‘uala, used in many traditional dishes.
Breadfruit: A starchy fruit that can be baked, boiled, or fried.
Seaweed: Various types, such as limu, are used in salads and as garnishes.
Proteins:
Pork: Especially in dishes like Kalua pig, which is traditionally cooked in an underground oven called an imu.
Chicken: Used in many dishes, including Huli Huli chicken and Chicken Long Rice.
Fish: Fresh fish like ahi (tuna), mahi-mahi, and snapper are staples in Hawaiian cuisine.
Spam: A popular ingredient in local dishes like Spam musubi.
Other Ingredients:
Macadamia Nuts: Used in both savory and sweet dishes.
Hawaiian Salt: Also known as alaea salt, used for seasoning and preserving.
Ginger and Turmeric: Commonly used for their flavor and health benefits.
Sugar Cane: Used in various forms, including as a sweetener and in beverages.
Would you like to explore any specific Hawaiian recipes or dishes using these ingredients?
Sent by you:
Tell me more about the origin of Chicken Aloha.
Sent by Copilot:
Chicken Aloha is a dish that reflects the fusion of flavors and culinary traditions found in Hawaii. While the exact origin of Chicken Aloha isn’t well-documented, it is inspired by the broader Hawaiian cuisine, which is a melting pot of influences from Polynesian, Asian, and American cultures.
Culinary Fusion: Over time, Hawaiian cuisine evolved to incorporate ingredients and cooking techniques from various cultures. The use of pineapple, for instance, is a nod to the tropical fruits abundant in Hawaii, while the sweet and tangy sauce reflects Asian culinary influences.
Chicken Aloha:
Chicken Aloha typically features chicken cooked with a sweet and tangy sauce made from ingredients like pineapple, brown sugar, and vinegar. This combination of flavors is characteristic of Hawaiian cuisine, which often balances sweet, savory, and tangy elements.
Would you like to know more about other Hawaiian dishes or perhaps some tips on how to enhance the flavors in Chicken Aloha?
If you like our recipes follow us on our Facebook page mr delicious recipes
Sure, here’s a step-by-step recipe for making Mongolian Chicken:
Ingredients:
1 ¼ pounds boneless, skinless chicken breast (thinly sliced)
¼ cup cornstarch (divided use, +2 teaspoons)
3 tablespoons vegetable oil
1 ½ teaspoons minced garlic
1 teaspoon minced ginger
1 teaspoon toasted sesame oil
½ cup low sodium soy sauce
⅓ cup water
½ cup dark brown sugar
½ cup green onions (cut into 1-inch pieces)
Salt and pepper to taste
Instructions:
Prepare the Chicken:
Thinly slice the chicken breast.
In a bowl, toss the chicken slices with ¼ cup of cornstarch until they are evenly coated.
Cook the Chicken:
Heat 3 tablespoons of vegetable oil in a large pan or wok over medium-high heat.
Add the chicken slices in a single layer and cook until they are golden brown and crispy on the edges. This should take about 3-4 minutes per side. Remove the chicken from the pan and set aside.
Make the Sauce:
In the same pan, add the minced garlic and ginger. Sauté for about 30 seconds until fragrant.
Add the soy sauce, water, brown sugar, and sesame oil. Stir to combine and bring the mixture to a simmer.
Thicken the Sauce:
In a small bowl, mix 2 teaspoons of cornstarch with 2 tablespoons of water to create a slurry.
Slowly pour the slurry into the simmering sauce, stirring constantly until the sauce thickens.
Combine and Serve:
Return the cooked chicken to the pan and toss to coat it evenly with the sauce.
Add the green onions and cook for another 1-2 minutes until they are slightly tender.
Season with salt and pepper to taste.
Serve:
Serve the Mongolian Chicken over steamed rice or noodles. Enjoy!
This dish is perfect for a quick and flavorful meal.
I’d like more vegetarian recipes!
Great! Here are a few vegetarian recipes that you might enjoy:
1. Vegetarian Chili
Ingredients:
2 tablespoons olive oil
1 onion, chopped
2 cloves garlic, minced
1 bell pepper, chopped
2 carrots, chopped
1 zucchini, chopped
1 can black beans, drained and rinsed
1 can kidney beans, drained and rinsed
1 can diced tomatoes
1 cup vegetable broth
2 tablespoons chili powder
1 teaspoon cumin
Salt and pepper to taste
Instructions:
Heat the olive oil in a large pot over medium heat. Add the onion and garlic, and sauté until softened.
Add the bell pepper, carrots, and zucchini. Cook for about 5 minutes until the vegetables are tender.
Stir in the black beans, kidney beans, diced tomatoes, and vegetable broth.
Add the chili powder, cumin, salt, and pepper. Bring to a boil, then reduce heat and simmer for 20-30 minutes.
Serve hot, garnished with your favorite toppings like avocado, cheese, or sour cream.
2. Stuffed Bell Peppers
Ingredients:
4 bell peppers
1 cup cooked quinoa
1 can black beans, drained and rinsed
1 cup corn kernels
1 cup diced tomatoes
1 teaspoon cumin
1 teaspoon chili powder
Salt and pepper to taste
1 cup shredded cheese (optional)
Instructions:
Preheat your oven to 375°F (190°C).
Cut the tops off the bell peppers and remove the seeds.
In a large bowl, mix the cooked quinoa, black beans, corn, diced tomatoes, cumin, chili powder, salt, and pepper.
Stuff the bell peppers with the quinoa mixture and place them in a baking dish.
If using, sprinkle the shredded cheese on top of the stuffed peppers.
Cover the dish with foil and bake for 30 minutes. Remove the foil and bake for an additional 10 minutes until the peppers are tender and the cheese is melted.
These recipes are not only delicious but also packed with nutrients. Enjoy experimenting with them in your kitchen!
3. Vegetarian Stir-Fry
Ingredients:
2 tablespoons vegetable oil
1 onion, sliced
2 cloves garlic, minced
1 bell pepper, sliced
1 cup broccoli florets
1 cup snap peas
1 carrot, sliced
1 cup mushrooms, sliced
2 tablespoons soy sauce
1 tablespoon hoisin sauce
1 teaspoon sesame oil
Cooked rice or noodles for serving
Instructions:
Heat the vegetable oil in a large pan or wok over medium-high heat.
Add the onion and garlic, and sauté for 2-3 minutes until fragrant.
Add the bell pepper, broccoli, snap peas, carrot, and mushrooms. Stir-fry for about 5-7 minutes until the vegetables are tender-crisp.
Stir in the soy sauce, hoisin sauce, and sesame oil. Cook for another 2 minutes until everything is well coated.
Serve the stir-fry over cooked rice or noodles.
I’d like a dessert recipe!
Sent by Copilot:
Explore
Sure! Here’s a delicious and easy dessert recipe for Chocolate Lava Cake:
Ingredients:
1/2 cup unsalted butter (plus extra for greasing)
4 ounces bittersweet chocolate (chopped)
2 eggs
2 egg yolks
1/4 cup granulated sugar
1/8 teaspoon salt
2 tablespoons all-purpose flour
Powdered sugar (for dusting)
Vanilla ice cream (optional, for serving)
Instructions:
Preheat the Oven:
Preheat your oven to 425°F (220°C). Grease four 6-ounce ramekins with butter and place them on a baking sheet.
Melt the Chocolate and Butter:
In a microwave-safe bowl, combine the chopped chocolate and butter. Microwave in 30-second intervals, stirring after each, until the mixture is smooth and fully melted. Let it cool slightly.
Prepare the Batter:
In a separate bowl, whisk together the eggs, egg yolks, granulated sugar, and salt until thick and pale.
Gradually add the melted chocolate mixture to the egg mixture, stirring constantly.
Sift the flour over the batter and gently fold it in until just combined.
Fill the Ramekins:
Divide the batter evenly among the prepared ramekins.
Bake:
Bake for 12-14 minutes, or until the edges are set but the centers are still soft. The tops should be puffed and slightly cracked.
Serve:
Let the cakes cool in the ramekins for 1 minute. Then, run a knife around the edges to loosen and invert each cake onto a plate.
Dust with powdered sugar and serve immediately with a scoop of vanilla ice cream, if desired.
Enjoy your rich and gooey Chocolate Lava Cakes! If you have any other preferences or need more recipes, feel free to let me know.
Mix the brine ingredients in a large bowl until the salt and seasoning are fully dissolved.
Submerge the chicken pieces in the brine and refrigerate for at least 2 hours. This step ensures the chicken stays moist and flavorful.
Preparing the Seasoning:
Combine all the seasoning ingredients in a large sealable container or a Ziploc bag.
Shake the container vigorously for about 30 seconds to ensure all ingredients are well mixed.
Marinating the Chicken:
Remove the chicken from the brine, rinse, and blot dry with paper towels.
Baste each piece of chicken evenly with canola oil.
Sprinkle the prepared seasoning mixture evenly over the chicken pieces. Let the chicken rest for 20 minutes to absorb the flavors.
Grilling the Chicken:
For Boneless Chicken:
Preheat your indoor grill to medium-high heat.
Grill the chicken until seared on one side, then turn over and repeat until the chicken is cooked through and juices run clear.
For Bone-In Chicken:
Preheat your indoor grill to medium-high heat.
Grill the chicken until seared on one side, then turn over and repeat until seared but not fully cooked.
Transfer the chicken to a baking pan with a rack.
Bake in a preheated oven at 350°F (175°C) for 20 minutes, turn the chicken over, and bake for another 20 minutes.
Serving:
Let the chicken rest for a few minutes before serving to allow the juices to redistribute.
Serve with your favorite sides like coleslaw, green beans, or corn.
Enjoy your delicious grilled Kentucky chicken! If you have any specific preferences or need further tips, feel free to ask. Happy cooking! 🍗
Tips to make the skin extra crispy?
Absolutely, Here are some tips to make the skin on your grilled Kentucky chicken extra crispy:
Dry the Chicken Thoroughly:
After brining, make sure to pat the chicken dry with paper towels. Moisture on the skin can prevent it from getting crispy.
Use Baking Powder:
Mix a small amount of baking powder (not baking soda) into your seasoning mix. Baking powder helps to draw moisture out of the skin, making it crispier.
Air Dry in the Fridge:
After seasoning, let the chicken air dry in the fridge for a few hours or overnight. This helps to dry out the skin further.
High Heat:
Start grilling the chicken on high heat to sear the skin quickly. This initial high heat helps to render the fat and crisp up the skin.
Indirect Heat:
After searing, move the chicken to a cooler part of the grill to cook through without burning the skin. This method ensures the skin stays crispy while the meat cooks evenly.
Oil the Grill Grates:
Make sure your grill grates are well-oiled to prevent sticking and tearing of the skin.
Avoid Overcrowding:
Give each piece of chicken enough space on the grill. Overcrowding can cause steaming, which prevents the skin from getting crispy.
Finish in the Oven:
If you’re using bone-in chicken, after grilling, finish cooking in a preheated oven at 400°F (200°C) for a few minutes to ensure the skin is extra crispy.
Rest Before Serving:
Let the chicken rest for a few minutes after grilling. This allows the juices to redistribute and the skin to stay crispy.
By following these tips, you should achieve beautifully crispy skin on your grilled Kentucky chicken. Enjoy your cooking! 🍗🔥
If you have any other questions or need more tips, feel free to ask!
What’s the best way to season grilled chicken?
Seasoning grilled chicken can really elevate its flavor and make it a standout dish. Here are some tips and popular seasoning ideas to help you achieve delicious results:
Tips for Seasoning Grilled Chicken:
Start with a Good Base:
Salt and Pepper: Always start with a base of salt and pepper. Salt enhances the natural flavors of the chicken, while pepper adds a bit of heat.
Dry Rubs: Combine your favorite spices and herbs to create a dry rub. Apply it generously to the chicken and let it sit for at least 30 minutes before grilling.
Marinades: Marinate the chicken in a mixture of oil, acid (like lemon juice or vinegar), and seasonings for at least 1 hour or overnight for deeper flavor penetration.
Let it Rest:
After applying the seasoning, let the chicken rest at room temperature for about 30 minutes before grilling. This helps the flavors to meld and the chicken to cook more evenly.
Popular Seasoning Ideas:
Classic BBQ:
Ingredients: Brown sugar, smoked paprika, onion powder, garlic powder, salt, and pepper.
Experiment with Herbs: Fresh herbs like rosemary, thyme, and parsley can add a burst of flavor.
Balance Flavors: Combine sweet, salty, spicy, and tangy elements for a well-rounded taste.
Proper Cooking: Ensure the chicken is cooked to an internal temperature of 165°F (74°C) for safety.
By following these tips and experimenting with different seasonings, you can create a variety of delicious grilled chicken dishes. Enjoy your cooking, with chef Geoffrey! 🍗🔥
If you have any specific preferences or need more detailed recipes, feel free to ask! Or Email us on Facebook page or WordPress.
An Iced Americano is a refreshing coffee drink made with espresso, chilled water, and ice. Here’s how you can make it at home:
Ingredients:
Espresso: You can use any roast (dark, medium, or light/blonde) as long as you brew it as espresso. Blonde espresso beans work well, but dark roast is traditional.
Water: Use cold filtered water for better flavor.
Ice: Preferably made from filtered water to prevent dilution.
Instructions:
Prepare two shots (60ml) of espresso using an espresso machine or a Moka pot.
While the espresso is pouring, fill a tall glass with ice cubes.
Making a hearty Irish beef stew is a delightful culinary adventure. Here’s a step-by-step guide to create a comforting bowl of goodness:
Brown the Beef:
Heat 1 tablespoon of vegetable oil in a large saucepan over high heat.
Cut 1 kg (about 2.2 lbs) of braising steak into 2.5 cm (1 inch) chunks.
Brown the beef in batches, ensuring the pan isn’t too full. Set aside on a plate.
Sauté the Vegetables:
While the beef is frying, peel and chop:
2 onions
4 large carrots
3 celery stalks
In the same saucepan, heat the remaining oil and sauté the onion, celery, and carrot for 4–5 minutes until softened. Scrape any flavorful bits from the pan.
Combine Beef and Vegetables:
Mix the browned beef with the sautéed vegetables.
Take the pan off the heat and transfer the meat and veggies to a large ovenproof dish.
Add Stock and Potatoes:
Pour 1 liter (1¾ pints) of beef stock (made from stock cubes) over the meat and vegetables.
Peel and slice 900g (about 2 lbs) of potatoes into ½ cm (¼ inch) thick slices.
Arrange the potato slices over the top of the beef.
Finishing Touches:
Dot 25g (1 oz) of unsalted butter over the potatoes.
Cover the dish tightly with foil.
Bake at 200°C (180°C Fan/Gas 6) for 1 hour.
Remove the foil and bake for an additional 15 minutes until the potatoes are crisp and golden-brown.
Serve:
Ladle the stew into deep bowls and enjoy the rich flavors of this classic Irish dish!
Remember, the secret ingredient is patience—the oven will work its magic! If you prefer a slow cooker version, I can provide that too!
Guinness Beef Stew
Here’s a delightful Guinness Beef Stew recipe that will warm your heart and impress your guests.
Ingredients:
2 tbsp vegetable oil
1 kg (2.2 lbs) braising steak, cut into 2.5 cm (1 in) chunks
2 onions
3 celery stalks
4 large carrots
1 liter (1¾ pints) beef stock (from stock cubes)
900g (2 lbs) potatoes
25g (1 oz) unsalted butter
Sea salt and freshly ground black pepper
Instructions:
Preheat the oven to 200°C (180°C Fan/Gas 6).
Brown the beef in batches in a large saucepan with 1 tablespoon of oil. Set aside on a plate.
In the same saucepan, sauté the chopped onions, celery, and carrots for 4–5 minutes until softened. Scrape any flavorful bits from the pan.
Mix the browned beef with the sautéed vegetables and transfer to a large ovenproof dish.
Pour the beef stock over the meat and veggies.
Peel and slice the potatoes into ½ cm (¼ in) thick slices. Arrange them over the top of the beef.
Dot the butter over the potatoes, then cover tightly with foil.
Bake for 1 hour, remove the foil, and bake for an additional 15 minutes until the potatoes are crisp and golden-brown.
Serve in deep bowls and savor the rich flavors!
Remember, the secret ingredient is patience—the oven will work its magic! If you prefer a slow cooker version, I can provide that too!
Enjoy your hearty stew!
I’doLoveThe Slow CookerVersion !
Here’s a cozy slow cooker version of Guinness Beef Stew that will fill your home with delightful aromas.
Ingredients:
2 tbsp vegetable oil
1 kg (2.2 lbs) braising steak, cut into 2.5 cm (1 in) chunks
2 onions, chopped
3 celery stalks, sliced
4 large carrots, peeled and sliced
1 liter (1¾ pints) beef stock (from stock cubes)
900g (2 lbs) potatoes, peeled and cubed
25g (1 oz) unsalted butter
Salt and pepper, to taste
Instructions:
Heat the vegetable oil in a large skillet over medium-high heat. Brown the beef chunks in batches until nicely seared. Transfer the beef to your slow cooker.
In the same skillet, sauté the chopped onions, celery, and carrots for about 5 minutes until softened. Add them to the slow cooker.
Pour the beef stock over the vegetables and beef.
Add the cubed potatoes to the slow cooker.
Season with salt and pepper.
Cover the slow cooker and cook on low for 7–8 hours or until the beef is tender and the flavors meld together.
Just before serving, dot the top with unsalted butter for extra richness.
Ladle into bowls and enjoy this hearty Irish stew!
Remember, the slow cooker does all the work while you relax!
If you have any other requests or need more recipes, feel free to ask!
Click in the link below to get more recipes or just follow our page on Facebook < mr delicious recipe >
This Italian margarita recipe is a fun twist on everyone’s favorite tequila-based cocktail.
Dreaming of an Italian summer? Toast to your travel goals, and raise a glass filled to the brim with a refreshing Italian margarita. Made with fresh squeezed lime juice, Triple Sec and your favorite brand of tequila, this recipe gives the classic margarita an Italian remix by adding a splash of amaretto.
Amaretto’s subtle notes of almond and cherry balance out the tang of the lime juice, similar to an amaretto sour. This drink will make you feel like you’re lounging the day away under the Tuscan sun or along the pristine Amalfi Coast.
Despite its name and excellent ability to pair with your favorite Italian recipes, the Italian margarita is not Italian and does not come from Italy (so don’t book your flight just yet). In fact, this unique cocktail is believed to have been created by California mixologists looking for fresh new ways to shake up the traditional fresh lime margarita recipe.
Ingredients for an Italian Margarita
Tequila: The best tequila for a margarita is your favorite tequila. Blanco tequila is most common for an Italian margarita, but reposado tequila is also a great option.
Triple Sec: Most margaritas are made with this orange-flavored liqueur. You can always go a bit more top-shelf with higher-end orange liqueurs like Cointreau or Grand Mariner (here’s everything you need to know between Cointreau vs. Triple Sec vs. Grand Marnier). Italy is Europe’s second-top producer of oranges (Spain is first), so it’s no surprise that orange is a common flavor in Italian cooking, baking and mixology.
Lime juice: The ingredient that gives this cocktail the same signature tartness of a classic margarita. Always opt for freshly squeezed lime juice, when possible, for the best taste.
Amaretto: Amaretto is an Italian liqueur with almond and cherry flavor. It’s popular in Italian baking, cocktails, and confections. Here’s a homemade amaretto recipe if you want to get super DIY about it. And if you end up with any left over, try these other amaretto cocktails.
Cherries: Fresh or maraschino cherries are the perfect garnish for this sweet, tangy cocktail. The deeply hued Luxardo cherries work here, too.
Salt: Rimming a margarita glass with salt counters the bitterness in the drink while pulling forward the sweeter notes. You can, of course, skip the salt if you prefer.
Directions
Step 1: Prepare your glass
Moisten the rim of one cocktail glass with a lime wedge. If desired, sprinkle salt on a plate, then dip the rim in salt. Fill the glass with ice, and set aside.
In an empty cocktail shaker, combine the tequila, Triple Sec, lime juice, and amaretto. Fill the shaker with ice, and cover. Shake until frost forms on the outside of the shaker, 15 to 20 seconds. Strain into the prepared glass. Garnish with a lime wedge and cherries. Cheers!
Editor’s Tip: If you don’t own a cocktail shaker, perhaps it’s time to invest. Don’t miss our guide to cocktail shakers for your home bar.
Italian Margarita Variations
Add orange: In some versions of this drink, a splash of freshly squeezed orange juice is added to the cocktail. If you love oranges, feel free to experiment.
Garnish with basil: Make this recipe extra Italian by garnishing with a few fresh basil leaves. The fragrance and flavor of basil complements the other flavors in this cocktail beautifully. Or try one of these other cocktail garnish ideas.
Try with limoncello: If you prefer the taste of lemon over orange, you could swap the Triple Sec for an equal amount of limoncello. It’s, a popular lemon-flavored Italian liqueur that would be perfect in this easy Italian margarita recipe.
Can you make an Italian margarita ahead of time?
Yes! You can make a pitcher of Italian margaritas ahead of time, just as you would make a pitcher of margaritas or sangria. To make a big batch in advance, use this guide on how to make a pitcher of margaritas.
Italian Margarita Tips
Can I make a blended Italian margarita?
Sure! Make a blended version of this easy cocktail, just as you would make any blended frozen margarita. Simply rim the glass as directed with salt, then combine all of the ingredients in a high-powered blender. Puree until smooth, then pour into your glass. Garnish as desired, and sip away!
Can I make a nonalcoholic Italian margarita?
Absolutely! If you want to make a virgin Italian margarita, simply omit the tequila from the recipe. Then, swap the Triple Sec out for freshly squeezed orange juice, and opt for an equal amount of a nonalcoholic amaretto substitute (like Lyre’s Non-Alcoholic Amaretti). A teaspoon of almond extract may also be used, but know that most are made with alcohol, so use this option at your own discretion.
Moisten rim of 1 cocktail glass with lime wedge. If desired, sprinkle salt on a plate; dip rim in salt. Fill glass with ice.In an empty cocktail shaker, combine tequila, Triple Sec, lime juice and amaretto. Fill with ice; cover and shake until frost forms on the outside of the shaker, 15-20 seconds. Strain into prepared glass. Garnish with lime wedge and, if desired, cherries.
Vodka: This is the base of the drink, so you want to use a high-quality vodka for a delicious final product.
Sugar: The mix of brown sugar and cane sugar provides the sweetness to balance out the vodka for a smooth finish.
Almond extract: Almond is a key flavor in amaretto. A little goes a long way.
Directions
Step 1: Make sugar syrup
In a small saucepan, bring cane sugar, brown sugar and water to a boil. Reduce heat and allow to simmer, uncovered, for 10 minutes. Cool liquid completely.
Step 2: Mix ingredients and store
Once cooled, transfer sugar syrup to a 1-quart glass jar. Add remaining ingredients—vodka, almond extract and vanilla extract—and shake well. Cover with a lid and let stand in a dark place for one to three days to allow flavors to blend.
When it’s ready, pour it into glass bottles and label them with the date. Seal tightly and store in a cool, dry place for up to two months.
Amaretto Recipe Variations
Change vanillas: Use the vanilla bean instead of vanilla extract for a slightly different flavor.
Add spice: Flavor the amaretto with some whole cloves or star anise for a more herbaceous final product.
How to Store Amaretto
For the best quality and longest storage, store your amaretto in a cool, dark place. It doesn’t need to be stored in the fridge, making it a great centerpiece on a bar cart.
This homemade amaretto recipe lasts for up to two months when stored properly. Make sure to store it somewhere cool and dark for the longest lasting results.
In a small saucepan bring sugar, water and brown sugar to a boil. Reduce heat; simmer, uncovered, for 10 minutes. Cool completely. Transfer to a 1-qt. glass jar. Add remaining ingredients; shake well. Cover and let stand for 1-3 days to allow flavors to blend.
Upgrade a classic lime margarita with this watermelon margarita recipe. The pretty, pink drink uses a sugared rim and blended watermelon to give the drink a sweet twist.
Hear us out. The watermelon margarita is the drink of summer. We know, we know, there are tons of tropical rum cocktails and Mexican drinks that transport you to the vacation mindset, but the watermelon marg is a sweet, frozen delight that’s hard to match. It’s not quite tart like a paloma, and it’s just a bit, well, more than a classic margarita with lime. Make a whole pitcher, and enjoy the pretty pink drink while you’re grilling skirt steak tacos and Mexican street corn.
Ingredients for a Watermelon Margarita
Watermelon: Be sure to buy seedless watermelon for this recipe so you don’t have to spit out the seeds after each sip. You’ll need 8 cups of 1-inch cubes, so half of a large watermelon should be enough. Use any leftovers to cut into wedges for a cocktail garnish!
Tequila: It wouldn’t be a marg without the tequila. Our watermelon margarita recipe is a fruit-forward cocktail, so opt for blanco tequila over the more golden añejo tequilas. Here are some of the best tequilas for margaritas.
Triple Sec: You’ll see orange liqueur in most margarita recipes, and this one is no different. We offer some suggestions for swaps below if you don’t have a bottle on your bar cart.
Lime juice: Still in line with a classic margarita, acidic lime juice balances the sweetness in our watermelon margarita recipe. Keep things fresh by squeezing the lime juice by hand instead of using the bottled store-bought juice.
Directions
Step 1: Rim the glasses
Cut one lime into 12 wedges to reserve for garnishes. Cut the other lime into slices to moisten the rim of the cocktail glasses. Pour sugar into a dish, and dip the lime-moistened rims in the sugar.
Step 2: Blend the ingredients
Place half the watermelon (4 cups) in a blender, and process it until the cubes are pureed. It should yield about 3 cups of pureed watermelon.
Add half of the ice, tequila, Triple Sec and lime juice. If desired, add sugar to taste. Cover and process until blended.
Step 3: Serve
Serve the watermelon margaritas in rimmed glasses, and garnish with lime wedges. Once the blender is emptied, blend the other half of the ingredients, and serve.
Recipe Variations
Put it on the rocks: Because watermelon can’t be juiced like a citrus, this cocktail will have a bit of texture to it from the blended flesh of the watermelon. If you prefer drinks with a smoother pour, blend the watermelon on its own, then pass it through a fine mesh strainer or cheesecloth. Then, pour the strained juice into a cocktail shaker with ice and the rest of the ingredients, and shake until chilled, about 20 seconds.
Use a salt rim: The sugar rim keeps things sweet, but if you like a sprinkle of salt on your fresh watermelon slices, use a salt rim on watermelon margaritas for the same effect.
Give it an herbal twist: Watermelon and basil pair so well together. Gently muddle a few fresh basil leaves in the bottom of the glass to release the oils, then pour the watermelon margarita over the leaves. Or make a basil-infused simple syrup to swap for the sugar. Use about 3 ounces, or more or less depending on the level of sweetness you prefer.
Can you store watermelon margaritas?
If you haven’t made the frozen version, yes. An on-the-rocks margarita will last in an airtight container in the fridge for up to three days, as long as there are no ice cubes in the glass or pitcher. We don’t recommend storing the frozen version of this drink because it will taste watered down.
Watermelon Margarita Tips
How do you make this a skinny watermelon margarita?
To cut the calories or refined sugars in this margarita, there are a couple changes you can make. Use fresh-squeezed, no-sugar-added orange juice instead of the orange liqueur, and skip the optional added sugar in the drink.
What can I use if I don’t have Triple Sec?
Triple Sec is an orange liqueur that can be replaced with any other brand of orange liqueur. Cointreau and Grand Marnier would be the next best swaps—just note that the different liqueurs vary in flavor, which will make the margarita take on sweeter or warmer tastes.
Cut 1 lime into 12 wedges; reserve for garnishes. If desired, coat the rim of each glass with sugar: Cut remaining lime into wedges. Using these wedges, moisten the rims of 12 margarita or cocktail glasses. Sprinkle sugar on a plate; hold each glass upside down and dip rim into sugar. Discard remaining sugar.
Place half the watermelon in a blender; cover and process until pureed (this should yield 3 cups). Add half each of the following: ice cubes, tequila, triple sec and lime juice. If desired, add sugar to taste. Cover and process until blended.
Serve in prepared glasses. Repeat with remaining ingredients. Garnish with reserved lime wedges.
Cocktail lore tells us Ted Pizio, a bartender at Confetti Bar in Florida, created this iconic cocktail. Back in the mid-’80s, peach schnapps had recently been introduced to the market. Ted took up the challenge to sell as much of the liqueur as possible, creating a cocktail that combined peach schnapps with vodka, orange, cranberry and pineapple juice.
As for the grown up name?
Anticipating its popularity with spring breakers, Pizio christened it after the two reasons he believed tourists flocked to the area. Some cocktail historians note there are recipes of this very drink in cocktail books from the early 1980s, made by combining two other iconic drinks from the decade: the fuzzy navel and the Cape Codder.
Sex on the Beach Ingredients
Peach schnapps: This peach-flavored liqueur adds a sweet, bright fruit flavor. Use peach puree or peach juice for a fresher, more modern take.
Orange juice: Go freshly squeezed or reach for a carton of your favorite orange juice.
Pineapple juice: Adding pineapple juice brings a vibrant, refreshing tropical twist.
Vodka: No need for anything fancy here. Any good quality vodka brand works: You won’t really taste it over the fruit juice and schnapps, so no need to use top-shelf.
Cranberry juice: The cranberry juice float gives this cocktail its sunset-esque look and provides a refreshing tartness to counterpoint the schnapps, orange juice and pineapple.
Garnishes: Top your sex on the beach drink with a maraschino cherry and orange wedge for added color and vacation vibes.
Directions
Step 1: Build the cocktail
Fill a highball or Collins glass with ice. Pour in peach schnapps, orange juice, pineapple juice and vodka. Stir well to combine. Top with cranberry juice and garnish.
Sex on the Beach Variations
Make it frozen: Blend the ingredients with 1 cup of crushed ice for an effortless slushy take on the ’80s cocktail classic.
Add coconut: Boost the tropical flavors by adding coconut liqueur, coconut rum or coconut-flavored vodka to the recipe.
Use melon liqueur: Swap the peach schnapps for a melon liqueur like Midori.
Can you make sex on the beach cocktails ahead of time?
Mix up a pitcher of sex on the beach up to three days in advance or up to one day if using fresh fruit juices. Avoid pre-batching drinks with ice so you don’t have to worry about diluting the cocktail.
Sex on the Beach Tips
What’s the best glass to serve a sex on the beach?
As a long drink, the sex on the beach is served in a Collins or highball glass. Other types of cocktail glasses you can use are hurricane glasses (ideal for leaning into the tropical appeal) and Mason jars.
What can you serve with a sex on the beach?
Thanks to its fun, fruity profile, the sex on the beach is excellent with all things seafood: Shrimp cocktail, grilled tilapia and South Seas mango halibut.
Crab recipes like crab cakes, crab dip and crab rangoons are fabulous washed down with a sex on the beach thanks to crab meat’s subtle natural sweetness. Chicken is stellar, too, especially recipes with zesty bold marinades like jerk chicken or five-spice chicken wings. For another non-seafood option, you can’t go wrong with pulled pork sliders.
Fill Collins glass with ice. Top with peach schnapps, orange juice, pineapple juice and vodka. Stir to combine; top with cranberry juice. Garnish with orange wedge and maraschino cherry.
If your mouth isn’t watering yet imagining soft, perfectly toasted, wood-fired flatbread coated with aromatic olive oil and Za’atar paste, maybe it will be from reading about these dishes that showcase the herb blend.
Check out these options for using Za’atar in your kitchen to take a visit to the fragrant markets and roadside stands of the Arab deserts.
Za’atar Roasted Chicken
Herby roasted chicken can be delicious any night of the week. Preparing chicken with a focus on Za’atar and other Middle Eastern flavors, like almonds, paprika, and lemon, can delight anyone at your table. Here’s how to make it.
Ingredients
Marinade
2 lemons, juiced
2/3 cup olive oil
1 Tbsp ground sumac
1 Tbsp cinnamon
1 tsp paprika
7 large cloves garlic
1 medium red onion, sliced
1/2 large lemon, sliced
Chicken
4 skin-on chicken breasts
Salt and pepper
3 Tbsp Za’atar spice blend, divided
2 Tbsp slivered almonds
1 Tbsp toasted pine nuts
1/2 cup chopped parsley
Instructions
Combine the marinade ingredients in a bowl.
Place chicken in a baking dish and pour marinade over the chicken, working it under the skin.
Place in the refrigerator for 4 hours.
Preheat the oven to 400°F.
Sprinkle the chicken with more sumac and paprika and 1 tbsp Za’atar. Work some Za’atar under the chicken skin. Reserve 1 tbsp of Za’atar for later.
Bake chicken for 30-35 minutes, ensuring it reaches a safe internal temperature..
Sprinkle chicken with the remaining Za’atar, sumac, nuts, and chopped parsley and enjoy.
Serve with a side of rice pilaf and roasted eggplants and peppers.
Za’atar Flatbread (Lebanese Manakish)
For people who grew up in the Middle East, flatbread with Za’atar is a cherished comfort food. Fortunately, it’s easy to make and enjoy at home!
Ingredients
1 cup warm water (~110°F)
1 Tbsp sugar
7 grams active dry yeast
3 cups all-purpose flour
1 tsp salt
1/3 cup plain yogurt or neutral cooking oil
1/2 cup Za’atar spice blend
1/2 cup Olive oil
Instructions
Whisk the yeast into the sugar and cup of warm water. Allow to stand for 5-10 minutes until the yeast wakes up and develops a foamy “head”.
While you wait, combine the flour and salt in a large stainless bowl.
Add the yogurt (or optional oil) and the yeast mixture to the flour bowl and mix into a shaggy dough.
Knead the dough by hand for about 10 minutes until the dough becomes elastic. If it’s too wet, add a tablespoon of flour at a time until it loses its stickiness. If it’s too dry, add water by single tablespoons until it develops a soft, springy texture.
Form the dough into a ball, coat lightly with oil, and return it back to the bowl. Cover with plastic wrap or a clean towel and let rise for one hour. The dough should double in size.
This finished dough is ready to make into Manakish.
To Make Manakish
Preheat oven to the highest temperature, usually around 500°F, and preheat an upside down sheet pan or pizza stone.
Divide the dough into roughly five equal pieces.
Roll dough out to approximately 1/4 inch (1-2 cm) thickness. Make depressions in the dough with your fingers.
Mix the Za’atar and olive oil in a small bowl. Spread onto the rolled-out bread dough.
Transfer the dough onto the pre-heated sheet pan or pizza stone and bake for 5-7 minutes, until golden brown on the edges.
Serve alone or as a side with a meal.
Bring World Flavors Like Za’atar into Your Kitchen
If you’re an aspiring culinarian, exploring the flavors of world kitchens can be one of the greatest joys in life. Even more exciting is when chefs blend the traditions, textures, and savory delights of several cultures in fusion cuisine.
If you’ve always dreamed of being a food-creative chef, why not explore how to use all the ingredients.
If you’re interested in exploring how to use the ingredients in your kitchen follow us on Facebook page Mr delicious recipe or use our link below
Some say To-May-To, others say To-Mah-To, and there’s room in our hearts for both. But if you call a tomato a vegetable, you might get some rotten ones thrown at you. “But wait!” you’ll surely exclaim. “People put tomatoes in salad, I take them off my burgers because I hate vegetables.” Well, it pains us to break the truth to you; those tomatoes are fruits! And it doesn’t just stop there. Dozens of foods commonly considered vegetables are actually fruits, bananas are actually berries, and the moon is made of cheese! Okay, we made that last one up, but this is all confusing enough to demand some levity.
Do you really know the difference between a fruit and a vegetable? It turns out that the definitions aren’t as clear as any of us might think. Read on to join us in a fact-finding mission, where we’ll get down to the bottom of this botanical blasphemy.
Fruits vs. Vegetables: What Makes a Fruit a Fruit and a Vegetable a Vegetable?
At first glance, this question might prompt you to respond, ‘Of course I know what a fruit is, compared to a vegetable.’ But it might surprise you to learn that how we often think of fruits and vegetables isn’t exactly how they are truly defined.
The confusion comes down to this: the technical, scientific definition of fruits and vegetables doesn’t match up with how those terms are commonly used.
What Is a Fruit?
A fruit is technically an edible plant part made from a flower that ripens from a plant’s ovary. This certainly includes what we commonly think of as fruits, like cherries, apples, and grapes. But confusingly, many foods that we think of as vegetables are also technically fruits. For example, zucchini, cucumbers, tomatoes, and bell peppers are botanically fruits. And believe it or not, green beans, peas, and even grains such as corn, wheat, and rice are also fruits! Even some nuts, such as walnuts and cashews are technically considered fruits because they grow with a fleshy fruit around the seed that becomes the edible nut.
Even though we think of peppers, cucumbers, tomatoes, and eggplants as vegetables, technically, they are fruits.
What Is a Vegetable, Then?
On the other hand, vegetables are defined as edible plant foods that come from all other types of plant parts, such as stems, roots, tubers, or leaves. Familiar examples include lettuce, carrots, celery, spinach, beets, potatoes, and onions.
Lettuce is a vegetable, as the leaves are the edible part.
The edible parts of potatoes and yams are “tubers,” meaning that they are fleshy, starchy roots, while onions, garlic, and leeks are technically “modified stems”. Cruciferous vegetables, like broccoli and cauliflower, are modified flower structures. Celery and rhubarb are edible stems, and greens like basil, kale, collards, and chard are simply the leaves of the plant.
Even the Avocado!
That’s right! The all-powerful avocado is not actually a vegetable. In fact, it’s considered a large berry with a single seed!! Sorry, but the next time you spend $12 on some avocado toast, you won’t even be able to comfort yourself by saying you’re getting a serving of vegetables.
So Should You Start Calling Your Zucchini “Fruit”?
Now that you know about these definitions, should you start calling the foods that you’ve thought of all your life as vegetables “fruit”? Not really. Even though these are the technical definitions of fruits and vegetables, colloquially, most people refer to sweet, fleshy plant foods as fruits and savory plant foods as vegetables.
Botanists developed this system of classification based on the scientific characteristics of plants so that it could accurately apply to any plant on Earth. But as is often the case, lay people have their own ways of describing the world. All the people eating and cooking with fruits and vegetables tend to use a more qualitative approach.
The Supreme Court Weighs In
In Nix vs. Hedden, a fruit importer claimed that tomatoes were technically a fruit, so they weren’t required to pay a tariff that the Port Authority of New York usually levied on vegetables. The Supreme Court determined that though tomatoes were botanically a fruit, in common usage they were considered vegetables, and the tariff had to be paid.
From now on, in this article, we’ll refer to fruits and vegetables by their commonly recognized categories: fruits as sweet, fleshy foods, and vegetables as something you would likely include in a savory dish.
Do Fruits vs. Vegetables Have Different Nutrition Profiles?
All plant foods contain some combination of natural sugars and complex carbohydrates, fiber, vitamins, and minerals, as well as small amounts of proteins and fats. Brightly colored fruits and vegetables also contain potent phytonutrients, which are unique compounds that may provide disease-fighting qualities. For example, increased consumption of lycopenes in tomatoes may decrease blood lipids, blood pressure, and inflammation.
Brightly colored fruits and vegetables, like blueberries, have plant phytonutrients that may help prevent health problems.
That said, there are some general differences between fruit and vegetable nutrition.
Fruits in general contain more water, a higher sugar content, and relatively high amounts of soluble fiber. This makes them helpful digestive aids for many people. They are also often high in vitamin C, and the minerals potassium, calcium, phosphorus, and magnesium.
Vegetables, on the other hand, can be fibrous and starchy, and they are often green. Dark leafy greens in particular are high in iron, calcium, phosphorus, copper, zinc, and vitamins C, K, E, and B complex.
Dark leafy greens like lettuce, kale, spinach, and chard are full of vitamins and minerals, as well as bitter compounds that support health.
Many vegetables, especially dark, leafy greens such as dandelion greens and chard, contain plant chemicals with a bitter taste, such as flavonoids, terpenes, and glucosinolates. These bitter compounds can support digestion by increasing the flow of digestive juices and partially account for some of the health benefits of vegetables.
Maintaining Nutrition in Fruits and Vegetables During Preparation
It’s important to note that fruit and vegetable preparation can change the nutritional content significantly. For example, potatoes are high in potassium and fiber. But most of that mineral lives in the potato skin, so if you peel your potatoes, you’re missing out on them. If you boil vegetables like broccoli or green beans, you extract some of the nutrients into the cooking water, but steaming preserves most of them.
In general, the less cooked and processed your produce, the higher the concentration and quality of the nutrition. A good guideline is to only cook your fruits or vegetables as much as is absolutely necessary to get your desired texture or doneness. If possible, leave the skins intact.
Vegetables and Fruits in the Culinary World
Chefs everywhere incorporate fresh and preserved fruits and vegetables into their culinary creations. Are veggies always savory and fruits always sweet?
Fruits are of course used as dessert stars for crisps, pies, and cake fillings. But sweet fruits can also be incorporated into savory dishes to add interest and texture, as when a chef adds whole fresh berries to a spinach salad or tangy dressing. Or how about the combination of a sweet fig spread with brie and crackers on a charcuterie board? Sometimes the acidic splash of tart sweetness from fruit can elevate the salty and fatty flavors of more savory food to another level.
Mixing savory foods like cheese and salami with a dash of fruit can bring your dishes to another level.
And what about the opposite? Is fruit the only produce that’s welcome in desserts, or can vegetables play a role? It’s a little less common, but it’s still done.
Consider something like a yam pie, served at Thanksgiving dinner. Carrot cake or zucchini bread is a classic example of vegetables being served with and enhancing a dessert. Or what about sweet potato cookies?
In these examples, the more commonly savory vegetable is hidden within but creates new flavor profiles or textures to enhance your dining experience. There’s no limit on how to combine foods, only your creativity and desired flavor palette.
Study How to Use Fruits and Vegetables at Culinary School
Sometimes, what elevates the ordinary to the extraordinary is a higher level of training. No matter whether you keep them separate or mix them up in a creative blend of sweet and savory, fruits and vegetables are star players in most types of cuisine.
Avoiding common mistakes in the kitchen can significantly improve efficiency and the quality of your dishes. Here are some key mistakes to watch out for:
Given your extensive experience, you might already be aware of these, but it’s always good to have a reminder. Are there any specific areas or techniques you’re looking to improve in your kitchen operations?
Some Common Baking Mistakes
Baking can be a rewarding but precise process. Here are some common mistakes to avoid:
Argentinian Beef Stew, also known as Carbonada Criolla, is a delightful dish with a unique blend of flavors. It’s slow-cooked to perfection, bringing out the best in organic produce and tender beef morsels.
Here’s a recipe you can try:
Argentinian Beef Stew (Carbonada Criolla)
Ingredients:
1/3 cup olive oil
1 large onion, chopped
1 green pepper, chopped
2 cloves garlic, minced
1 1/2 pounds stewing beef, cut into 1-inch pieces
1 (14.5-ounce) can stewed tomatoes
2 cups beef broth
3 sweet potatoes, peeled and cubed
2 white potatoes, peeled and cubed
2 tablespoons sugar
1 large winter squash, peeled and cubed
1 cup (7 ounces) dried apricots, roughly chopped
Kosher salt and freshly ground black pepper, to taste
1 cup frozen corn
Instructions:
In a large pot, heat the olive oil and sauté the onions, green pepper, and garlic until golden and soft (about 10 minutes).
Add the stewing beef and cook on medium-high heat, turning to brown all sides.
Stir in the stewed tomatoes, beef broth, sweet potatoes, white potatoes, sugar, winter squash, raisins, and dried apricots. Lower the heat to a simmer.
Cover and simmer over low heat for 1 hour.
Taste for seasoning and adjust with salt and pepper. If the stew seems too thick, add more beef broth.
Continue cooking for about 30 minutes longer, until the beef is tender.
Finally, stir in the frozen corn and simmer for an additional 5 to 10 minutes.
Recipe Variation Ideas:
Use red or yellow peppers instead of green for added color and flavor.
Add other vegetables like cut green beans.
Fresh corn cut straight off the cob can replace frozen corn.
Consider adding raisins along with the dried apricots.
Certainly! Argentinian Beef Stew, also known as Carbonada Criolla, is a delightful dish with a unique blend of flavors. It’s slow-cooked to perfection, bringing out the best in organic produce and tender beef morsels. Here’s a recipe you can try:
Storage and Freezing:
Let the stew cool down before refrigerating or freezing it.
Store in an airtight container in the refrigerator for up to four days.
Freeze in freezer-safe zip bags or containers for up to three months, leaving 1/2-inch headspace for expansion.
Enjoy your hearty Argentinian Beef Stew! It pairs wonderfully with cornbread and a green salad. 🍲🥖🥗
For more details, you can find the recipe here. Let me know if you need any further assistance! 😊
Argentinian Beef Stew (Carbonada Criolla)
Ingredients:
1/3 cup olive oil
1 large onion, chopped
1 green pepper, chopped
2 cloves garlic, minced
1 1/2 pounds stewing beef, cut into 1-inch pieces
1 (14.5-ounce) can stewed tomatoes
2 cups beef broth
3 sweet potatoes, peeled and cubed
2 white potatoes, peeled and cubed
2 tablespoons sugar
1 large winter squash, peeled and cubed
1 cup (7 ounces) dried apricots, roughly chopped
Kosher salt and freshly ground black pepper, to taste
1 cup frozen corn
Instructions:
In a large pot, heat the olive oil and sauté the onions, green pepper, and garlic until golden and soft (about 10 minutes).
Add the stewing beef and cook on medium-high heat, turning to brown all sides.
Stir in the stewed tomatoes, beef broth, sweet potatoes, white potatoes, sugar, winter squash, raisins, and dried apricots. Lower the heat to a simmer.
Cover and simmer over low heat for 1 hour.
Taste for seasoning and adjust with salt and pepper. If the stew seems too thick, add more beef broth.
Continue cooking for about 30 minutes longer, until the beef is tender.
Finally, stir in the frozen corn and simmer for an additional 5 to 10 minutes.
For more details, you can find the recipe here. Let me know if you need any further assistance!
Recipe Variation Ideas:
Enjoy your hearty Argentinian Beef Stew! It pairs wonderfully with cornbread and a green salad. 🍲🥖🥗
Use red or yellow peppers instead of green for added color and flavor.
Add other vegetables like cut green beans.
Fresh corn cut straight off the cob can replace frozen corn.
Consider adding raisins along with the dried apricots.
Storage and Freezing:
Let the stew cool down before refrigerating or freezing it.
Store in an airtight container in the refrigerator for up to four days.
Freeze in freezer-safe zip bags or containers for up to three months, leaving 1/2-inch headspace for expansion.
Certainly! Cooking a perfect ribeye steak is all about achieving a beautiful sear on the outside while keeping the inside juicy and tender. Here are a couple of methods you can try:
Pan-Seared Ribeye Steak:
Ingredients:
Ribeye steak
Flaky sea salt
Freshly ground black pepper
Butter (about 1 3/4 oz)
2 sprigs of thyme
1 garlic clove (bashed with the skin left on)
Steps:
Remove the steak from the fridge at least half an hour before cooking to allow it to come to room temperature.
Season the steak generously with salt and pepper on both sides.
Heat a large cast-iron pan on the stove over medium-high heat.
Add the steak and cook for 2 minutes per side to brown.
Place the pan in the oven and roast for 11-14 minutes (adjust time based on desired doneness).
Immediately remove the steak from the pan and let it rest.
The reverse sear method is a fantastic technique for cooking steaks, especially thicker cuts like ribeye. Here’s how it works:
What is Reverse Searing?
Unlike the traditional searing method (where you sear the steak first and then finish it in the oven), reverse searing flips the order.
In reverse searing:
You start by slow-cooking the steak in the oven at a low temperature until it reaches the desired internal temperature.
Then, you finish it off with a quick sear in a hot pan or on the grill to develop a flavorful crust.
Steps for Reverse Searing:
Ingredients:
Ribeye steak
Salt and pepper
Olive oil or butter
Method:
Season the Steak: Season the ribeye generously with salt and pepper.
Low and Slow in the Oven:
Preheat your oven to around 250°F (120°C).
Place the seasoned steak on a wire rack over a baking sheet (to allow air circulation).
Slow-cook the steak until it reaches an internal temperature of about 10°F (5.5°C) below your desired doneness. Use a meat thermometer to check.
For medium-rare, aim for an internal temperature of 125°F (52°C).
Rest the Steak:
Remove the steak from the oven and let it rest for about 10 minutes. This allows the juices to redistribute.
Sear It Hot:
Heat a cast-iron skillet or grill over high heat.
Add a bit of olive oil or butter to the pan.
Sear the steak for about 1-2 minutes per side until you achieve a beautiful crust.
Serve and Enjoy:
Let the steak rest for a few more minutes before slicing.
Serve it up and savor the juicy, perfectly cooked ribeye!
Why Reverse Sear?
Even Cooking: Reverse searing ensures even cooking throughout the steak.
Better Control: You have better control over the internal temperature, resulting in a consistent doneness.
Crispy Crust: The final sear gives you that mouthwatering crust without overcooking the center.
Tell me more about sous-vide cooking.
Explore
Certainly! Sous vide (French for “under vacuum”) is a cooking technique where food is vacuum-sealed in bags and slowly cooked in a precisely regulated water bath. Here’s how it works:
Precision Cooking:
You seal the food (such as steak, chicken, vegetables, or eggs) in a bag.
Then, you immerse the bag in a water bath set to a specific temperature using an immersion circulator.
The circulator maintains that exact temperature, ensuring even cooking.
No Overcooking:
Unlike traditional methods, sous vide eliminates the risk of overcooking.
The water temperature equals the food’s temperature—no hotter.
Perfectly cooked results every time!
Patience Required:
It takes longer (about an hour for a steak), but the outcome is worth it.
Imagine a flawlessly cooked ribeye with no guesswork! 🥩🔥
Certainly! Dry-aging steaks is a fascinating process that enhances flavor and tenderness. Here’s what you need to know:
What Is Dry-Aging?
Dry-aging involves aging beef in controlled conditions (temperature, humidity, and airspeed) to improve its quality.
Whole sub-primals (large cuts with bones and fat caps) are aged uncovered for weeks or months.
Enzymes break down fibers, resulting in tender, flavorful meat.
Home Dry-Aging:
Professionals use sub-primals, but individual steaks at home don’t benefit much.
Blind taste tests showed no improvement within the first week of individual steak aging.
However, whole sub-primals can be aged successfully at home.
The Process:
Start with prime-grade beef (bone-in, fat-cap-intact).
Age it in various ways (temperature, humidity, and time) to find what works best.
Remember, patience and controlled conditions are key to achieving that perfect dry-aged steak! 😊
Give it a try, and bon appétit!
Give it a try, and you’ll be amazed at the results!
Remember, ribeye steaks are best cooked to at least medium-rare to allow the fat to render down and flavor the meat. Enjoy your perfectly cooked ribeye!
Effective Communication: Regularly communicate with your staff. Provide guidance, address issues, and inspire them to excel.
Create a Staff Manual: Document kitchen procedures, safety protocols, and standards. This ensures consistency and helps new team members understand expectations.
Invest in Kitchen Equipment: High-quality tools enhance efficiency and productivity. Regular maintenance is crucial.
Encourage Creativity: Foster innovation by allowing chefs to experiment with new dishes and flavors. Balance creativity with consistency.
Focus on Customer Satisfaction: Deliver exceptional dining experiences. Monitor feedback and adapt accordingly.
Cross-Train Employees: Develop a versatile team. Cross-training ensures flexibility during busy periods or staff shortages.
Invest in Staff Development: Recognize and reward success. Support their growth and provide opportunities for learning and advancement.
Remember, transitioning from a team member to a leader requires passion, teamwork, clear direction, and fair discipline. You’ve got this!
What are some cost-saving strategies for a restaurant kitchen?
Managing costs in a restaurant kitchen is crucial for profitability. Here are some effective strategies:
Identify High-Cost, Low-Profit Items: Review your menu and eliminate items that cost a lot to make but don’t sell well. Replace them with popular alternatives.
Remember, these strategies can help you save money without compromising quality or customer experience.
What about labor cost management?
Managing labor costs is essential for maintaining a healthy bottom line. Here are some strategies:
Staff Scheduling Optimization: Create efficient schedules that match labor needs with peak business hours. Use historical data to predict busy times and allocate staff accordingly.
Cross-Training: Train employees to handle multiple roles. This flexibility helps during staff shortages and reduces the need for excessive hiring.
Labor Cost Percentage Calculation:
Calculate the labor cost percentage using this formula:Labor Cost %=Total RevenueTotal Labor Cost×100
Aim for a labor cost percentage between 20% and 30%.
Monitor Overtime: Keep overtime hours in check. Overtime pay can significantly impact labor costs.
Performance Metrics and Incentives: Set performance targets and reward employees who meet or exceed them. This motivates staff and improves productivity.
Remember, effective labor cost management involves balancing quality service with financial sustainability.
How can I improve staff retention?
Improving staff retention is crucial for a successful kitchen. Here are some strategies:
Positive Work Environment: Foster a supportive, respectful atmosphere. Encourage teamwork and celebrate achievements.
Competitive Compensation: Ensure fair wages and benefits. Regularly review salaries to stay competitive in the industry.
Professional Development: Invest in training and skill development. Offer workshops, certifications, and opportunities for growth.
Recognition and Appreciation: Acknowledge hard work and dedication. Regularly praise and thank your team.
Work-Life Balance: Promote reasonable working hours and time off. Burnout affects retention.
Clear Communication: Be transparent about expectations, changes, and feedback. Listen actively to staff concerns.
Remember, happy employees are more likely to stay committed and contribute to your kitchen’s success!.
Employee retention strategies in the restaurant industry.
Employee retention is crucial for a successful restaurant. Here are effective strategies to keep your valuable staff motivated and loyal:
Understand Your Restaurant Staff: Get to know your team individually. Recognize their strengths, preferences, and aspirations. This understanding helps tailor retention efforts.
Offer Competitive Compensation:
Competitive Salaries: Pay should reflect skills, experience, and local cost of living.
½ cup Mexican crema (or substitute Mexican sour cream, crème fraîche, or vegan sour cream)
1 lime
Tortillas (for serving)
Instructions:
Preheat your oven’s broiler.
Place the poblano peppers on a baking sheet and broil, turning occasionally, until the skin is charred and blistered (about 10 minutes). Remove from the oven and let them cool.
Once cooled, peel off the charred skin, remove the seeds, and slice the peppers into thin strips.
In a skillet, heat the olive oil over medium heat. Add the sliced onion and chopped garlic. Sauté until the onion is softened and slightly caramelized.
Add the sliced poblano peppers, corn, jalapeño, oregano, cumin, ground coriander, salt, and pepper. Cook for a few minutes until the flavors meld.
Warm the tortillas (you can use corn or flour tortillas) in a dry skillet or microwave.
Assemble the tacos: Spread a spoonful of Mexican crema on each tortilla, add the poblano-corn mixture, and squeeze fresh lime juice over the top.
Serve your Rajas Tacos warm and enjoy the deliciousness! 🌮
Rajas Tacos have an interesting history! 🌮 These flavorful tacos originate from Mexico and are beloved for their simplicity and rich taste. Let me share some insights:
What Are Rajas Tacos?
The word “rajas” in Spanish means “strips,” and that’s precisely what these tacos are all about.
Traditionally, Rajas Tacos feature strips of roasted poblano peppers and onions.
You can also find variations with zucchini, zucchini blossoms, or mushrooms (especially during cooler months).
The filling is often made creamy with Mexican Crema (similar to sour cream) or cheese.
Our Discovery:
We stumbled upon Rajas Tacos at La Super Rica in Santa Barbara (a favorite spot of Julia Child).
But it was during a trip to San Miguel Allende that we fell in love with them at a local taco stand.
Despite dining at fancy restaurants, these humble tacos stole the show!
How to Make Rajas Tacos:
Grill the Poblanos and Corn:
Grill whole corn cobs and poblano peppers until lightly charred and tender.
Steam the blistered poblanos in a bag, then peel, deseed, and slice them into strips.
Cut the kernels off the corn.
Sauté the Onion and Flavorful Additions:
Sauté white or yellow onion in olive oil until caramelized.
Add garlic, jalapeño, and fresh oregano.
Combine Everything:
Add the corn and poblanos to the skillet.
Season with salt, pepper, and spices.
Stir in Mexican crema (or a vegan alternative).
Squeeze in lime juice.
Warm Tortillas:
Grill or warm your tortillas.
Assemble:
Spread a little crema on each tortilla.
Fill with the rajas mixture.
Top with cilantro and more lime juice.
Enjoy these delightful Rajas Tacos—the perfect blend of simplicity and flavor! 🌶️👌 If you’d like more recipes, feel free to ask! 😊
Feel free to drop your comment, like, share and follow
Feel free to customize these recipes with your favorite toppings and enjoy your homemade Mexican pizza! 🍕🌮
What other toppings can I add?
Here are some additional toppings you can consider for your Mexican pizza:
Black Olives: Sliced black olives add a briny flavor and a pop of color.
Bell Peppers: Diced bell peppers (red, green, or yellow) provide a fresh crunch.
Avocado: Sliced avocado or guacamole adds creaminess.
Cilantro: Fresh cilantro leaves give a vibrant taste.
Red Onion: Thinly sliced red onion adds a mild onion flavor.
Sour Cream: A dollop of sour cream complements the spiciness.
Pickled Jalapeños: For an extra kick of heat.
Feel free to mix and match these toppings to create your perfect Mexican pizza! 🌶️🥑
What’s the best cheese for Mexican pizza?
For a delicious Mexican pizza, consider using a blend of Monterey Jack and Cheddar cheeses. The combination provides a creamy texture and a rich, tangy flavor that pairs well with the other toppings. 🧀🍕
Cheddar cheese
Queso Fresco: A crumbly, mild cheese that adds a subtle creaminess.
Pepper Jack: If you like some heat, Pepper Jack with jalapeños is a great choice.
Oaxaca Cheese: Similar to mozzarella, it melts beautifully and has a rich flavor.
Cotija: A salty, crumbly cheese that works well as a topping after baking.
Certainly
While Monterey Jack and Cheddar are popular choices, you can get creative with other cheeses too. Here are some options:
Feel free to experiment and find your favorite combination! 🧀🍕
Do you have any tips for making homemade pizza dough?
Certainly!
Making homemade pizza dough is a delightful process, and here are some essential tips to help you create a perfect crust:
Eggplant Parmigiana (also known as Parmigiana di Melanzane) is a classic Italian dish that’s rich, comforting, and bursting with flavor. Here’s a step-by-step guide to making it:
Prep the Eggplant:
Thinly slice the eggplant (aubergine) and place the slices in a colander.
Lightly salt the slices and let them sit for an hour. This draws out excess moisture and prevents the dish from becoming watery during baking.
Make the Tomato Sauce:
Finely chop an onion and sauté it in olive oil until translucent.
Add tomato passata (pureed tomatoes) and torn basil leaves.
Season with salt and pepper, then simmer for 10-15 minutes. Set aside.
Fry the Eggplant:
Rinse the eggplant slices under cold water to remove the salt.
Pat them dry with a kitchen towel.
Lightly dust the slices with flour and shake off any excess.
Fry them in sunflower oil for a few seconds on each side until golden. Drain.
Layer the Dish:
In a baking dish, start layering:
Tomato sauce
Thinly sliced mozzarella cheese
Grated Parmesan cheese
Fried eggplant rounds
Repeat the layers until you’ve used up all the ingredients.
Bake:
Top with remaining Parmesan cheese.
Bake at 180°C (350°F) for 40-60 minutes, until the eggplant is soft and the top is golden.
Serve:
Let it rest for a few minutes, then serve topped with fresh basil.
is a delightful rectangular pizza that hails from Milan, Italy. It’s neither Neapolitan nor Roman but has its own unique character. Here’s how you can make it at home:
Ingredients (for 4-6 people):
For the Biga (Pre-fermentation):
11 oz (310 g) flour
½ cup (120 ml) water (at 40°F or 4°C)
A pinch of beer yeast
For the Dough:
1 lb 7 oz (650 g) flour
½ cup (120 ml) water (at 40°F or 4°C)
2 ½ tbsp salt
Extra virgin olive oil
Milanese-Style Seasoning:
Pannerone di Lodi (Slow Food Presidium)
Fiordilatte mozzarella
Battened bacon
Garda PDO extra-virgin olive oil (Avanzi)
Method:
Prepare the Biga:
Dissolve the yeast in water and roughly knead it.
Cover with film and let it rest in a cool place for 16-24 hours. The biga will double in volume and then collapse.
Make the Dough:
Sift the flour into a bowl and knead, adding 1 ½ cups of water.
Incorporate the leavened biga.
Dissolve the salt in the remaining water and add it to the dough.
Let the dough rest for about ten minutes under an upside-down container.
Make some reinforcement folds, then cover with cling film (with a few holes for oxygen).
Rest the dough for 2-3 hours at room temperature.
Shape and Rest:
Divide the dough into pieces of the desired size.
Let them rest in a bowl in the refrigerator for 12-15 hours.
Remove them 3 hours before spreading.
Spread the Dough:
Place the leavened dough in a baking pan.
Drizzle olive oil over the dough.
Spread it evenly with your fingertips, being gentle not to crush the cavities too much.
Let the dough rest for at least one hour in the baking tin, covering it with film.
Bake:
Preheat your oven to 480°F (250°C).
Bake the pizza for about 20-25 minutes or until golden and crispy.
Enjoy!
Slice it into squares and savor the Milanese goodness.
Remember, this pizza is all about simplicity, quality ingredients, and that unmistakable Milanese touch! Buon appetito!
Can you do it? Yes. Is it simple? Yes, and no. Is it something you can do easily without a dedicated setup? Hell no.
How To Dry Age Steak At Home:
There’s lots of questions surrounding dry aging in the home setting, and I’m gonna answer all of them here for you. On a weekly basis, particularly leading up to the Holiday prime rib season, I was getting emails from folks who weren’t even exactly sure what dry aging was, asking if they should do it to their roasts. The potential threat of ruined meat and upset stomachs was both high and alarming, so instead of saying “no, don’t do it!”, I instead decided to write this guide. I enlisted the help of Diana Clark, a meat scientist at Certified Beef®, to ensure that this guide was more than just a personal opinion on how it should be done. The do’s and don’ts within are all based on professional scientific recommendations. Also thank you to Texas Beef Council and Dr Davey Griffin from Texas A&M for extra assistance in answering the hard questions.
Dry aging is an expensive process, both in equipment required and meat investment cost. It’s not something you can do (correctly) with a bag or plastic box, and you need to be prepared to cut away a fair chunk of the final product you worked so hard to create. Now, if you’re still on board after reading all that, here’s what you need to know:
What Is Dry Aging?
Dry aging is a post mortem treatment for beef designed primarily to intensify flavor, with a secondary benefit of promoting tenderness. The flavor development is shaped by both a reduction in moisture which correlates to a concentration of flavor, and the cultivation of ‘good’ mold and bacteria to lend a funky, nutty profile to the meat. In short – dry aging makes beef taste really, really good.
CAVEAT: dry aging does not appeal to everyone. There are some folks who prefer regular beef, and who find the intense and nutty flavors of dry aging too much for their palate. The assumption here is, if you’ve arrived at this article interested enough in creating a set up at home, that you enjoy aged beef. If you haven’t yet tried it, I thoroughly recommend getting in touch with a local purveyor (be it butcher or restaurant) and tasting dry aged beef before you embark on this journey.
What Kind Of Steak Can You Dry Age at Home?
This is pretty important. You SHOULD NOT age individually cut steaks . Technically speaking you CAN age individually cut steaks, but it’s a colossal waste, and you’re foolish for undertaking it. Your meat will shrink vastly in size as it loses water through the aging process. When you combine the amount of rind trimming that needs to occur along with the smaller size, you’ll be left with barely a sliver of a steak.
What you SHOULD be dry aging are subprimals – or larger whole muscles. For example, a strip loin shell (bone in), or a 107/109 rib (basically a giant slab of bone in ribeye). It doesn’t matter whether it is grain or grass fed – that’s just a case of personal preference. You want to look for meat that is on the bone, not because it tastes better, but because you can cut the bone away during trimming and not lose any meat. If you keep reading, I’ll explain why you cut the bone away, rather than cook the meat on the bone.
The quality of the meat also matters. You need to use meat with a minimum degree of marbling, Choice grade or higher, and steer clear from overly-lean cuts (like the Round). Lean or lower grade meat does not develop any significant intensification of flavor, because the marbling is slight. Fat equals flavor, and so the absence of fat means you’re lacking the taste foundation which you need to build on.
Feel free to do some experimenting with other cuts, like beef ribs, as long as you remember you WILL need to trim any rind off. For example, dry aging may not be suitable for a brisket, where the flat may already be too thin to cut away and sacrifice any further. In their own experiments, CAB also noticed that dry aged brisket did not absorb any smoke flavor, and thus determined that dry aging briskets for BBQ was a pointless exercise.
It is perhaps stating the obvious, but since this is an attempt at a complete guide: all dry aging should occur with unwrapped/unbagged meat, where the cuts are placed ‘naked’ into the fridge. Leaving meat in a vacuum bag is wet aging. To learn more about the difference between Wet and Dry Aging, read this article.
How Long Should You Age Meat For?
Here’s where the art of dry aging becomes a rabbit hole… Let’s chat for a moment about tenderness. Yes, dry aging can help tenderness, but it’s mainly undertaken to intensify flavor. After about 28 days of aging, the meat is about as tender as its going to become. Technically speaking, for you sticklers, it has the capacity to continue to tenderize, but it’s practically negligible beyond this point. What you are looking at now is intensity of flavor, and nutty notes from the mold and controlled decomposition (yeah, it’s not the most pleasant way of putting it, but that’s literally what dry aging is!).
Short answer – the length of time you leave meat to age depends on numerous factors. What cut are you using? What kind of mold do you have in your fridge? Is it more intense than other strains? How much of that mold is in there? And most importantly: what is your personal preference?
Generally, it takes at least 30 days before you can start to taste any signature dry aged flavors. My personal preference is for something between 60-80 days. That may change as I get to know my own set up better (in terms of the intensity of the flavoring). After a certain point, dry aged steak turns from a delight to a delicacy. Meaning – the more funky it gets, the fewer people it will appeal to. Kind of like a light blue cheese versus a gorgonzola. One is much mustier than the other, and some palates find that too overwhelming.
You also have to consider the loss versus gain. The more you leave the meat to age, the thicker and tougher the rind will be, ergo the more you will need to cut away. There comes a point at which the benefit of flavor intensification is negated by the sheer loss of product and shrinkage.
The message here is: don’t be a hero. You’re not cool because you left a tenderloin in your fridge for 365 days so you can boast to your facebook friends that you’re eating year old steak. Slow your roll. Try less before you try more.
The Dry Aging Set Up:
THE FRIDGE: You’ll need a dedicated fridge for your dry aging. When I say dedicated, I mean it. Do not store any overflow items requiring refrigeration in here- no beer, no birthday cakes, no freshly harvested deer quarters. You’re trying to create and maintain an ideal microclimate for your beef to get funky. Protect your atmosphere! Further, sharing the space with other items may lead to cross contamination of flavor profiles which manifest in the fat.
I chose the 8.6 cubic feet Edgestar model, because it’s large enough for me to have a “starter” piece, plus 2-3 additional pieces aging at one time. It seemed to me that any smaller model would not allow me enough space to have a reasonable selection actively aging. And if you’re going to spend the money, then give yourself the extra space. Also take note to make sure the interior widths aren’t too narrow – the pieces of meat you’ll be aging are wide and will need extra room for air flow around the edges. Conversely, a fridge that is too large (if you’re only aging 1-2 pieces at a time) may have more trouble with humidity levels. You’ll notice this unit also has wire shelves – you’ll need these (as opposed to solid glass shelves) to make sure airflow is sufficient.
Finally, the unit I chose also has a glass door – which isn’t necessary, but is preferable for two reasons. 1) it allows you to check progress without opening the door. 2) it looks cool AF. This fridge is slightly cheaper than the Edgestar but still has a glass door. Obviously there are even more budget options, but here are some things to watch out for. You may need to pay extra $ to swap out glass shelves; if it has a built in freezer that detracts from overall usable area, and if it has a veggie crisper drawer you may also lose some space where otherwise the fan could have gone.
Be sure to disinfect your fridge before you use it for the first time – I used a water/bleach mixture to wipe down all internal surfaces.
THE AIRFLOW: Airflow is a crucial component to your dry aging set up. The good news is, ensuring you have adequate circulation is easy, and cheap. Just add a standalone fan. I chose this one – it was cheap, the perfect size for my fridge and offers 360 swivel of the fan head.
I actually placed my fan on a sheet pan to catch any meat drips (for easy cleaning), and angled the fan to face straight up towards the shelves. The cord will come straight out of the front of the fridge, just make sure it’s sitting as flat as possible against the seal.
THE HUMIDITY: 75-85% is the humidity range recommended by Certified Angus Beef®, which was within the parameters of humidity levels as cited in Dry Aging of Beef Executive Summary, produced for the National Cattlemen’s Beef Association by Dr Jeff Savell of Texas A&M.
It’s important to keep your humidity levels in this optimal zone. Too much humidity can lead to spoilage, with bacteria growth producing nasty odors and also spoiled flavor. If humidity is too low, excess product shrinkage will occur, and drying too quickly can compromise the integrity of the muscle structure, creating gaps and air pockets.
For many locations in the United States, humidity will not be an issue, as a level around 80% will be easy to maintain. For example, in the winter, you would simply ensure that your fridge is stocked to capacity, so the water within the fresh (also called green) product would contribute to humidity. If you do live in an area where you will be dealing with extremely dry or moist air, you will need a humidity control on your fridge. Although not cheap, the simplest solution is to look for a wine fridge that has this feature.
If you’re just flirting above the 85% mark, an easy solution to control humidity is to install a giant salt block somewhere in your fridge. This will help lower humidity, can act as a air purifier and assist with controlling unwanted or “bad” bacteria.
THE TEMPERATURE: Your refrigerator needs to be set to below 40f and above 29f. I have mine set to 37f, just to account for any potential inaccuracies in the built in thermostat. The sweet spot is 36-39f. Although my fridge has a temperature display, it’s a great idea to invest in a stand alone thermometer which will monitor the temp. Anything above 40f will lead to faster spoilage and oxidization… aka rancidity. I’m sure you are aware that rancid meat is not a good thing. I’d rather pay an insurance premium of $15 for this Thermoworks unit (that you simply leave in the fridge) than lose expensive meat or get sick from it being held at incorrect temperatures. If you’re looking for something to display both temperature and humidity, consider this model.My home dry aging set up.
Get Your Dry Aging Fridge Knocked Up
When I discovered the concept of dry age fridge inoculation, it kind of blew my mind. I had never considered it before, yet it was so obvious! Much like a sourdough needs a starter, or salami requires introduced mold cultures, your dry aging fridge will benefit from being inoculated by an already dried piece of meat.
In short – introducing the “right” mold to the fridge gets you off to a flying start, and makes sure the correct bacterias are present from the get go. The Certified Beef cut dry age locker in Ohio got their “starter” piece from DeBragga meats, New York’s Butcher® (who, fun fact, were one of the original purveyors in New York’s Meatpacking District). And my fridge was started off by a 70 day old strip shell from the CAB facility, with DeBragga provenance. It’s kinda cool to trace it back that far. So ideally, you want to start off your fridge by smearing the interior with the already-aged meats (that haven’t yet been trimmed) from a facility that has a good program already set up. This may require you to trace down some online options or try to negotiate with your local dry age purveyor.
So, what happens if you can’t get your hands on a piece of dry aged meat and you don’t inoculate? Well, nothing bad. You can still start your own fridge off, but the microclimate will just take far longer to develop. So, your meat will be tender and slightly more intensified, but will lack the funkiness of a mature dry aging facility.
Mold Is Good…Depending On The Color.
Mold in dry aging is like terroir. In winemaking, terroir refers to the hyperlocal environmental conditions that form the unique flavor and aroma profiles in the wines. So each region, sometimes down to the different vineyard plots, has its own unique terroir.
The mold in your fridge will be influenced by what is locally present in the atmosphere where you live. For example – even though CAB in Ohio got their starter meat from New Jersey, it will have evolved over time to account for the local bacteria that can be found there. Not to mention the bacteria on the various humans handling the meat and opening the door. My fridge will be another evolution of that mold again, with a Texas twist being added into the Ohio hybrid. This is also the reason you want to make sure not to put any additional items in your dry aging fridge, and to keep the door closed as much as possible.
When it comes to good versus bad molds, meat scientist Diana Clark states “I am comfortable with any colored mold as long as it’s not black”. Black mold is bad, folks. If the meat in your fridge develops this mold, you’ll likely wanna stop any further aging, disinfect the fridge and start again. Conversely, Walter Apfelbaum of Detroit’s Prime & Proper, a butcher who has been involved with intensive dry aging programs for over 25 years, maintains that proper dry aged beef should be completely devoid of mold. He states: “I’ve had primals aged with mold and the meat always taste like mold not beef”. Thus suggesting, whether to mold or not mold is up to personal preference. Me? I’m in camp mold. I like getting funky.
Proper Preparation & Cooking Of Dry Aged Meat:
Your set up is a huge part of the dry age process, but so is knowing how to treat the product when it’s ready to eat. There are important two factors you need to consider when approaching the preparation and cooking stage: palatibility and food safety.
PALATABILITY basically refers to how enjoyable it is to eat, both in terms of flavor and texture. Assuming all your aging parameters were correct and there’s no spoilage, the only hindrance to perfect palatability is going to be the rind, or hard outer shell that forms during aging. The rind does not soften during the cooking process and so needs to be removed. Don’t be stingy with your trimming here – there’s no point in aging steak only to have a poor eating experience by leaving rind on there.
When trimming back your rind, you may notice that there are parts of the muscle itself that have turned a brown shade. In most cases, this is nothing but oxidization of the myoglobin, a harmless color change. As long as you feel the darker areas and they seem to be the same consistency (and not firm or “rindy”) they will be fine to eat, despite not being appealing in color. There’s always a chance that the discoloration is not simply part of the myoglobin cycle, but a more concerning issue like meat that was close to an air pocket or seam which held mold. You should be able to make a judgement call here using smell and touch, but if in doubt, trim it away. Food poisoning is not fun, FYI.
FOOD SAFETY is another factor to consider. When you sear a steak, the surface area comes into contact with high heat which kills of any bacteria. The middle of the steak is safe to keep rare, as it’s sterile, and has never been exposed to said bacteria. So it’s really only the outside that needs the heat treatment.
So this is where the bone comes into play. Given it’s shape and rigidity, not all of it will come into direct contact with the heat source. Further, it’s highly unlikely that the heat is going to reach the porous and hollow bone interior and heat it to a safe temp of at least 165f. Basically, the bone is going to remain a fairground for bacteria and mold. If you want to serve your steak with the bone, cut the bone away, cook your steak as normal, throw the bone into a super hot oven to roast (which will make it taste better when gnawed anyway) and serve together.
AND SO TO SUMMARIZE…
The Do’s and Don’ts of Dry Aging At Home:
DO NOT use a non-dedicated fridge. A very esteemed writer in the meat world (who I personally admire) wrote about his dry aging experiment where he used the office fridge as a test lab. GASP! Do you have ANY idea how many times a day that thing is opened and closed? Not to mention the variety of questionably-sealed food it houses! Put it this way – I would refuse to eat a piece of meat that had been aged under those circumstances. Domestic fridges are often warmer than the recommended safe temperature of 40f, due to inaccurate thermostats and the door being frequently opened. Other items stored in the fridge can also taint the flavor of your meat.
DO know the difference between funky and foul. You’ll have to use a bit of common sense here, but you’re going to need to understand the difference in smell between a heavily dry aged steak, and a steak that has gone rancid. One will be weird, but not unpleasant, like blue cheese. Perhaps not unanimously liked by everyone, but still pleasant. The other will make you recoil in disgust. Do not eat the latter.
DO NOT use the dedicated dry aging fridge as storage for any other items aside from meats you specifically mean to age. As stated above, you’re creating a delicate environment of delicious molds. Plus, any other items can lead to cross contamination of flavor profiles into the fat.
DO use whole muscles like subprimals that can be trimmed back from all the rind.
DO NOT season your meat prior to aging, or wash/rinse it after aging. Save the salt until it’s time to cook each individual steak.
Jess Pryles is a full fledged Hardcore Carnivore. She’s a live fire cook, author, meat specialist and Meat Science grad student. She’s also a respected authority on Texas style barbecue. Australian born and raised, she now lives in Texas.
Certainly! Here are a couple of videos featuring chicken stew recipes that you might enjoy:
African Chicken Stew:
This flavorful dish combines chicken, tomatoes, herbs, and spices. Here’s how to make it:
Cut up a whole chicken and season it with garlic, ginger, basil, parsley, celery, onion, white pepper, salt, and maggi cubes.
Boil the chicken until done and reserve the stock.
Blend the remaining tomatoes and onion together.
Heat oil in a large pot and sauté the remaining onion.
Add the blended tomatoes and cook until they shrink and start sticking to the pot.
Add tomato paste and cook for a few more minutes.
Broil the chicken in the oven to get some color and crispiness.
Add the reserved green seasoning, curry powder, maggi cube, and chicken stock to the tomato sauce and simmer.
Finally, add the chicken and let it simmer with the sauce until the flavors marry. Serve with mushed matoke
Delicious Chicken Stew:
In this tutorial, a pre-rotisserie chicken is used to create a comforting stew with a butter and flour roux, vegetables, and seasonings. Here are the steps:
Melt half a stick of butter in a large pot and add flour to make a roux.
Add chopped onion, celery, carrot, and garlic to the roux and cook for a few minutes.
Pour in chicken broth and add diced potatoes and corn. Simmer until the potatoes are tender.
Shred the pre-rotisserie chicken and add it to the stew along with salt, pepper, and Creole seasoning.
Serve with food of your choice
Feel free to explore these recipes and enjoy cooking your own delicious chicken stew!
VEGETABLE STEW
Explore
Here’s a simple step-by-step guide to making a delicious vegetable stew:
Sauté Vegetables:
Heat olive or rapeseed oil in a large, lidded, heavy-based pan over medium heat.
Add chopped onion and cook gently, stirring occasionally, for 5-10 minutes until softened.
Add Flavorful Ingredients:
Stir in minced garlic cloves, smoked paprika, ground cumin, dried thyme, carrots, celery sticks, red and yellow peppers.
Cook for 5 minutes, allowing the flavors to meld.
Simmer and Combine:
Tip in canned tomatoes, vegetable stock, courgettes (zucchini), and fresh thyme sprigs.
Give it a good stir, cover, and simmer for 20-25 minutes until the vegetables are tender.
Final Touches:
Remove the thyme sprigs and discard.
Stir in cooked lentils and bring back to a simmer for 5 minutes until warmed through.
Serve:
Enjoy your hearty vegetable stew with wild and white basmati rice, mashed potatoes, or quinoa.
Remember, this stew is even better if made the day before to allow the flavors to develop.
If you like this recipes comment and share to your friends, to help us grow this website.
Essential Tips for Freezing Steak Without Losing Quality and how to make five cuts of steaks step by step with sauces and ingredients to make it flavourful
Let’s dive into both topics:
T-bone steak Beef Tenderloin steak
Freezing Steak Without Losing Quality:
To freeze steak without compromising quality, follow these steps:
Wrap the Steak:
Remove the steak from its original packaging and wrap it well. Use at least two layers, such as plastic wrap followed by aluminum foil or parchment paper inside a freezer bag. Press out as much air as possible to prevent freezer burn.
Label and Date: Clearly label the package with the contents and the date to keep track of it in the freezer.
Storage Location: Store the wrapped steak on the bottom shelf of the freezer, which is the coldest part.
Freezing Duration: For the best quality, use the steak within six months. It can be safely frozen for up to a year, but longer storage may increase the risk of freezer burn.
Defrosting: Defrost steak slowly in the refrigerator overnight or up to a full day. Pat it dry and let it rest uncovered for better texture and browning.
Egyptian cuisine is a delightful fusion of Mediterranean, North African, and Middle Eastern flavors. Here are some must-try dishes:
Foul Mudammas/Medames and Taameya (Fava Beans Stew and Falafel):
Foul Medames: Slow-cooked fava beans stew, often served for breakfast. It can be whole beans or mashed, topped with cumin, lemon, oil, pepper, salt, parsley, onion, and butter.
A popular street food made with boiled lentils, rice, macaroni, chickpeas, and crispy fried onions. It’s drizzled with a special Egyptian red sauce and often served with vinegar and hot sauce. Alexandrians add grilled liver for a twist
Hamam Mahshi (Stuffed Pigeons):
A unique dish where pigeons are boiled, stuffed with spicy rice or grits, onions, and tomato sauce, then deep-fried or baked
Feel free to explore these flavorful Egyptian dishes and savor their rich history! 🇪🇬🍽️
Chicken Tetrazzini is a creamy pasta dish with mushrooms and chicken. Here’s a simple recipe you can follow:
Ingredients:
8 ounces of spaghetti
2 cups of cooked, chopped chicken
1/4 cup of butter
1/4 cup of all-purpose flour
1/2 teaspoon of salt
1/4 teaspoon of white pepper
1 cup of chicken broth
1 cup of heavy cream
1/2 cup of grated Parmesan cheese
1/4 cup of sherry wine (optional)
2 cups of sliced mushrooms
Instructions:
Preheat your oven to 350°F (175°C).
Cook the spaghetti according to package instructions, drain and set aside.
In a large saucepan, melt the butter over medium heat. Add the mushrooms and sauté until tender.
Stir in the flour, salt, and pepper; cook until bubbly.
Gradually add the chicken broth and heavy cream, stirring constantly until the sauce thickens.
Add the Parmesan cheese and sherry wine if using, and stir until the cheese melts.
Combine the sauce with the cooked spaghetti and chicken in a greased baking dish.
Bake uncovered for about 30 minutes or until bubbly.
Enjoy your Chicken Tetrazzini!
To make a vegetarian version of Chicken Tetrazzini, you can replace the chicken with a plant-based protein or more vegetables. Here’s how you can adjust the recipe:
Ingredients:
8 ounces of spaghetti
2 cups of your choice of plant-based protein (like tofu, tempeh, or seitan), or additional mushrooms or other vegetables such as zucchini or bell peppers
1/4 cup of butter or a plant-based alternative
1/4 cup of all-purpose flour
1/2 teaspoon of salt
1/4 teaspoon of white pepper
1 cup of vegetable broth
1 cup of heavy cream or a plant-based cream alternative
1/2 cup of grated Parmesan cheese or a vegan cheese alternative
1/4 cup of sherry wine (optional)
2 cups of sliced mushrooms
Instructions: Follow the same steps as the original recipe, substituting chicken broth with vegetable broth and chicken with your chosen vegetarian option. If you’re using tofu, tempeh, or seitan, consider sautéing it with the mushrooms for added flavor.
Would you like any specific suggestions for plant-based proteins or other vegetarian ingredients?
Would you like any tips on variations or additional garnishing for this dish?
Here’s a detailed recipe for BBQ chicken with homemade sauce that you might enjoy,
BBQ Sauce Ingredients:
1 cup ketchup (refined sugar-free, if needed)
½ cup coconut sugar (can sub brown sugar)
½ cup apple cider vinegar
2 teaspoons EACH: Dijon mustard, Worcestershire sauce, and sriracha
1 teaspoon EACH: garlic powder, onion powder, and chili powder
6 drops liquid smoke
Chicken Ingredients:
4 chicken breasts, skinless, boneless
1 tsp salt
1 tsp smoked paprika
½ tsp garlic powder
Instructions:
Prepare the BBQ Sauce: Whisk together the ketchup, coconut sugar, apple cider vinegar, Dijon mustard, Worcestershire sauce, sriracha, garlic powder, onion powder, chili powder, and liquid smoke in a small pot over medium-high heat. Bring the mixture to a boil, then reduce the heat to medium-low and simmer for 10 minutes, stirring occasionally. Remove from the heat and allow the BBQ sauce to cool.
Season the Chicken: Combine the salt, smoked paprika, and garlic powder in a small bowl. Generously season the chicken breasts with this spice mixture on both sides.
Grill the Chicken: Preheat your grill or griddle pan. Cook the chicken, basting with the BBQ sauce continuously until the chicken is sticky, glossy, and cooked through. This should take about 5-6 minutes per side, depending on the size of the chicken breasts.
Rest and Serve: Remove the chicken from the grill and let it rest for at least 5 minutes before slicing. This step is crucial as it allows the juices to redistribute, resulting in succulent chicken.
Enjoy your BBQ chicken with a side of your choice, like a fresh salad or roasted vegetables!
BBQ TILAPIA
Explore
BBQ Tilapia is a delightful dish that’s both flavorful and easy to prepare. Here’s a recipe that combines the mild taste of tilapia with a savory BBQ sauce:
Ingredients for the BBQ Sauce:
¾ cup ketchup
3 tablespoons mustard
½ cup oil
½ cup apple cider vinegar
A pinch of garlic salt
3 tablespoons Worcestershire sauce
2 teaspoons paprika
¼ cup lemon juice
1 teaspoon pepper
3 tablespoons brown sugar
¾ cup water
½ cup finely chopped onions
2 cups fresh or canned peaches, pureed
For the Tilapia:
4 (7 oz) tilapia fillets
Olive oil
Salt to taste
Smoked paprika, garlic powder, onion powder, and celery seed for seasoning
Season the Tilapia: Pat the tilapia dry with a clean towel. Rub it with olive oil and sprinkle with kosher salt. Mix the smoked paprika, garlic powder, onion powder, and celery seed in a small bowl, then pat it onto the fish.
Grill the Tilapia: Preheat your grill to medium-high heat (375 to 450°F). Grill the tilapia skin side down for 3 to 4 minutes until grill marks appear and it releases from the grates. Flip and cook another 3 to 4 minutes, depending on the thickness, until flaky and the internal temperature reaches 130°F.
Serve: Remove the tilapia from the grill, allow it to rest for a few minutes, then serve with a generous spoonful of the peach BBQ sauce on top. Finish with a squeeze of fresh lime juice.
Enjoy your BBQ Tilapia with a side of grilled vegetables or a fresh salad for a complete meal!
Given your culinary background, you might appreciate the balance of sweet and tangy flavors with a hint of smokiness in this dishes . Enjoy your cooking !
Please, don’t forget to follow, comment and share.
Here’s a delicious recipe for Slow-Cooker Burgundy Beef:
Ingredients:
1 kg (2 lb 4 oz) braising beef (such as shin, cheek, brisket, or stewing or chuck steak), cut into 4–5 cm (1½–2 in) chunks
250 g (9 oz) shallots, peeled and larger ones halved
5 garlic cloves, 4 halved, 1 crushed
200 g (7 oz) bacon lardons or smoked streaky bacon, sliced into strips
4–5 large carrots, peeled and each cut into 3–4 chunks
About 6 fresh thyme sprigs
3 tbsp plain flour
3 tbsp tomato purée
1 beef stock pot or stock cube, crumbled
375 ml (13 fl oz) cooking red wine
15 g (½ oz) butter
125 g (4½ oz) button mushrooms, larger ones halved or all thickly sliced if preferred
Salt and freshly ground black pepper
1 tbsp cornflour (optional)
Freshly steamed green vegetables and creamy mashed potato, to serve
Method:
Turn the slow cooker to the High setting to heat up.
Add the beef to the slow cooker with the shallots, halved garlic cloves, bacon, carrot, and thyme sprigs.
Mash together the flour, tomato purée, and stock pot or cube in a large bowl, then gradually stir in 300 ml (10 fl oz) water. Stir into the beef and vegetables with the red wine.
Cover and cook on Low for 7–8 hours or High for about 5 hours, depending on the cut used.
When the casserole is almost ready, heat the butter in a frying pan and fry the mushrooms until golden brown and softened. Stir in the crushed garlic and cook for 1–2 minutes. Stir the mushroom mixture into the slow cooker.
If you want the sauce to be a little thicker, mix a splash of the sauce from the slow cooker with the cornflour to create a smooth paste in the mushroom frying pan. Gradually stir in another ladleful of the sauce and cook, stirring over medium heat, until it thickens dramatically. Stir this back into the slow cooker.
Taste and season with salt and pepper.
Serve the bourguignon with green vegetables and creamy mashed potatoes.
Enjoy your Slow-Cooker Burgundy Beef!
Beef Burgundy Crispy grilled Asian chicken salad You can make it in your own favourite ingredients or style
Explore
Here’s a recipe for a delicious Crispy Asian Chicken Salad:
Ingredients:
For the Salad:
2 boneless, skinless chicken breasts
1/2 cup bread crumbs
2 tablespoons sesame seeds
1 tablespoon vegetable oil
4 cups mixed salad greens
1 red bell pepper, thinly sliced
1 carrot, julienned
1 cup mushrooms, sliced
1/2 red onion, thinly sliced
1/4 cup sliced almonds
For the Dressing:
1/4 cup soy sauce
2 tablespoons rice vinegar
1 tablespoon sesame oil
1 tablespoon honey
1 garlic clove, minced
1 teaspoon grated fresh ginger
Method:
Prepare the Chicken:
In a shallow bowl, combine the bread crumbs and sesame seeds.
Dip the chicken breasts into the mixture, ensuring they are well-coated.
Heat the vegetable oil in a large nonstick skillet over medium heat.
Cook the chicken for 5-6 minutes on each side, or until no longer pink in the center.
Remove the chicken from the skillet and let it rest for a few minutes before slicing it into thin strips.
Prepare the Salad:
Divide the salad greens between two plates.
Top with red bell pepper, carrot, mushrooms, and red onion.
Place the sliced chicken on top of the salad.
Prepare the Dressing:
In a small bowl, whisk together the soy sauce, rice vinegar, sesame oil, honey, minced garlic, and grated ginger until well combined.
Assemble the Salad:
Drizzle the dressing over the salad.
Sprinkle with sliced almonds.
Enjoy your Crispy Asian Chicken Salad!
Please us grow this website, comment and share to your friends thanks.
Serve the Foyot Sauce immediately, drizzled over your desired dish for an added touch of richness and flavor.
HOLLANDAISE SAUCE
Explore
To make a classic Hollandaise sauce, you’ll need to create an emulsion of egg yolks, melted butter, and lemon juice. Here’s a step-by-step guide:
Ingredients:
3 large egg yolks
1 teaspoon of cold water
1 teaspoon of fresh lemon juice
A pinch of salt
A pinch of cayenne pepper (optional)
1/2 cup (113 grams) of unsalted butter
Preparation:
In a heatproof bowl, whisk together the egg yolks, cold water, lemon juice, salt, and cayenne pepper until smooth.
Cut the butter into small pieces and melt it in a saucepan over low heat. Be careful not to let it brown.
Cooking:
Place the bowl with the egg yolk mixture over a pot of simmering water (double boiler). The water should not touch the bottom of the bowl.
Gradually whisk the melted butter into the egg mixture, a little at a time, until the sauce begins to thicken and double in volume.
Continue whisking vigorously to prevent the eggs from scrambling and to achieve a smooth, creamy consistency.
Finishing:
Once the sauce has thickened to your liking, remove it from the heat.
Taste and adjust the seasoning, adding more lemon juice, salt, or cayenne pepper if needed.
If the sauce is too thick, you can whisk in a few drops of warm water to reach the desired consistency.
Serving:
Serve the Hollandaise sauce immediately, or keep it warm for a short period by placing the bowl in a pan of lukewarm water.
Hollandaise sauce is a delicate preparation that requires attention to temperature and constant whisking. It’s a wonderful accompaniment to vegetables, eggs, and fish, adding a rich and buttery flavor to any dish. Enjoy your cooking!
When making Hollandaise sauce, there are several common mistakes that can affect the outcome. Here are some to watch out for:
Potjiekos (pronounced as “poi-key-kos”) is a traditional South African stew that’s cooked in a round, cast iron, three-legged pot known as a potjie. The name itself translates to “small pot food.” This flavorful dish is often prepared outdoors over open embers, making it a social pastime where guests engage in fireside conversation while the potjie simmers for several hours. Here’s how you can make your own delicious potjiekos:
Ingredients:
Beef (chunks or stewing meat)
Onions
Mushrooms
Chili
Garlic
Carrots
Potatoes
Other vegetables of your choice (e.g., beans, sweetcorn)
Beef stock
Mixed herbs
Red wine (optional)
Instructions:
Layer the Components:
Add the chopped vegetables (onions, mushrooms, carrots, potatoes, etc.) to the pot.
Layer the beef on top of the vegetables, ensuring it’s properly packed.
Add Flavor:
Whisk together the remaining ingredients (except the cream) with 250ml of hot water.
Pour this mixture into the pot over the beef and vegetables.
Cooking Process:
Close the lid of the pot.
Simmer the potjiekos for about 25 minutes without stirring.
The meat and vegetables will cook together, creating a rich and flavorful stew.
Final Touch:
Remove the potjie from the heat.
Add fried onions or peppers for extra flavor.
Stir in some cream to finish the dish.
Serving:
Serve your potjiekos with rice, samp, or another favorite side.
Remember, there are countless variations of potjiekos, so feel free to experiment with different meats, vegetables, and seasonings. Enjoy this hearty South African dish! 🇿🇦123.
Certainly! Here are two delicious Italian chicken chardonnay recipes you can try:
Chardonnay Chicken (Quick Stovetop Version):
Ingredients:
Chicken breasts (sliced in half horizontally)
Salt and pepper
Olive oil
Butter
Shallot (finely minced)
Garlic
Chardonnay (half a bottle)
Chicken stock
Lemon juice
Dijon mustard
Heavy cream or creme fraiche
Instructions:
Season the chicken breasts with salt and pepper.
Sear the chicken in a skillet with olive oil and butter until golden on both sides.
Remove the chicken and set it aside.
In the same skillet, sauté minced shallot and garlic.
Locro, the traditional Argentinian stew, is a hearty and flavorful dish that warms the soul. It’s often associated with national holidays and celebrations, especially on May 25th, which commemorates the Argentine revolution. Let’s dive into the recipe for this comforting meal:
Traditional Argentinian Locro Recipe
Ingredients:
1 cup dried white corn (hominy-style corn)
1 cup dried soybeans (or porotos de soja)
1 cup semolina wheat
4 cups meat (choose from skirt steak, ossobuco, pork belly, or pork ribs)
2 chorizo colorados (can be replaced with regular chorizo or smoked pancetta)
1/2 calabaza (or a 16-ounce piece of pumpkin or acorn squash)
2 cups potatoes, cubed
2 cups carrots, cubed
2 scallions (or 2 leeks)
1/2 bunch celery (about 3 stalks)
1 tablespoon smoked paprika (adjust to taste)
1 tablespoon dried oregano (adjust to taste)
2 teaspoons salt (adjust to taste)
Instructions:
Soak the Beans and Grains:
Soak the dried white corn (hominy) and soybeans in water for at least 12 hours or overnight. Drain them before using.
Prepare the Meat:
In a large pot, boil the meat (skirt steak, ossobuco, pork belly, or pork ribs) in water until tender. This will take about 2 hours (or 1 hour in a pressure cooker). You can also use a combination of different meats for added flavor.
Sauté the Chorizo:
In a separate pan, sauté or brown the chorizo colorados (or regular chorizo or smoked pancetta). Once done, cut them into small pieces.
Chop the Vegetables:
Chop all the vegetables (potatoes, carrots, scallions, celery) into small pieces.
Combine Ingredients:
Add all the ingredients (soaked corn, soaked soybeans, semolina wheat, cooked meat, sautéed chorizo, chopped vegetables) to a large caserola (or pan) over medium-low heat.
Season and Simmer:
Season with smoked paprika, dried oregano, and salt. Stir well.
Let the locro simmer on medium-low heat, stirring occasionally, until all the flavors meld together and the vegetables are tender.
Serve Hot:
Serve the locro piping hot in bowls.
Consider serving it with some crusty bread on the side.
Variations:
Locro has countless variations, and each cook adds their personal touch. Some versions include tripe, while others omit it. Feel free to experiment with different meats and vegetables based on what you have available.
Enjoy your homemade Argentinian locro! It’s a dish that brings warmth and tradition to the table. 🍲🇦🇷
ARGENTINIAN TRADITIONAL BEEF STEW
It’s served traditional
Argentinian Beef Stew, also known as Carbonada Criolla, is a delightful dish with a unique blend of flavors. It’s slow-cooked to perfection, bringing out the best in organic produce and tender beef morsels.
Here’s a recipe you can try:
Argentinian Beef Stew (Carbonada Criolla)
Ingredients:
1/3 cup olive oil
1 large onion, chopped
1 green pepper, chopped
2 cloves garlic, minced
1 1/2 pounds stewing beef, cut into 1-inch pieces
1 (14.5-ounce) can stewed tomatoes
2 cups beef broth
3 sweet potatoes, peeled and cubed
2 white potatoes, peeled and cubed
2 tablespoons sugar
1 large winter squash, peeled and cubed
1 cup (7 ounces) dried apricots, roughly chopped
Kosher salt and freshly ground black pepper, to taste
1 cup frozen corn
Instructions:
In a large pot, heat the olive oil and sauté the onions, green pepper, and garlic until golden and soft (about 10 minutes).
Add the stewing beef and cook on medium-high heat, turning to brown all sides.
Stir in the stewed tomatoes, beef broth, sweet potatoes, white potatoes, sugar, winter squash, raisins, and dried apricots. Lower the heat to a simmer.
Cover and simmer over low heat for 1 hour.
Taste for seasoning and adjust with salt and pepper. If the stew seems too thick, add more beef broth.
Continue cooking for about 30 minutes longer, until the beef is tender.
Finally, stir in the frozen corn and simmer for an additional 5 to 10 minutes.
Recipe Variation Ideas:
Use red or yellow peppers instead of green for added color and flavor.
Add other vegetables like cut green beans.
Fresh corn cut straight off the cob can replace frozen corn.
Consider adding raisins along with the dried apricots.
Storage and Freezing:
Let the stew cool down before refrigerating or freezing it.
Store in an airtight container in the refrigerator for up to four days.
Freeze in freezer-safe zip bags or containers for up to three months, leaving 1/2-inch headspace for expansion.
Enjoy your hearty Argentinian Beef Stew! It pairs wonderfully with cornbread and a green salad. 🍲🥖🥗
For more details, you can find the recipe here. Let me know if you need any further assistance!
Certainly! To outperform your competitors and enhance your restaurant’s profitability, consider implementing the following strategies:
Understand Your Competitors:
Gain a deep understanding of your competitors. Analyze their tactics, strengths, and weaknesses. Identify opportunities to gain a competitive edge.
Analyze Competitor Strategies:
Research your competitors’ marketing and sales approaches.
Understand their target audience, pricing models, and promotional activities.
Identify gaps in the market that you can leverage.
Differentiate Your Product or Service:
Offer something unique that sets you apart.
Define your Unique Selling Proposition (USP).
Add value to your product or service to attract more customers.
Enhance Customer Experience:
Superior customer experience is a powerful tool.
Go above and beyond in interactions with customers.
Personalize interactions and provide exceptional service.
Value-Added Features:
Identify additional features or benefits to offer.
Enhance the overall customer experience.
Psychological Pricing:
Use pricing tactics that appeal to customer psychology:
Charm Pricing: End prices with 9 (e.g., $9.99).
Tiered Pricing: Offer different portion sizes.
Bundle Deals: Combine items for a discounted price.
Stay Updated with Trends:
Keep an eye on industry trends and shifts.
Adapt your menu offerings accordingly.
Remember, a well-crafted menu not only covers costs but also entices customers. Strive for value rather than just competing on price. Bon appétit! 🍽️👨🍳👩🍳
How Can You Create A Memorable Dining Experience for your Customers?
Crafting a memorable dining experience goes beyond serving delicious food. Here are some practical tips to captivate your guests and keep them coming back for more:
Set the Stage with an Inviting Ambiance:
Visual appeal matters: Pay attention to lighting, decor, and music. Create an atmosphere that aligns with your concept and target audience.
Whether cozy or vibrant, ensure your restaurant feels like home to your guests.
Craft a Stellar Menu:
Your menu is the heart of your restaurant. Curate diverse dishes catering to different tastes and dietary preferences.
Highlight signature dishes with enticing language that evokes cravings and builds anticipation.
Prioritize Outstanding Customer Service:
Train staff to be friendly, attentive, and knowledgeable.
Personalized service makes customers feel valued and creates a connection beyond the food.
Embrace Technology for Efficiency:
Use online reservations and ordering systems to minimize wait times.
Implement mobile payment options for seamless transactions.
Highlight Ethical Food Practices:
Promote organic produce, sustainable seafood, or artisanal products.
Deliver exceptional flavors while supporting ethical practices.
Make a Grand Entrance:
Greet and seat customers promptly.
Ensure appropriate music volume for conversation.
Decorate for the Season:
Create a festive, welcoming environment.
Seasonal decor adds charm and warmth.
Offer Menu Options for Everyone:
Cater to various palates and dietary needs.
Experiment with fusion cuisine or modern twists on traditional dishes.
Remember, a memorable dining experience combines great food, ambiance, and exceptional service.
What are some creative ways to surprise diners during their meal?
Here are some creative ways to surprise diners during their meal, making their dining experience truly memorable:
Arcade Games:
Set up classic arcade games like pinball machines, PAC-MAN, or Tetris in your restaurant.
Instead of a regular dessert menu, surprise diners with a chef’s selection of mini desserts.
Include unique flavors, textures, and presentation.
Tableside Cooking or Flambé:
Prepare a dish right at the table in front of diners.
Flambé desserts (like crêpes Suzette) create a dramatic effect and engage guests.
Live Music or Entertainment:
Arrange for live musicians, singers, or even magicians to perform during dinner.
Jazz bands, acoustic guitarists, or violinists can enhance the ambiance.
Hidden Messages or Riddles:
Slip a personalized note or riddle under each diner’s plate.
It adds an element of surprise and intrigue.
Themed Evenings:
Host themed nights like “Throwback Thursday” with retro music and dishes.
Celebrate holidays, seasons, or cultural events with special menus.
Remember, the key is to create an experience that goes beyond the food. Surprise and delight your diners, and they’ll cherish the memories they make at your restaurant!
What are some unique ways to engage diners during special occasions or celebrations?
Certainly! When it comes to special occasions or celebrations, creating memorable experiences for diners is essential. Here are some unique and delightful ways to engage your guests during these moments:
Themed Dinners:
Host themed evenings based on cuisines, eras, or cultural celebrations.
Examples: Retro ’80s Night, Mediterranean Feast, or Mexican Fiesta.
Cook the lo mein noodles according to the package instructions. Drain and set aside.
Marinate the Beef:
In a bowl, marinate the sliced beef with soy sauce, oyster sauce, and a pinch of salt. Let it sit for 15 minutes.
Stir-Fry the Beef:
Heat 1 tablespoon of vegetable oil in a wok or large skillet over high heat.
Add the marinated beef and stir-fry for 2-3 minutes until browned. Remove from the wok and set aside.
Stir-Fry the Vegetables:
In the same wok, add another tablespoon of oil.
Add minced garlic, sliced onion, bell peppers, broccoli, and mushrooms.
Stir-fry for 3-4 minutes until the vegetables are slightly tender.
Combine Everything:
Add the cooked noodles and browned beef back to the wok.
Drizzle with soy sauce, oyster sauce, dark soy sauce (if using), sesame oil, salt, and white pepper.
Toss everything together until well combined and heated through.
Serve:
Garnish with chopped green onions.
Serve hot and enjoy your homemade Beef Lo Mein!
Remember, you can customize this recipe by adding other vegetables like snow peas, carrots, or baby corn. Feel free to experiment and make it your own! 🍜🥦🥩
For visual inspiration, you can also check out these recipes:
Certainly! Spaghetti alla Puttanesca is a classic Italian pasta dish with a rich and flavorful sauce. Despite its name, which translates to “prostitute’s spaghetti,” this dish is beloved both in Italy and abroad.
Let’s dive into the authentic recipe and create a delicious plate of Puttanesca!
Authentic Spaghetti alla Puttanesca Recipe
Ingredients:
Pasta: Use a good-quality Italian branded pasta, traditionally spaghetti, but you can also use other long pasta types like linguine.
Extra Virgin Olive Oil: Choose a high-quality extra virgin olive oil for richness.
Garlic: Thinly slice or chop the garlic to infuse the oil with flavor.
Anchovy Fillets: These add depth and umami. Rinse off excess salt if using salted anchovies; if using oil-packed, drain them well.
Peperoncino Flakes or Fresh Peperoncino: Adjust the heat to your liking.
Capers: These briny little gems contribute to the sauce’s character.
Black Olives: Use pitted Kalamata olives or other brine-cured olives.
Canned Crushed Tomatoes: A key ingredient for the sauce.
Fresh Parsley: Chopped for garnish.
Instructions:
Cook the Pasta:
Bring a large pot of salted water to a boil. Add the pasta and cook until al dente. Reserve a ladleful of pasta water before draining.
Prepare the Sauce:
Heat extra virgin olive oil in a pan over medium heat.
Add thinly sliced garlic and anchovy fillets. Cook until the garlic is fragrant and the anchovies dissolve (about 5 minutes).
Stir in capers, black olives, and a bit of chopped parsley.
Add the Tomatoes:
Pour in the canned crushed tomatoes and bring the sauce to a gentle simmer.
Combine with Pasta:
Add the drained spaghetti to the sauce. Toss everything together, coating the pasta evenly.
If needed, add a splash of the reserved pasta water to loosen the sauce.
Serve:
Serve immediately, garnished with more chopped parsley.
Notes:
Parmigiano Cheese: Italians don’t usually use cheese on seafood pasta dishes, so skip the Parmigiano if you make it with anchovies.
No Basil: Traditional Puttanesca doesn’t include basil.
Enjoy your flavorful Spaghetti alla Puttanesca! Buon appetito! 🍝🌿🇮🇹
For visual inspiration, you can also check out these recipes on the Facebook page below :
Spaghetti Alfredo is a delightful Italian pasta dish known for its creamy and indulgent sauce. It’s a comfort food favorite that’s surprisingly easy to prepare.
Let’s dive into a few variations of this classic recipe:
Traditional Alfredo Pasta:
This authentic recipe uses only four ingredients: fettuccine, Parmesan cheese, butter, and freshly ground black pepper.
Here’s how to make it:
Boil fettuccine in salted water until al dente.
In a separate pan, melt half the butter and whisk it with 1/4 cup of Parmesan cheese and 1/2 to 1 ladle of hot reserved pasta water (about 3-5 tablespoons). This creates a creamy base.
Add the drained cooked pasta, another 1/2 to 1 ladle of hot pasta water (or more if needed), the remaining butter, and more Parmesan cheese. Gently toss everything together on low heat for about 1 minute.
Serve immediately, sprinkled with additional Parmesan cheese and black pepper. The simplicity of this dish allows the flavors to shine! 🍝🧀
One-pan creamy Tuscan chicken is a delightful dish that combines juicy chicken with a rich, flavorful sauce featuring sun-dried tomatoes, spinach, and Parmesan cheese. It’s a weeknight winner because it’s ready in about 30 minutes and only requires one pot.
Here’s a simple recipe you can try:
One-Pan Creamy Tuscan Chicken Recipe
Ingredients:
1.5 lbs boneless, skinless chicken breasts (cut into bite-sized pieces)
2 tbsp olive oil
1 medium onion (finely chopped)
3 cloves garlic (minced)
1 cup chicken broth
1 cup heavy cream
1/2 cup grated Parmesan cheese
1 cup sun-dried tomatoes (drained and chopped)
2 cups fresh baby spinach
Salt and pepper, to taste
Fresh basil (optional, for garnish)
Instructions:
Enjoy this comforting and flavorful dish! If you have any other requests or need further assistance, feel free to ask! 😊
Makhni Chicken Gravy (murgh makhani or Butter Chicken
Makhni chicken gravy, also known as Murgh Makhani or Butter Chicken, is a rich and flavorful Indian curry. It’s made with a creamy tomato-based sauce, tender chicken, and aromatic spices.
Here are a couple of recipes you can try:
Murgh Makhani Recipe (Chicken Makhani Gravy):
This recipe combines tomatoes and cashew nuts blended into a puree, mixed with stir-fried chicken. It’s a delightful dish that pairs well with naan or rice.
Ingredients:
4 tablespoons beaten yogurt
Salt to taste
¼ teaspoon turmeric powder
½ teaspoon red chili powder
1 teaspoon ginger-garlic paste
2 teaspoons oil (for marinating chicken)
500 grams boneless chicken pieces
2 tablespoons oil (for stir-frying the marinated chicken)
Instructions:
Marinate the chicken with yogurt, salt, turmeric, red chili powder, ginger-garlic paste, and oil. Let it sit for 30 minutes.
Stir-fry the marinated chicken until cooked.
Blend tomatoes and cashews into a puree.
Heat oil in a pan, add the puree, and cook until the oil separates.
Add the cooked chicken and simmer for a few minutes.
Serve hot with naan or rice.
Full recipe
Makhani Gravy – Hotel Style:
This version of the gravy is perfect for recreating restaurant-style butter chicken.
Ingredients:
28 ounces canned tomatoes (without any other flavors)
2 teaspoons chili powder (adjust for desired spiciness)
1 teaspoon kosher salt (or 2/3 teaspoon table salt)
Spices: tej patta (Indian bay leaf), black cardamom, peppercorns, cassia stick
Garlic-ginger paste, green chili, neutral oil
Whole cashews, heavy cream, butter
Instructions:
Prepare the tomato base by pressure cooking quartered tomatoes with spices.
Blend and strain the tomato mixture.
Heat butter, add garlic-ginger paste, and sauté.
Add the tomato puree, cashews, and cream. Simmer until thickened.
Finish with butter and serve with your choice of protein.
Basic Makhani Gravy:
This versatile gravy forms the base for various dishes like paneer makhani, chicken makhani, and more.
Ingredients:
Tomatoes, onion, garlic, ginger, green chili, cashew nuts, cloves, oil, butter, cumin seeds, spices, cream, sugar, and tomato ketchup.
Instructions:
Blend tomatoes, onion, garlic, ginger, green chili, and cashews.
Sauté cumin seeds, add spices, and the tomato-onion-cashew paste.
Simmer until thickened, then add cream and sugar.
Use this gravy as a base for various dishes.
Feel free to choose the recipe that suits your taste, and enjoy your homemade Makhni chicken gravy!
TANGY SPARE RIBS
Tangy spare ribs are a delightful treat that combines tender meat with a sweet and tangy flavor.
Here are a few different recipes you can try:
Sweet and Tangy Spareribs:
Preheat your oven to 350°F (175°C).
Heat ¼ cup of bacon drippings in a large skillet over medium heat.
Brown 3 pounds of pork spareribs on each side for about 5 minutes.
Season the ribs with garlic salt and black pepper.
In a medium bowl, mix together ¼ cup prepared mustard, ¼ cup light molasses, ¼ cup soy sauce, 3 tablespoons vinegar, 2 tablespoons Worcestershire sauce, and 2 teaspoons hot pepper sauce.
Place the browned ribs in a large baking dish and cover them with the mustard sauce mixture.
Chicken Kiev is a classic dish that features crumbed and fried chicken stuffed with melting garlic butter. The combination of crispy breadcrumbs and oozing butter makes it a delightful treat.
Here’s how you can make Chicken Kiev:
Ingredients:
Garlic Butter Stuffing:
8 tablespoons unsalted butter (softened)
1 teaspoon dried parsley
1 teaspoon dried tarragon
1 teaspoon kosher salt (plus extra for seasoning the chicken)
¼ teaspoon freshly ground black pepper (plus extra for seasoning the chicken)
Crumbed Chicken:
4 skinless chicken breast halves
2 cups Japanese panko breadcrumbs (plus ¼ cup for filling)
Flour and egg (for binding)
Instructions:
Prepare the Garlic Butter:
Mix the softened butter with salt, minced garlic, finely chopped parsley, and dried tarragon until smooth.
Spread the butter mixture onto parchment or baking paper, shaping it into a 10 x 6 cm (4 x 2.3 inches) rectangle. It doesn’t need to be perfect; roughly is fine.
Refrigerate the butter until firm, then cut it lengthwise into 2 pieces.
Stuff the Chicken Kiev:
Place a chicken breast between two freezer bags (or use “Go Between” freeze film).
Pound the chicken using a meat mallet (or rolling pin) until it is about 0.5 cm (0.2 inches) thick.
Lay the chicken presentation side down so that side stays neat and flat.
Place one piece of the garlic butter on the chicken and roll it up tightly.
Seal the edges by folding them in.
Repeat with the remaining chicken breasts.
Coat and Crumb the Chicken:
Coat each stuffed chicken breast in flour, then dip it into beaten eggs, and finally coat it with panko breadcrumbs.
Chill the breaded chicken until firm.
Fry and Bake:
Heat vegetable oil in a frying pan over medium heat.
Fry the chicken Kiev until golden brown on all sides.
Season with salt and a pinch of cayenne pepper.
Transfer the fried chicken to a baking dish and bake in a preheated oven until you can hear the butter start to sizzle.
Serve:
Slice the Chicken Kiev and serve it with your favorite sides.
For a true Kiev experience, deep frying is recommended. However, if you prefer a no-fry option, you can follow a breadcrumb toasting method similar to the one used in this Chicken Tenders recipe. Enjoy your delicious Chicken Kiev!
Optional: Heavy whipping cream and minced fresh parsley
Instructions:
In a stockpot, cook the Italian sausage, onion, and red pepper over medium heat for 9-11 minutes or until the sausage is no longer pink and the onion is tender, breaking up the sausage into crumbles.
Add the minced garlic and cook for an additional 1 minute.
Remove the sausage mixture with a slotted spoon and set it aside; discard the drippings.
Add the butternut squash, 1-1/2 cups of corn, water, and chicken base to the same pot; bring to a boil. Reduce the heat and simmer, covered, for 15-20 minutes or until the squash is tender.
Remove the soup from heat and allow it to cool slightly. Process the soup in batches in a blender until smooth. Return it to the pot.
Add the great northern beans, fire-roasted diced tomatoes (undrained), salt, pepper, the reserved sausage mixture, and the remaining corn. Heat through.
If desired, drizzle each serving with heavy whipping cream and sprinkle with minced fresh parsley.
Can you freeze Hearty Butternut Squash Soup? Yes! You can freeze the cooled soup in freezer containers. To use, partially thaw it in the refrigerator overnight, then heat it through in a saucepan, stirring occasionally and adding a little water if necessary.
Nutrition Facts (per 1-1/2 cups):
Calories: 327
Fat: 13g (saturated fat: 4g)
Cholesterol: 29mg
Sodium: 937mg
Carbohydrate: 44g (sugars: 8g, fiber: 11g)
Protein: 13g
Enjoy your delicious and comforting butternut squash soup! 🍲 If you’d like more recipes, feel free to explore other variations like this.
CLASSIC, BEST BEEF STEW
Here are a few classic beef stew recipes that you can try:
Classic, Hearty Beef Stew:
This rich and satisfying beef stew is packed with tender beef, lots of vegetables, and fragrant herbs. It’s perfect for cold weather! Here’s how to make it:
Season 2 pounds of boneless beef round steak, cut into 1-inch cubes, with salt and pepper.
Toss the beef with 1/4 cup all-purpose flour and 1 tablespoon smoked paprika until evenly coated.
Heat 1 tablespoon canola oil in a Dutch oven over medium-high heat. Working in batches, sear the beef in the hot oil until well-browned (about 10-11 minutes per batch). Transfer the beef to a plate and leave the drippings in the pot.
Add 3 cups chopped onion to the drippings; season with salt and pepper. Cook and stir until the onion begins to caramelize (about 10 minutes).
Stir in 6 cloves minced garlic until fragrant (about 30 seconds).
Add 4 tablespoons tomato paste and cook until it turns brown and begins to caramelize and stick to the bottom of the pan.
Pour in 2 cups dry red wine and bring to a boil while scraping the browned bits off the bottom of the pan with a wooden spoon. Cook until the wine is almost evaporated (about 3 minutes).
Add 1 tablespoon dried thyme, 1 tablespoon dried rosemary, 1 tablespoon herbes de Provence, and 3 bay leaves.
Stir in 2 cups beef broth and 1 tablespoon Worcestershire sauce; bring to a boil.
Return the beef to the pot, then remove from heat and cover with the lid.
Braise the stew in the preheated oven at 350°F (175°C) until the beef is almost tender (about 1 hour 30 minutes).
Remove from the oven, add 3 cups chopped carrots, 3 cups cubed Yukon Gold potatoes, and more beef broth if needed. Cover the pot and return to the oven to braise until the beef and vegetables are tender (about 30 minutes more).
Discard the bay leaves and stir in 1 cup fresh peas, 1 1/2 teaspoons chopped fresh rosemary, and 1 teaspoon chopped fresh thyme. Serve hot!
Slow Cooker Beef Stew:
Place beef, potatoes, carrots, onion, and garlic into a 6-qt slow cooker.
Stir in beef broth, tomato paste, Worcestershire sauce, thyme, rosemary, paprika, caraway seeds, and bay leaves until well combined; season with salt and pepper.
Cover and cook on low heat for 7-8 hours or high heat for 3-4 hours. Easy and delicious! 😋
Classic Beef Stew (Oven-Baked):
Brown beef in batches in oil in an oven-safe Dutch oven; drain.
Return all meat to the pan and add onions, tomatoes, broth, tapioca, garlic, parsley, salt, pepper, and bay leaf.
Bring to a boil, then cover and bake at 350°F (177°C) for 1 hour.
Stir in carrots, potatoes, and celery, and bake, covered, for 1 hour longer or until meat and vegetables are tender.
A classic and comforting choice!
Classic Beef Stew (Stovetop):
Season the beef, then brown it in a Dutch oven or heavy-bottom pot.
Add onions, celery, carrots, and garlic.
Next, add umami with tomato paste, and all of your spices.
Add the beef and stock, and simmer for about an hour and a half.
Warm, hearty, and perfect for chilly nights!
Best Ever Beef Stew:
This cozy beef stew features tender beef, carrots, mushrooms, and potatoes.
Cook it for 1 hour and 10 minutes, and you’ll have a comforting meal for those chilly evenings!
Feel free to choose the recipe that suits your taste and cooking style.
HAVEST SALAD WITH CHERRY VINAIGRETTE
Here are two delicious recipes for salads with cherry vinaigrette that you can try:
Havest salad with cherry vinaigrette
Harvest Salad with Cherry Vinaigrette:
This salad combines mixed greens, fresh beets, apples, carrots, tomatoes, chickpeas, walnuts, and bacon, all drizzled with a delightful cherry vinaigrette. It’s both satisfying and gorgeous to serve for special occasions.
Ingredients:
3 medium fresh beets (about 1 pound)
5 ounces spring mix salad greens
2 medium apples, thinly sliced
1 medium carrot, shredded
1/2 cup grape tomatoes, halved
1/2 cup yellow grape tomatoes or pear tomatoes, halved
1/2 cup chickpeas, rinsed and drained
1/2 cup coarsely chopped walnuts, toasted
4 thick-sliced bacon strips, cooked and crumbled
Cherry Vinaigrette:
1/2 cup tart cherry preserves
3 tablespoons olive oil
2 tablespoons red wine vinegar
2 teaspoons Dijon mustard
1 garlic clove, minced
1/4 teaspoon salt
1/8 teaspoon pepper
Instructions:
Preheat the oven to 400°F. Scrub the beets, trim the tops to 1 inch, and wrap them in foil. Bake for 50-60 minutes or until tender. Cool completely, peel, and cut into 1/2-inch pieces.
In a large bowl, combine the salad greens, apples, carrot, tomatoes, chickpeas, walnuts, bacon, and cooled beets.
In a small bowl, whisk together the cherry vinaigrette ingredients until blended.
Serve the salad with the cherry vinaigrette drizzled over the top.
Nutrition Facts (per 1 cup salad with about 1 tablespoon vinaigrette):
Calories: 181
Fat: 10g (saturated fat: 2g)
Cholesterol: 4mg
Sodium: 229mg
Carbohydrate: 21g (sugars: 15g, fiber: 3g)
Protein: 4g
You can find the full recipe on mr delicious recipe pages.
Balsamic Cherry Vinaigrette:
If you’re looking for a simpler dressing, try this balsamic cherry vinaigrette. It’s made with fresh pitted cherries, avocado oil (or another neutral-flavored oil), white balsamic vinegar (or substitute apple cider vinegar), and a pinch of sea salt. Just blend these ingredients together, and you’ll have a burst of fruity freshness to elevate your summer salads.
Ingredients:
1 cup fresh pitted cherries (packed)
1/3 cup avocado oil (or another neutral-flavored oil)
3 tablespoons white balsamic (or sub apple cider vinegar)
A pinch of sea salt
Instructions:
Put the ingredients into your blender and blend on high until smooth.
Keeps well for 5-6 days in your fridge.
Each tablespoon of this vinaigrette contains approximately 48 calories.
You can find the full recipe on The Endless Meal’s website
Feel free to choose the one that appeals to your taste buds, and enjoy your flavorful salads!
ITAIAN MEAT BALL
Italian meatballs are a classic comfort food that can be enjoyed in various ways.
Meat balls
Classic Italian Meatballs:
These soft and tender meatballs are made with ground beef, egg, bread crumbs, Parmesan cheese, minced garlic, chopped parsley, salt, and pepper. They are cooked in a flavorful tomato sauce and can be served as a main dish or over a bowl of al dente pasta. Don’t forget to sprinkle some Parmesan cheese on top!
Ingredients:
1 pound ground beef (80% lean)
1 egg
1/2 cup bread crumbs
1/4 cup grated Parmesan cheese
2 cloves minced garlic
2 tablespoons chopped parsley
Salt and pepper, to taste
Olive oil
Tomato puree/passata or canned peeled tomatoes
Fresh basil and oregano
Water
Instructions:
In a large bowl, mix together the ground beef, egg, bread crumbs, Parmesan cheese, minced garlic, chopped parsley, salt, and pepper.
Slowly add milk until you have a soft, compact mixture.
Form the mixture into small balls.
In a large pan, add olive oil, garlic, tomato puree/passata or peeled tomatoes, salt, fresh basil, oregano, and water. Mix to combine.
Add the meatballs and gently mix to coat them in the sauce.
Cover the pan and cook for about 20 minutes, then uncover and continue cooking for another 15 minutes or until the meatballs are cooked through and the sauce has thickened.
Serve as desired!
Italian Meatballs with Grated Onion:
These extra soft and juicy meatballs are made with grated onion (no need to sauté onion separately). They are served with a rich tomato sauce made in the same pan for extra flavor.
Ingredients:
1 pound ground beef
1/2 cup bread crumbs
1/2 cup grated onion
1 egg
Salt and pepper, to taste
Olive oil
Tomato sauce
Instructions:
Mix together the ground beef, bread crumbs, grated onion, egg, salt, and pepper.
Form the mixture into meatballs.
In the same pan, make a rich tomato sauce using the meatball drippings.
Add the meatballs to the sauce and simmer until cooked through.
Serve with your favorite pasta or as desired!
You can find the full recipe
Here are a couple of delicious Italian meatball recipes for you to try:
Enjoy your flavorful Italian meatballs!
Feel free to ask your question, in the comment section.
Hummus is a delightful Middle Eastern dip made from chickpeas, tahini, garlic, and citrus. It’s creamy, satisfying, and packed with plant-based protein.
Here are a few different ways to make delicious hummus:
Classic Hummus Recipe:
Ingredients:
3 cups cooked chickpeas (canned or cooked from scratch)
1-2 cloves of garlic (finely minced)
⅓ cup tahini (rich, nutty sesame paste)
Juice from 1 lemon
Pinch of kosher salt
Extra virgin olive oil (for serving)
Garnish: Sumac or ground cumin, fresh parsley, and cooked chickpeas
Instructions:
Cook the Chickpeas: If using canned chickpeas, give them a brief 20-minute simmer in water to soften them. If cooking from scratch, soak dried chickpeas overnight and then simmer them until tender.
Blend: In a food processor, combine the cooked chickpeas, minced garlic, tahini, lemon juice, and a pinch of salt. Blend until smooth.
Adjust Consistency: If you’d like a smoother texture, add 1-2 tablespoons of the reserved chickpea liquid and blend again.
1 (15-ounce) can of chickpeas (or 1 ½ cups cooked chickpeas)
¼ cup fresh lemon juice (from 1 large lemon)
¼ cup well-stirred tahini
1 small garlic clove (minced)
2 tablespoons extra-virgin olive oil
½ teaspoon ground cumin
Salt to taste
Aquafaba (chickpea liquid) or water (if needed for consistency)
Ground paprika or sumac (for garnish)
Instructions:
Blend: Combine all ingredients in a food processor and blend until smooth.
Adjust Consistency: Add aquafaba or water if you want a smoother texture.
Remember, hummus is incredibly versatile! Enjoy it with warm pita bread, fresh veggies, or even as a sandwich spread. Feel free to get creative and adjust the flavors to your liking.
* Baba Ganoush
Baba ganoush is a delightful Middle Eastern dip made from roasted eggplant, tahini, garlic, and citrus. It’s creamy, smoky, and perfect for dipping pita bread or veggies.
Baba ganoush
Here’s a step-by-step guide on how to make authentic baba ganoush:
Ingredients:
2 smaller eggplants (Italian eggplant or the smallest globe eggplant you can find work best; they have fewer seeds and tender flesh)
1 to 2 fresh garlic cloves (depending on your preference for garlic flavor)
Juice of 1 lemon (adjust to taste)
¼ cup tahini paste (made from toasted sesame seeds)
Optional: Greek yogurt (for creaminess and color enhancement)
Salt and pepper (to taste)
Extra virgin olive oil (for drizzling)
Garnish: Toasted pine nuts and chopped fresh parsley
Cook the Eggplant:
Grill the eggplant whole over an open flame (medium-high heat) or bake it in the oven.
If grilling, turn the eggplant occasionally with tongs until it’s fully charred on the outside and the flesh has softened (about 15 to 20 minutes).
Peel and Mash:
Once the eggplant is cooked, let it cool slightly, then peel off the charred skin.
Mash the eggplant flesh using a fork or food processor.
Mix the Ingredients:
In a bowl, combine the mashed eggplant, tahini, minced garlic, lemon juice, and optional Greek yogurt.
Season with salt and pepper. Adjust the lemon juice and garlic to your liking.
Blend or Mash Further:
Use a food processor or continue mashing by hand until you achieve a smooth consistency.
If using Greek yogurt, it will enhance creaminess and color.
Serve and Garnish:
Transfer the baba ganoush to a serving bowl.
Drizzle with extra virgin olive oil and sprinkle with toasted pine nuts and chopped parsley.
Enjoy!:
Serve with warm pita bread, fresh veggies, or as part of a mezze platter.
Remember, baba ganoush is all about balance—smoky, creamy, and tangy:
* Creamy whipped Feta Dip
Whipped feta dip is a delightful and versatile appetizer that combines the rich flavors of feta cheese with creamy Greek yogurt.
Here’s a simple recipe for making creamy whipped feta:
Creamy Whipped Feta Dip Recipe
Whipped Feta Dip
Ingredients:
Feta Cheese: Use a block of good-quality feta that has been refrigerated in brine. Avoid pre-crumbled feta, as it tends to be too salty and dry.
Greek Yogurt: Whole milk Greek yogurt provides extra smoothness and creaminess to the dip. Use plain, unflavored Greek yogurt.
Lemon Zest: The zest of one lemon adds brightness and flavor.
Extra Virgin Olive Oil: Adds richness and enhances the silky texture. Use a robust extra virgin olive oil with a peppery finish.
Herbs & Spices (Optional): Get creative and add fresh herbs like mint, parsley, or dill. You can also incorporate Aleppo pepper or other spices.
Nuts (Optional): Toasted pine nuts or crushed pistachios add crunch and flavor.
Traditional Greek Melitzanosalata (Roasted Eggplant Dip):
Ingredients:
2 large eggplants
1 clove of garlic (minced)
1/2 red onion (finely chopped)
Juice of 1 lemon
1/2 cup extra virgin olive oil
Salt and freshly ground pepper
3 tablespoons fresh parsley (chopped)
Instructions:
Roast the Eggplant:
Place the whole eggplants directly over an open flame (gas burner or grill) until they are charred on all sides and very soft. Alternatively, you can broil them in the oven.
Drain and Peel:
Let the roasted eggplants cool slightly, then peel off the charred skin.
Place the eggplant flesh in a colander over a bowl to drain any excess water.
Mix the Ingredients:
In a bowl, combine the drained eggplant, minced garlic, finely chopped red onion, lemon juice, and extra virgin olive oil.
Season with salt and pepper to taste.
Chill and Serve:
Refrigerate the melitzanosalata for about 30 minutes to allow the flavors to meld.
Garnish with chopped parsley before serving.
Serve:
Enjoy with pita bread.
Oven-Baked
Melitzanosalata:
Ingredients:
2 large eggplants
2 cloves of garlic (minced)
1 cup Greek yogurt
1/4 cup extra virgin olive oil
Salt and pepper
Instructions:
Preheat the Oven:
Preheat your oven to 480°F (250°C).
Bake the Eggplant:
Cut the eggplants in half lengthwise.
Place them on a baking sheet, cut side down.
Bake for about 40 minutes or until the eggplant is tender.
Cool and Mix:
Remove the eggplants from the oven and let them cool.
Scoop out the flesh and mix it with minced garlic, Greek yogurt, and extra virgin olive oil.
Season with salt and pepper.
Serve:
Instructions:
Whip the Feta:
Start by crumbling the feta cheese and placing it in a food processor.
Add Greek yogurt, lemon juice, minced garlic, salt, and pepper to the feta.
Blend until smooth and creamy.
Incorporate Fresh Herbs:
Add chopped fresh herbs (such as parsley and dill) to the whipped feta.
Pulse a few times until the herbs are evenly distributed.
Serve:
Transfer the creamy whipped feta to a serving dish.
Drizzle with extra virgin olive oil.
Optionally, sprinkle with Aleppo pepper or other spices.
Serve with pita bread, baguette, or fresh veggies for dipping.
Enjoy this delightful dip at your next gathering or as a tasty snack!
For more detailed recipes, you can check out these sources:
@Mr delicious recipes: Mediterranean loved dish.
Feel free to customize the flavors and enjoy!
* Melitzanosalota
Melitzanosalata, also known as Greek Eggplant Dip, is a flavorful and rustic dish made with roasted eggplant, garlic, parsley, lemon juice, and extra virgin olive oil. It’s a delightful appetizer that pairs perfectly with warm pita bread or crusty bread.
Here are two different methods for making this delicious dip:
Cert
Melitzanosalata, also known as Greek Eggplant Dip, is a flavorful and rustic dish made with roasted eggplant, garlic, parsley, lemon juice, and extra virgin olive oil. It’s a delightful appetizer that pairs perfectly with warm pita bread or crusty bread. Here are two different methods for making this delicious dip:
Traditional Greek Melitzanosalata (Roasted Eggplant Dip):
Ingredients:
2 large eggplants
1 clove of garlic (minced)
1/2 red onion (finely chopped)
Juice of 1 lemon
1/2 cup extra virgin olive oil
Salt and freshly ground pepper
3 tablespoons fresh parsley (chopped)
Instructions:
Roast the Eggplant:
Place the whole eggplants directly over an open flame (gas burner or grill) until they are charred on all sides and very soft. Alternatively, you can broil them in the oven.
Drain and Peel:
Let the roasted eggplants cool slightly, then peel off the charred skin.
Place the eggplant flesh in a colander over a bowl to drain any excess water.
Mix the Ingredients:
In a bowl, combine the drained eggplant, minced garlic, finely chopped red onion, lemon juice, and extra virgin olive oil.
Season with salt and pepper to taste.
Chill and Serve:
Refrigerate the melitzanosalata for about 30 minutes to allow the flavors to meld.
Garnish with chopped parsley before serving.
Serve:
Oven-Baked Melitzanosalata:
Ingredients:
2 large eggplants
2 cloves of garlic (minced)
1 cup Greek yogurt
1/4 cup extra virgin olive oil
Salt and pepper
Instructions:
Preheat the Oven:
Preheat your oven to 480°F (250°C).
Bake the Eggplant:
Cut the eggplants in half lengthwise.
Place them on a baking sheet, cut side down.
Bake for about 40 minutes or until the eggplant is tender.
Cool and Mix:
Remove the eggplants from the oven and let them cool.
Scoop out the flesh and mix it with minced garlic, Greek yogurt, and extra virgin olive oil.
Season with salt and pepper.
Serve:
Feel free to choose the method that suits you best, and enjoy this classic Greek dip!
Please if you’ve liked this recipes comment and share, to help me grow this website and page
Certainly! Crispy and creamy doughnuts are a delightful treat that can be made at home. Here are a couple of recipes for you to choose from:
Krispy Kreme Copycat Doughnuts:
These doughnuts are light, airy, and covered in a rich glaze. Unlike cake doughnuts, these are raised doughnuts made with yeast. Here’s how you can make them:
Dissolve 2 1/4 teaspoons of active dry yeast in 1/4 cup warm water.
Add 1/4 cup granulated sugar, 1/2 teaspoon salt, 2 tablespoons softened butter, 1 egg, 1 egg yolk, 1 teaspoon vanilla extract, and 2 cups all-purpose flour to the yeast mixture.
Knead until a soft dough forms.
Transfer the dough to a bowl, cover, and let it rise for 2 hours.
Refrigerate the dough overnight.
Roll out the dough, cut out doughnut shapes, and let them rest for 1 hour.
Heat vegetable shortening in a deep-fryer or large skillet to 375°F (191°C).
Fry the doughnuts in batches for 1 minute on each side.
Remove from the oil and place them on a wire rack to cool.
Enjoy your homemade Krispy Kreme-style doughnuts!
Classic Glazed Doughnuts:
These doughnuts are warm, soft, and crispy. Here’s a simple recipe:
Mix 1 cup warm milk, 1/4 cup granulated sugar, and 2 1/4 teaspoons active dry yeast. Let it sit for 5 minutes.
Add 1/4 cup melted butter, 1 beaten egg, 1/2 teaspoon salt, and 3 1/2 cups all-purpose flour to the yeast mixture.
Knead until a smooth dough forms.
Cover and let the dough rise for 1 hour.
Roll out the dough and cut out doughnut shapes.
Heat oil in a deep-fryer or large heavy skillet to 350°F (175°C).
Fry the doughnuts on each side until golden brown.
Remove from the oil and drain on a wire rack.
Glaze with a mixture of powdered sugar, vanilla extract, and a little milk.
Enjoy your homemade glazed doughnuts!
Feel free to choose the recipe that appeals to you the most, and enjoy your freshly made doughnuts!
Please, share and comment to help me grow this website and page
Let’s explore the fascinating world of tomatoes. 🍅
Cherry Tomatoes: These are sweet, small tomatoes that grow in clusters. They’re easy to cultivate, disease-resistant, and great for home gardens. Use them in salads or roast them for intense flavor.
Standard Globe Tomatoes: Also known as salad tomatoes, these are the classic tomatoes. They measure 2 to 3 inches (5 to 7 cm) in width and have a tart, acidic taste. Slice them for raw consumption, cook them into sauces (though they may need more time to evaporate their juices), or stuff them with breadcrumbs.
Beefsteak Tomatoes: These hefty tomatoes have a meaty texture. Their large size makes them perfect for caprese sandwiches, mushroom burgers, or layering with mozzarella and basil (hello, caprese!).
Roma Tomatoes: Also called paste tomatoes, Romas are ideal for making sauces due to their low moisture content. They’re elongated and have a rich flavor.
Now, let’s dive into some tomato-related knowledge:
Hybrid vs. Heirloom Tomatoes:
Hybrid tomatoes result from crossbreeding different varieties. They’re often bred for higher yields or resistance to pests.
Heirloom tomatoes, on the other hand, are locally grown and sold. They aren’t bred for long shelf lives or transportation, which means they often come in fun, funky colors and shapes.
Determinate vs. Indeterminate Tomatoes:
If you’re into gardening, this classification matters:
Determinate tomato plants are compact and bush-like. They bear fruit all at once and then die.
Indeterminate tomato plants grow as vines and can bear fruit for a longer period, stopping only when you cut them or the weather turns cold.
For more tomato inspiration, check out this guide that delves into the differences between various tomato types, their sweetness levels, and delicious recipes! 🌱🍅
LET’S EXPLORE 10 DIFFERENT TYPES OF TOMATOES AND
How‘s You Can Use Them In Your Cooking adventures :
Cherry Tomatoes:
Caprese Skewers: Thread cherry tomatoes, fresh basil leaves, and mozzarella balls onto toothpicks. Drizzle with olive oil and balsamic glaze.
Pasta Salad: Toss halved cherry tomatoes with cooked pasta, olives, feta cheese, and a zesty vinaigrette.
Standard Globe Tomatoes:
Classic Tomato Sauce: Simmer diced tomatoes with garlic, onions, and herbs for a versatile pasta sauce.
BLT Sandwich: Layer thick slices of tomato with crispy bacon, lettuce, and mayo on toasted bread.
Beefsteak Tomatoes:
Tomato Slices: Simply slice and season with salt, pepper, and a drizzle of olive oil. Serve as a side dish.
Stuffed Beefsteaks: Hollow out the centers and stuff with a mixture of breadcrumbs, herbs, and cheese. Bake until tender.
Roma Tomatoes:
Bruschetta: Dice Roma tomatoes, mix with minced garlic, fresh basil, and olive oil. Spoon onto toasted baguette slices.
Tomato Confit: Slow-roast Roma tomatoes with olive oil, garlic, and herbs until caramelized. Use as a topping for grilled meats or pasta.
Heirloom Tomatoes:
Heirloom Tomato Salad: Slice colorful heirlooms and arrange them with fresh mozzarella, basil, and a drizzle of balsamic reduction.
Open-Faced Sandwich: Layer thick slices of heirloom tomatoes on crusty bread with avocado, arugula, and goat cheese.
Green Tomatoes:
Fried Green Tomatoes: Dip slices in buttermilk, coat with cornmeal, and fry until crispy. Serve with a tangy dipping sauce.
Green Tomato Chutney: Simmer green tomatoes with onions, ginger, and spices for a flavorful condiment.
Yellow Pear Tomatoes:
Tomato Tarts: Arrange yellow pear tomatoes on puff pastry squares, sprinkle with cheese, and bake until golden.
Tomato Jam: Cook down yellow pear tomatoes with sugar, vinegar, and spices. Spread on toast or serve with cheese.
San Marzano Tomatoes:
Pizza Sauce: Crush San Marzano tomatoes and season with salt, pepper, and oregano. Spread on pizza dough.
Tomato Risotto: Use San Marzano tomatoes to flavor a creamy risotto.
Grape Tomatoes:
Greek Salad: Combine grape tomatoes with cucumber, red onion, olives, and feta cheese. Dress with lemon vinaigrette.
Roasted Grape Tomatoes: Toss with olive oil, garlic, and herbs. Roast until caramelized and serve over pasta.
Campari Tomatoes:
Tomato Bruschetta: Dice Campari tomatoes and mix with garlic, basil, and olive oil. Pile onto toasted baguette slices.
Tomato Salsa: Chop Campari tomatoes, red onion, jalapeño, and cilantro. Add lime juice and salt for a zesty salsa.
Remember, the best way to enjoy tomatoes is when they’re in season and bursting with flavor! 🍅 For more inspiration, check out these delicious tomato recipes.
Here’s a step-by-step guide on how to make delicious Lasagna Roll Ups:
Soften the Lasagna Noodles:
Place the lasagna noodles in very hot water to soften them.
Prepare the Cheese Filling:
In a mixing bowl, combine the following ingredients:
24 oz cottage cheese
8 oz cream cheese (softened)
1 egg
1/4 cup grated parmesan cheese
1 cup shredded Monterey Jack cheese
1 tsp dried basil
1 tsp dried parsley
Mix everything together until well combined. Set aside.
Create the Sauce:
Pour the spaghetti sauce into a separate bowl.
Fill the empty sauce jar with 1 1/2 cups of water.
Cover the jar with a lid and shake it to extract any remaining sauce.
Whisk the water and sauce together until smooth.
Assemble the Roll-Ups:
When the lasagna noodles are soft enough to handle, spread about 2 tbsp of the cheese filling over each noodle.
Roll up the noodles tightly.
Arrange in Baking Dishes:
Place 8 roll-ups into each baking dish (you can use two 10″ by 8-inch disposable foil pans).
Evenly divide the sauce between the two pans.
Sprinkle the remaining parmesan and Monterey Jack cheeses on top.
Securely cover the pans with aluminum foil if you plan to freeze them.
Baking Instructions:
To bake immediately:
Preheat the oven to 375°F (190°C).
Bake the covered roll-ups until heated thoroughly (about 35 minutes).
Remove the aluminum foil and lightly broil the top.
To bake frozen roll-ups:
Thaw them thoroughly.
Bake covered for 35-45 minutes.
Remove the aluminum foil and lightly broil the top.
Enjoy your homemade lasagna roll-ups!
They’re perfect for make-ahead dinners
How To Make Beef Ragu (Bolognese)
Here’s a step-by-step guide on how to make a delicious Bolognese Sauce (also known as Ragu alla Bolognese):
Authentic Bolognese Sauce Recipe
Fresh ground beef (minced meat)
This authentic Italian recipe takes time, but it’s incredibly worth it. The slow cooking process results in a rich and flavorful sauce that pairs perfectly with fresh egg Tagliatelle or Pappardelle pasta.
Ingredients:
1 small carrot, finely chopped
1 celery stalk, finely chopped
1 small onion, finely chopped
300g (10 oz) ground beef
150g (5 oz) minced pancetta or ground pork
300g (1 ¼ cup) tomato passata or crushed peeled tomatoes
100ml (½ cup) dry white wine
300ml (1 ½ cups) meat broth
Salt and pepper, to taste
1-2 bay leaves
A splash of milk (optional)
Instructions:
Chop the Vegetables:
Finely chop the carrot, celery, and onion. They should be small but not pulpy.
Sauté the Vegetables:
In a medium to large pot, heat olive oil over low heat.
Add the chopped vegetables and cook until the onion is transparent.
Add the Meat:
Increase the heat to medium and add the ground beef and minced pancetta or ground pork.
Stir and break up the meat as it cooks and browns.
Deglaze with Wine:
Raise the heat to high and add the white wine.
Cook until the wine has evaporated.
Add Tomatoes and Seasonings:
Lower the heat to medium and add the tomato passata (or crushed peeled tomatoes).
Season with salt, pepper, and bay leaves.
Bring the sauce to a boil, then gradually lower the heat to the lowest level.
Cover the pot and stir occasionally.
Let the sauce cook slowly for about three hours. Do not boil, or it will burn.
Final Touch:
During the last 15-20 minutes of cooking, raise the heat slightly and cook on a slow boil, stirring often.
Remove the bay leaf.
If desired, add a splash of milk to the sauce and heat thoroughly for a couple of minutes.
Serve:
Serve your Bolognese sauce over freshly cooked pasta (Tagliatelle or Pappardelle) with a sprinkle of Parmesan cheese.
Enjoy your homemade Bolognese sauce! It’s a labor of love, but the depth of flavor is unmatched. Buon appetito!
* How To Make Italian Beef Osso Bucco
Explore
Osso Buco is a classic Italian dish originating in Milan. The name “osso buco” (in Milanese dialect “Oss Buss”) literally means “bone with a hole,” referring to the marrow hole in the center of the cross-cut veal shank used in this dish.
9 The Osso Buco recipe, although it requires a long cooking time, is not difficult to make. What makes it truly special is its tenderness and unique flavor.
Here’s how to make a delicious Osso Buco using beef shanks:
Osso Bucco (beef on bone)
Ingredients:
4 veal osso buco (cross-cut veal shanks with marrow in the bone), 1 to 1 ½ inches thick (3 to 4 cm high)
1 medium onion
50 g (½ stick) unsalted butter
50 g (⅓ cup) all-purpose flour
100 ml (½ cup) dry white wine
600 ml (2 cups) meat broth
1 tablespoon tomato paste
2 tablespoons extra virgin olive oil
A pinch of fine salt
Freshly ground black pepper
Gremolata (Sauce):
A bunch of parsley
Zest of ½ lemon
1 garlic clove
Instructions:
Prepare the Veal Shanks:
Cut the white connective tissue surrounding the shank in a few places using kitchen shears. This prevents the meat from curling during cooking.
Flour the veal shanks on both sides and set aside.
Sauté the Onion:
In a large pan, melt the butter and add the olive oil.
Add the finely chopped onion and cook over low heat for 3 minutes until transparent.
Brown the Veal Shanks:
Add the floured veal shanks to the pan.
Brown them on both sides until golden.
Add Flavor and Liquid:
Pour in the dry white wine to deglaze the pan.
Stir in the meat broth and tomato paste.
Season with salt and pepper.
Slow Cooking:
Cover the pan with a lid and cook the shanks in a preheated oven at 300°F (150°C) for 4-5 hours.
Alternatively, simmer on the stovetop over low heat for 2-3 hours.
Prepare the Gremolata:
Finely chop parsley, garlic, and lemon zest together.
Sprinkle the gremolata over the dish before serving. It adds a bright and aromatic flavor.
Serve:
Osso Buco is typically served with risotto alla Milanese, polenta, or mashed potatoes to soak up the delicious sauce.
Enjoy the tender beef shanks with the rich flavors of the sauce!
Remember, the marrow from the bone is considered a delicacy and is usually eaten with the tender meat.
Buon appetito!
Please, if you like our recipes follow, comment and share to help us grow our website and page on Facebook, X, and t
Here’s a simple and delicious Honey Dijon Chicken Salad recipe that you can whip up in no time:
Honey Dijon Chicken Salad Recipe
Ingredients:
2 cups cooked and shredded chicken
1 stalk celery, diced fine
1 cup mayonnaise
2 tbsp honey
2 tbsp Dijon mustard
3/4 cup dried cranberries
Hearty rolls or croissants for serving
Instructions:
Place the cooked chicken, diced celery, and dried cranberries in a large mixing bowl.
Add in the mayonnaise, Dijon mustard, and honey.
Mix all the ingredients well until they are thoroughly incorporated.
Cover the bowl with plastic wrap and chill it in the refrigerator for about 2 hours.
Serve the chicken salad on rolls or croissants.
Pro Tips:
Use a stand mixer to shred the cooked chicken easily. After shredding the chicken, add the rest of the ingredients to the stand mixer and let it do the work for you!
For special occasions like bridal showers or baby showers, serve this chicken salad on croissants for an elegant touch.
Enjoy your delightful Honey Dijon Chicken Salad!
HOW TO MAKE GREEK SALAD AT HOME TWO WAYS
Explore
Here are two simple and refreshing Greek salad recipes for you to choose from:
1. Traditional Greek Salad (Horiatiki)
Ingredients:
1 medium red onion, thinly sliced into half moons
4 medium juicy tomatoes, sliced into bite-sized pieces or wedges
1 English cucumber, partially peeled to make a striped pattern and sliced into half moons
1 green bell pepper, cored and sliced into rings
A handful of pitted Kalamata olives
1 ½ teaspoons dried oregano
Kosher salt (to taste)
¼ cup extra virgin olive oil
2 tablespoons red wine vinegar
1 (7-ounce) block of Greek feta cheese (in brine), torn into slabs
Instructions:
Soak the thinly sliced red onion in water.
In a large bowl, combine the sliced tomatoes, cucumber, bell pepper, and olives.
Sprinkle with dried oregano and season with kosher salt.
Drizzle the salad with extra virgin olive oil and red wine vinegar.
Top with torn slabs of Greek feta cheese.
Serve as a quick and easy first course or side salad. Enjoy!
2. Chunky Greek Salad
Ingredients:
½ small red onion, thinly sliced
2 large ripe tomatoes, roughly chopped
½ cucumber, deseeded and roughly chopped
100 grams reduced-fat feta cheese, drained and cut into cubes
50 grams black olives (preferably Kalamata olives), pitted and drained (in brine, not oil)
A small handful of fresh mint leaves
½ teaspoon dried oregano
2 teaspoons extra virgin olive oil
2 teaspoons fresh lemon juice
Sea salt and freshly ground black pepper (to taste)
2 wholemeal pita breads (warmed)
Instructions:
Combine the thinly sliced red onion, chopped tomatoes, cucumber, feta cheese, black olives, and mint leaves in a bowl.
Sprinkle with dried oregano and season with sea salt and black pepper.
Drizzle with extra virgin olive oil and fresh lemon juice.
Serve alongside warmed wholemeal pita breads.
Enjoy this high protein dish
Feel free to choose the recipe that suits your taste buds!
BEEF SALAD
Here are two delicious beef salad recipes for you to choose from:
1. Thai Beef Salad (Yum Nua)
Ingredients:
7 to 8 oz (200 – 250g) good quality steak (sirloin or rib-eye)
2 cups mixed lettuce leaves
10 cherry tomatoes, halved
1 small red onion, very finely sliced
1/2 cucumber, optional (deseeded and cut into slices)
1/4 cup fresh coriander leaves (cilantro), lightly packed
1/4 cup fresh mint leaves, lightly packed
1/4 cup roasted unsalted peanuts, finely chopped
Dressing:
1/2 teaspoon Thai chili (or bird’s eye chili, deseeded and finely minced)
1/4 teaspoon garlic (finely minced, about 1/2 small clove)
Season the steak well with salt and cook it to your liking (medium-rare is recommended).
While the steak rests, prepare the dressing:
Grind the coriander stems, chili, and garlic in a mortar and pestle to form a paste.
Mix in the sugar, fish sauce, lime juice, and oil.
Slice the steak into thin strips while it’s still hot.
In a large bowl, combine the lettuce, cherry tomatoes, red onion, cucumber (if using), coriander leaves, mint leaves, and peanuts.
Add the sliced steak to the dressing and mix well.
Toss the salad ingredients with enough dressing to coat.
Serve your zingy and flavorful Thai Beef Salad!
2. Best Steak Salad with Creamy Balsamic Vinaigrette
Ingredients:
10 oz grilling steak (boneless prime rib)
Salt and pepper
1 teaspoon avocado oil
4 oz arugula
1 cup cherry tomatoes, cut in half
1/2 English cucumber, diced
1/2 avocado, sliced
1/4 cup thinly sliced red onions
Creamy Balsamic Vinaigrette:
1/2 tablespoon grainy mustard
1/2 tablespoon Dijon mustard
2 tablespoons olive oil
1 pinch salt and pepper
1 tablespoon balsamic vinegar
Instructions:
Season the steak well with salt and pepper.
Heat a pan until smoking hot and sear the steak until medium-rare.
Let the steak rest.
In a large bowl, combine arugula, cherry tomatoes, cucumber, avocado, and red onions.
Whisk together the dressing ingredients (mustards, olive oil, salt, pepper, and balsamic vinegar).
Pour the dressing over the salad and toss to coat.
Thinly slice the steak against the grain and add it to the salad.
Enjoy this juicy and flavorful steak salad!
Feel free to choose the recipe that tempts your taste buds!
ITALIAN CLASSIC PANZANELLA SALAD TWO WAYS
Explore
Panzanella is a delightful Italian bread and tomato salad that celebrates the flavors of summer. Bursting with ripe tomatoes, fresh herbs, and chunks of toasted bread, it’s a simple yet satisfying dish. Here are a few variations of this classic salad:
1. Tuscan Tomato and Bread Panzanella
Ingredients:
Hearty Italian bread (such as ciabatta), torn into chunks
Ripe tomatoes, cut into wedges or chunks
Red onion, thinly sliced
Cucumber, peeled and sliced
Fresh basil leaves, torn
Mozzarella cheese, torn into pieces (optional)
Extra virgin olive oil
Red wine vinegar
Salt and pepper
Instructions:
Tear the Italian bread into chunks and allow it to sit uncovered for a few hours or overnight to dry and harden.
Toss the bread with some extra virgin olive oil and toast it in the oven until crisp in some parts but still chewy.
In a large bowl, combine the tomatoes, red onion, cucumber, torn basil leaves, and optional mozzarella.
Add the toasted bread cubes to the bowl.
Drizzle with more extra virgin olive oil and a splash of red wine vinegar.
Season with salt and pepper.
Toss everything together gently.
Let the flavors meld for a few minutes before serving.
Enjoy this rustic and flavorful Tuscan panzanella!
2. Classic Panzanella with Tomatoes and Basil
Ingredients:
Day-old country bread, torn into chunks
Ripe tomatoes, roughly chopped
Cucumber, peeled and diced
Red onion, thinly sliced
Garlic, finely chopped
Fresh basil leaves
Extra virgin olive oil
Red wine vinegar
Salt
Instructions:
Place the torn bread in a salad bowl.
Add the tomatoes, cucumber, red onion, and finely chopped garlic.
Sprinkle with salt.
Drizzle with good-quality extra virgin olive oil and red wine vinegar.
Toss everything together with your hands until well combined.
Add the basil leaves and mix again.
Let the juice soak into the bread cubes.
Serve and savor the flavors of Italy!
Feel free to choose the version that speaks to your taste buds! Buon appetito!
Here’s a step-by-step guide on how to make Kentucky Grilled Chicken:
Marinade Preparation:
In a bowl or shallow dish, combine the following ingredients:
1 cup cider vinegar
1/2 cup canola oil
5 teaspoons Worcestershire sauce
4 teaspoons hot pepper sauce
2 teaspoons salt
Pour 1 cup of this marinade into a separate bowl.
Add bone-in chicken breast halves (10 ounces each) to the marinade and turn to coat.
Cover and refrigerate for at least 4 hours.
Cover and refrigerate the remaining marinade for basting.
Grilling Process:
Drain and discard the marinade from the chicken.
Prepare your grill for indirect heat, using a drip pan.
Place the chicken breasts, bone side down, on an oiled grill rack.
Grill, covered, over indirect medium heat until a thermometer reads 170°F (about 20 minutes on each side).
Baste the chicken occasionally with the reserved marinade.
Serving:
Transfer the grilled chicken to a platter and serve.
Enjoy your flavorful Kentucky Grilled Chicken!
HOW TO MAKE KFC FRIED CHICKEN AT HOME
Explore
KFC’s Original Recipe Fried Chicken is legendary for its crispy coating and flavorful blend of 11 herbs and spices. While the exact secret recipe remains elusive, I can guide you through a copycat version that captures the essence of KFC’s iconic chicken. Let’s get cooking! 🍗
Ingredients for KFC Coating:
3 pounds (1.4 kg) chicken, cut into 10 pieces (2 wings, 2 legs, 2 thighs, and 4 breast pieces)
1 cup (240 mL) buttermilk
1 large egg
2 cups (200 g) all-purpose flour
2 quarts (1.9 L) vegetable oil for frying
The Secret to KFC Chicken Lies in the Spices:
Blend the following spices in a food processor until they’re uniformly sized:
2/3 tablespoon kosher salt
1/2 tablespoon dried thyme
1/2 tablespoon dried basil
1/3 tablespoon dried oregano
1 tablespoon celery salt
1 tablespoon ground black pepper
1 tablespoon dried mustard
3 to 4 tablespoons paprika
2 tablespoons garlic salt
1 tablespoon ground ginger
3 tablespoons ground white pepper
(Optional) 2 teaspoons Accent Seasoning (MSG) for authentic flavor
Whisk the spice blend into the flour. Combine the seasoned flour in a large dish where you’ll later place your chicken pieces.
Beat the egg and buttermilk in a separate bowl. Make sure the bowl is deep enough to submerge all your chicken pieces.
Marinating and Breading the Chicken:
Cut the chicken into 10 pieces as specified above.
Dip each chicken piece into the egg-buttermilk mixture, ensuring it’s well-coated.
Dredge the chicken in the seasoned flour, pressing the coating onto the chicken to adhere.
Frying Process:
Heat vegetable oil in a deep fryer, Dutch oven, or pressure fryer. The ideal temperature is around 350°F (175°C).
Fry the chicken in batches, ensuring not to overcrowd the pan. Cook until golden brown and crispy, about 12-15 minutes for each batch. The internal temperature should reach 165°F (74°C).
Drain the fried chicken on paper towels to remove excess oil.
Serving:
Transfer your homemade KFC fried chicken to a platter and serve it piping hot!
Remember, the real KFC magic lies in the pressure frying technique, but this copycat version will still give you a taste of that finger-lickin’ goodness. Enjoy!
KFC BAKED CHICKEN
CERTAINLY!
If you prefer a healthiercooking method, baking the chicken is a great alternative to frying. Here’s how you can make KFC-style chicken using the oven:
Oven-Baked KFC-Style Chicken Recipe
Ingredients:
3 pounds (1.4 kg) chicken pieces (wings, legs, thighs, and breasts)
1 cup (240 mL) buttermilk
1 large egg
2 cups (200 g) all-purpose flour
Cooking spray or vegetable oil for greasing
Instructions:
Marinate the Chicken:
In a bowl, mix the buttermilk and egg.
Add the chicken pieces to the mixture, ensuring they are well-coated.
Cover and refrigerate for at least 4 hours (or overnight).
Preheat the Oven:
Preheat your oven to 375°F (190°C).
Prepare the Coating:
In a separate bowl, combine the seasoned flour (the spice blend from the previous recipe).
Remove the chicken from the buttermilk mixture and let any excess liquid drip off.
Dredge each piece in the seasoned flour, pressing the coating onto the chicken.
Bake the Chicken:
Place the coated chicken pieces on a greased baking sheet or wire rack set over a baking sheet.
Lightly spray the chicken with cooking spray or brush with a little vegetable oil to promote browning.
Bake for approximately 45-50 minutes, turning halfway through, until the chicken is golden brown and crispy.
The internal temperature should reach 165°F (74°C).
Serve Hot:
Let the chicken rest for a few minutes before serving.
Enjoy your oven-baked KFC-style chicken! It won’t be exactly the same as deep-fried KFC, but it’ll still be delicious and healthier.
VEGGETELIANS
How to Make Vegetable Cutlate at Home
Certainly!
Vegetable cutlets are delightful, crispy patties made with a medley of vegetables, herbs, and spices. They make for a perfect tea-time snack or appetizer. Let’s dive into the recipe:
Veg Cutlet Recipe (Vegetable Cutlet)
Ingredients:
2 cups potatoes (peeled and cubed to 3/4 inch, approximately 2 large potatoes)
1/2 cup green peas (frozen or fresh)
1 cup carrot (diced, about 1 large carrot)
1/2 cup French beans (chopped, 6 to 8 beans)
3 tablespoons coriander leaves (finely chopped)
1/2 teaspoon salt (adjust to taste)
3/4 teaspoon grated ginger (or ginger paste)
2 green chilies (finely chopped; skip for kids)
3/4 teaspoon garam masala
6 tablespoons bread crumbs (or 1/2 cup thick poha powdered or roasted besan; see notes)
4 tablespoons oil (or as needed)
2 tablespoons besan (gram flour) for binding
1/2 cup bread crumbs (or powdered poha for the crust)
Instructions:
Preparation:
Rinse and finely chop 8 French beans, 1 large carrot (cut into 1/2-inch pieces), and 2 medium potatoes (cut into 3/4-inch cubes).
You can also use cauliflower and beets if desired.
Steam the Vegetables:
Add the chopped vegetables (potatoes, French beans, carrots, and green peas) to a steamer basket.
Pour 1 1/2 cups of water into your cooker or steamer.
Place a rack or trivet, and then position the steam basket in the steamer.
Cook the Vegetables:
Steam the vegetables until they are tender but not mushy.
Remove them from the steamer and let them cool slightly.
Mash and Season:
Mash the steamed vegetables using a fork or potato masher.
Add grated ginger, finely chopped green chilies (if using), chopped coriander leaves, garam masala, salt, and 6 tablespoons of bread crumbs (or powdered poha).
Mix everything well to form a cohesive mixture.
Shape the Cutlets:
Divide the mixture into equal portions and shape them into round or oval patties.
Roll each cutlet in additional bread crumbs (or powdered poha) to coat them evenly.
Pan-Fry the Cutlets:
Heat oil in a pan over medium heat.
Place the cutlets in the pan and cook until they turn golden brown and crispy on both sides.
Remove them onto a paper towel to absorb any excess oil.
Serve Hot:
Serve the vegetable cutlets hot with green chutney, mint chutney, or any dip of your choice.
Enjoy these flavorful and healthy vegetable cutlets! They’re perfect for tea.
Certainly! Here’s a delicious recipe for Balsamic Chicken and Mushrooms that’s easy to prepare and bursting with flavor. You’ll love the rich, tangy taste of the balsamic sauce paired with tender chicken and earthy mushrooms. Let’s get cooking! 🍽️
Balsamic Chicken and Mushrooms Recipe
Ingredients:
4 boneless, skinless chicken thighs
4 tablespoons balsamic vinegar
1.5 tablespoons soy sauce
1 tablespoon brown sugar
2 cloves garlic, minced
1/4 teaspoon dried thyme
Salt and pepper, to taste
Fresh thyme for garnish
Instructions:
Prepare the Sauce:
In a small bowl, stir together 4 tablespoons balsamic vinegar, 1.5 tablespoons soy sauce, 1 tablespoon brown sugar, 2 cloves minced garlic, and 1/4 teaspoon dried thyme. Set the sauce aside.
Season the Chicken:
Season four boneless, skinless chicken thighs with a pinch of salt and pepper on both sides.
Sear the Chicken:
Heat a large skillet over medium heat.
Add a little oil or butter to the skillet.
Brown the chicken thighs on both sides until they’re nicely seared and cooked through. Remove them from the skillet and set aside.
Make the Pan Sauce:
In the same skillet, add the prepared balsamic sauce.
Stir to dissolve any browned bits (fond) left from searing the chicken.
Let the sauce simmer and reduce by half.
Finish the Dish:
Add a pat of butter to the sauce and stir until melted. This will thicken the sauce and add richness.
Return the chicken thighs to the skillet, coating them with the balsamic sauce.
Add sliced mushrooms (I recommend using baby bellas or white button mushrooms).
Simmer everything together for a few more minutes until the mushrooms are tender and the flavors meld.
Serve:
Garnish with fresh thyme.
Serve your Balsamic Chicken and Mushrooms with your favorite sides. I recommend Garlic Herb Mashed Potatoes and steamed green beans.
Enjoy this flavorful and comforting dish! The buttery balsamic sauce pairs beautifully with the chicken and mushrooms. Bon appétit! 🍗🍄
Coq au Vin is a classic French chicken stew that’s rich, flavorful, and perfect for a special occasion. Here’s a recipe to create this delightful dish:
Coq au Vin Recipe
Ingredients:
1½ tbsp olive oil
3 rashers (100g) dry-cured, smoked back bacon, fat trimmed, chopped
12 small shallots, peeled
2 free-range chicken legs (460g), skin removed
4 free-range chicken thighs with bone and skin (650g), skin removed
3 thyme sprigs, 2 rosemary sprigs, and 2 bay leaves (to make a bouquet garni)
Small handful of chopped flat-leaf parsley (for garnish)
Instructions:
Sear the Bacon and Shallots:
Heat 1 tbsp olive oil in a large, heavy-based saucepan or flameproof dish.
Add the chopped smoked back bacon and fry until crisp. Remove and drain on kitchen paper.
Add the peeled shallots to the pan and fry, stirring or shaking the pan often, for 5-8 minutes until well browned all over. Remove and set aside with the bacon.
Prepare the Chicken:
Take the chicken legs, chicken thighs, and boneless chicken breasts (all with skin removed) and pat them dry with kitchen paper.
Brown the Chicken:
Pour ½ tbsp olive oil into the pan.
Fry half of the chicken pieces, turning regularly, for 5-8 minutes until well browned. Remove, then repeat with the remaining chicken. Set aside.
Deglaze the Pan:
Scatter in the finely chopped garlic cloves and fry briefly.
Pour in 3 tbsp brandy or Cognac, stirring the bottom of the pan to deglaze. The alcohol should sizzle and start to evaporate.
Create the Sauce:
Return the chicken legs and thighs to the pan along with any juices.
Pour in a little of the red wine, stirring the bottom of the pan again.
Stir in the rest of the wine, good-quality chicken stock, and tomato purée.
Add the thyme sprigs, rosemary sprigs, and bay leaves to make a bouquet garni.
Season with pepper and a pinch of salt.
Return the bacon and shallots to the pan.
Simmer and Cook:
Cover and lower the heat to a gentle simmer.
Add the chicken breasts and cook for 50 minutes to 1 hour.
Sauté the Mushrooms:
Just before serving, heat 1½ tbsp olive oil in a large non-stick frying pan.
Add the chestnut mushrooms (halved if large) and fry over high heat for a few minutes until golden. Remove and keep warm.
Serve:
Lift the chicken, shallots, and bacon from the pan and transfer to a warmed serving dish.
Remove the bouquet garni.
Garnish with chopped flat-leaf parsley.
Enjoy your Coq au Vin with crusty bread, mashed potatoes, or buttered noodles. The rich wine sauce and tender chicken make this dish truly special! 🍷🍗
ItaIan Minestrone Suop
Explore
Minestrone soup is a classic Italian dish that’s hearty, flavorful, and perfect for chilly days. It’s a vegetable-based soup with beans and pasta, and it’s incredibly versatile. Here’s a simple recipe to make your own delicious Italian Minestrone Soup:
Vegetarian Minestrone Soup Recipe
Ingredients:
1.5 tbsp olive oil
1 large onion, chopped
2 carrots, peeled and diced
2 celery stalks, chopped
3 cloves garlic, minced
1 tsp dried rosemary
1 can (14 oz) kidney beans, drained and rinsed
1 can (14 oz) diced tomatoes
4 cups vegetable broth
1 cup elbow pasta (or any small pasta)
Salt and pepper, to taste
Fresh parsley, chopped (for garnish)
Instructions:
Sauté the Aromatics:
Heat 1.5 tbsp olive oil in a large pot over medium heat.
Add the chopped onion, diced carrots, chopped celery, and minced garlic.
Sauté until the vegetables begin to soften (about 5 minutes).
Add the Beans and Tomatoes:
Stir in the diced tomatoes and drained kidney beans.
Pour in the vegetable broth and add the dried rosemary.
Season with salt and pepper.
Simmer and Cook:
Bring the soup to a simmer.
Add the elbow pasta and cook uncovered, stirring occasionally, until the pasta is tender (about 10 minutes).
Serve:
Ladle the hot minestrone soup into bowls.
Garnish with freshly chopped parsley.
Optionally, sprinkle with some grated Parmesan cheese.
Enjoy your comforting bowl of Italian Minestrone Soup! Feel free to customize it by adding other seasonal vegetables or using different types of beans. Buon appetito! 🍲🇮🇹
You can also get us on Facebook page, TikTok, X and Tumbur
Here are some key Differences between Branding and Marketing
Definition and Focus:
Branding establishes a unique identity for your company. It encompasses visual assets (like logos) and brand guidelines, defining your brand’s personality and values.
Marketing, on the other hand, is about communicating with your target audiences through various channels (digital or traditional) to promote products, services, or messages.
Brand vs. Message:
Branding includes information about what your brand stands for—the essence of your company.
Marketing messages can include brand messaging, but they also cover product-specific details, promotions, and company announcements.
Timeframe and Lifecycle:
Both branding and marketing are ongoing efforts.
Branding is a long-term investment—it’s forever.
Marketing strategies can change over time.
Ownership and Audience:
Branding: Your brand belongs to your consumers. It’s how they perceive you.
Marketing: You own your marketing efforts—it’s how you reach out to your audience.
Strategy:
Similarity: Both aim to elevate your company’s reputation.
Difference: Brand strategy establishes your unique identity, while marketing strategy determines communication methods.
Content and Channels:
Branding focuses on consistent visual identity and brand voice.
Marketing uses various channels (digital, print, etc.) to convey messages.
Purpose:
Branding: Builds trust and loyalty among customers.
Marketing: Cultivates customers and drives sales.
Depth of Information:
Branding dives into core values and personality.
Marketing covers a broader range, including product details.
Permanence:
Branding endures—it’s the foundation.
Marketing is transient—it adapts to trends and campaigns.
Relationship:
Branding is like a long-lasting friendship.
Marketing is the active conversation you have with friends.
Remember, while branding and marketing are distinct, they work together to create a holistic customer experience.
Now, Let’s Delve Into Some Successful Branding Examples:
Apple: Known for simplicity and gorgeous design, Apple has created a loyal fan base that remains locked into their ecosystem.
Microsoft: Rather than selling computers, they licensed Windows to other manufacturers, leveraging their power.
Google: Focused on building a superior search engine, Google dominates online searches.
Disney: Targeting youngsters, Disney’s branding efforts lead kids to beg their parents for magical experiences.
Za’atar is a Middle Eastern spice blend that combines wild thyme, sesame seeds, and other flavorful ingredients. Here’s a simple and delicious za’atar roasted chicken breast recipe:
Ingredients:
4 boneless, skinless chicken breasts
2 tablespoons za’atar spice
Juice and zest of 1 lemon
Salt and pepper to taste
Olive oil
Sumac (optional)
Instructions:
In a mixing bowl, combine the marinade ingredients (za’atar, lemon juice, zest, salt, and pepper).
Place the chicken in a deep dish, sprinkle with salt and pepper, and cover with the marinade.
Work some of the marinade underneath the chicken skin for better flavor.
Refrigerate for at least 4 hours or overnight.
Preheat the oven to 400°F.
Transfer the chicken and marinade to a baking dish or cast iron skillet.
Sprinkle with sumac and paprika.
Roast in the oven for about 35 minutes.
Let the chicken rest for 5 minutes before serving.
Sprinkle with more sumac and za’atar.
Serve your za’atar chicken with Israeli couscous salad or roasted Greek potatoes for a delightful meal! Enjoy!
Please don’t forget to follow, share and comment or get us on Facebook by Mr delicious recipe
Certainly! When it comes to deep frying, there are some common mistakes that almost everyone makes. Let’s dive into these pitfalls and learn how to avoid them:
Frying at Too High a Temperature:
To achieve perfectly crispy fried chicken or other goodies, ensure your oil temperature is between 325°F and 390°F. Going higher can lead to quick cooking, resulting in dry or burnt food. So, find that sweet spot for golden deliciousness1.
Avoid oils like avocado and olive—they have low smoke points and can be pricey. Opt for peanut or canola oils, which have high smoke points and neutral flavors. Here’s a handy guide on which oils to use1.
Certainly! French sauces are an essential part of French cuisine, adding depth and flavor to various dishes. Let’s explore five basic French sauces, along with their recipes and directions:
Béchamel Sauce:
Ingredients:
2 tablespoons butter
2 tablespoons all-purpose flour
1 cup milk
Salt and pepper to taste
Directions:
Melt the butter over low heat.
Stir in the flour with a wooden spoon and cook for two minutes.
Gradually add the milk, whisking to create a smooth consistency.
Cook on medium heat until thickened and nearly boiling.
Certainly! Starting as a dishwasher can be a stepping stone toward becoming a chef. Here are 10 advantages of beginning your culinary journey in the dish pit:
Kitchen Dynamics: Working as a dishwasher exposes you to the fast-paced environment of a professional kitchen. You’ll witness how the entire team collaborates and functions together.
Health and Safety Knowledge: Dishwashers become familiar with health and safety regulations, which is crucial in any culinary setting.
Appreciation for Culinary Arts: By observing chefs and cooks, you’ll gain a deeper appreciation for the artistry behind food preparation.
Mise en Place Understanding: You’ll learn the importance of proper mise en place (everything in its place) and how it impacts kitchen efficiency.
Inventory Management: Dishwashers handle expensive inventory (like plates, utensils, and glassware), teaching them to care for these items meticulously.
Clean Canvas: A clean kitchen is essential for chefs to create beautiful dishes. Dishwashers contribute to this canvas.
Organization Skills: Keeping the dish area organized and efficient translates to better overall kitchen organization.
Basic Food Prep: During downtime, dishwashers can assist with basic food prep tasks like peeling, chopping, and washing vegetables.
Observation Opportunities: Dishwashers observe the entire kitchen team, learning from their techniques and practices.
Recognition by Chefs: Chefs notice hardworking dishwashers who go the extra mile. This commitment can lead to future opportunities.
Now, let’s explore some world-renowned chefs who started their culinary journey as dishwashers:
Remember, the restaurant industry is multifaceted, dynamic, and full of passionate professionals who contribute to delightful dining experiences! 🍽️👩🍳
HOW DO I GET BECOME A SUCCESSFUL CHEF?
Explore
Becoming a successful chef involves a blend of culinary skills, leadership, and business acumen. Here are some essential steps to guide you on your journey:
Remember, becoming a successful chef involves passion, dedication, and continuous growth. Keep honing your craft, stay curious, and embrace both the art and science of cooking! 🍽️
WHAT ARE SOME COMMON MISTAKES MADE BY CHEFS?
Certainly! Professional chefs have seen it all, and they often cringe at some common mistakes made by home cooks. Here are a few culinary blunders to avoid:
Chefs appreciate simplicity too. Outside of work, we often prefer straightforward home-cooked meals we grew up with – like spicy lentils or spaghetti casserole. Not every dish needs to be Michelin-star-worthy1.
Certainly! Here’s a 7-day diabetes-friendly meal plan that provides balanced nutrition while helping manage blood sugar levels. Remember to consult with a healthcare professional or a registered dietitian to tailor this plan to your specific needs:
Day 1: Monday
Breakfast:
Scrambled eggs with spinach and tomatoes
Whole-grain toast
A small apple
Lunch:
Grilled chicken salad with mixed greens, cucumber, and avocado
Olive oil and vinegar dressing
Dinner:
Baked salmon tilapia with roasted asparagus
Quinoa
Steamed broccoli
Snack:
Greek yogurt with berries
Day 2: Tuesday
Breakfast:
Overnight oats with almond milk, chia seeds, and sliced almonds
Lunch:
Turkey and vegetable wrap (use whole-grain tortilla)
Carrot sticks
Dinner:
Lentil soup
Grilled zucchini
Brown rice
Snack:
Cottage cheese with cucumber slices
Day 3: Wednesday
Breakfast:
Smoothie (spinach, banana, unsweetened almond milk, and protein powder)
Lunch:
Quinoa salad with chickpeas, bell peppers, and feta cheese
Dinner:
Baked chicken breast
Cauliflower rice
Steamed green beans
Snack:
Raw almonds
Day 4: Thursday
Breakfast:
Avocado toast (whole-grain bread)
Lunch:
Tuna salad (use Greek yogurt instead of mayo)
Sliced cucumber
Dinner:
Stir-fried tofu with bell peppers and broccoli
Brown rice noodles
Snack:
Baby carrots with hummus
Day 5: Friday
Breakfast:
Omelette with mushrooms, onions, and feta cheese
Lunch:
Black bean and corn salad
Whole-grain pita bread
Dinner:
Grilled shrimp
Quinoa pilaf
Roasted Brussels sprouts
Snack:
Sugar-free gelatin
Day 6: Saturday
Breakfast:
Greek yogurt parfait with berries and walnuts
Lunch:
Caprese salad (tomato, mozzarella, basil, and balsamic glaze)
Whole-grain crackers
Dinner:
Baked white fish (such as cod or tilapia)
Steamed asparagus
Wild rice
Snack:
Sliced bell peppers with guacamole
Day 7: Sunday
Breakfast:
Chia seed pudding with sliced strawberries
Lunch:
Spinach and feta stuffed chicken breast
Quinoa salad with lemon vinaigrette
Dinner:
Vegetable stir-fry (use tofu or lean beef)
Cauliflower fried rice
Steamed snap peas
Snack:
Unsweetened applesauce
Remember to monitor portion sizes, spread meals throughout the day, and stay hydrated. Adjust the plan based on your individual needs and preferences.
Certainly! When managing diabetes, it’s essential to be mindful of the foods you consume. Here are some types of foods and drinks to limit or avoid:
Foods High in Added Sugars:
Baked goods (cakes, cookies, and pies)
Sugary cereals
Sweetened beverages (sodas, energy drinks, and fruit juices)
Choose whole fruits with a low to medium glycemic index (GI).
Healthy Fats:
Olive oil
Avocado
Unsweetened Drinks:
Water
Tea or coffee (without added sugar)
Flavored, unsweetened sparkling waters
Remember that maintaining a balanced diet, monitoring portion sizes, and staying physically active are crucial for managing blood glucose levels and overall health. Always consult with your healthcare team for personalized guidance.
Certainly! Let’s dive into the delightful world of Italian-inspired dishes. I’ll provide you with recipes for Chicken and Mushroom Alfredo with Tagliatelle, Zesty Cream Chicken with Spaghetti, and Mushroom Puff Pastry Bites. Bon appétit!
Chicken and Mushroom Alfredo with Tagliatelle
This indulgent pasta dish combines tender chicken, sautéed mushrooms, and a creamy garlic Parmesan Alfredo sauce. Here’s how to make it:
Ingredients:
2 boneless, skinless chicken breasts
8 oz (225 g) tagliatelle pasta
8 oz (225 g) baby Bella or Crimini mushrooms, sliced
2 cloves of garlic, minced
1 cup (240 ml) heavy cream
1/2 cup (120 g) grated Parmesan cheese
2 tablespoons butter
Fresh parsley, chopped
Salt and pepper, to taste
Instructions:
Brine the Chicken (optional):
In a solution of 4 cups of water, 1/4 cup of sea salt (or kosher salt), and 1 teaspoon of baking soda, brine the chicken breasts for 30 minutes. This step adds moisture and flavor to the meat.
Brown the Chicken:
In a large skillet, brown the chicken in oil over medium heat. Remove and set aside.
Sauté the Mushrooms:
In the same skillet, melt the butter and add the sliced mushrooms. Cook until caramelized (about 10-12 minutes).
Add Garlic and Cream:
Stir in the minced garlic, then pour in the heavy cream. Mix well.
Combine Chicken and Sauce:
Add the chicken back to the mushroom cream sauce.
Cook the Pasta:
Cook the tagliatelle pasta according to package instructions. Drain.
Toss It All Together:
Add the cooked pasta to the skillet with the parsley. Toss everything together until well coated.
Serve and Enjoy!:
Top with shredded Parmesan cheese and serve alongside some homemade garlic bread.
Restaurant and hotel marketing are two types of marketing strategies that aim to attract and retain customers in the hospitality industry. They have some advantages and disadvantages, depending on the goals, budget, and resources of the business.
Some of the advantages of restaurant and hotel marketing are:
It can help create a strong brand image and reputation for the business, which can increase customer loyalty and word-of-mouth referrals.
It can help differentiate the business from the competition by highlighting its unique selling proposition, such as its location, atmosphere, menu, or services.
It can help increase the visibility and awareness of the business among potential customers, especially through online channels such as social media, websites, and online reviews.
It can help boost sales and revenue by attracting more customers, increasing the average spending per customer, and encouraging repeat visits and referrals.
Some of the disadvantages of restaurant and hotel marketing are:
It can be costly and time-consuming, especially if the business has to invest in advertising, promotions, staff training, and equipment.
It can be risky and uncertain, as the business may not be able to predict the return on investment or the customer response to the marketing efforts.
It can be affected by external factors, such as economic downturns, weather conditions, consumer preferences, and competition, which can reduce the demand for the business or make it less attractive.
It can be challenging to measure and evaluate the effectiveness of the marketing strategies, as the business may not have clear and reliable metrics or feedback mechanisms.
Please, I always share this kind of article to those who maybe interested in the same ideas for their business.
So keep visiting my website or Facebook page for more information.
Here are 10 Good Requirements for Customer Care Services:
Prompt response times: Customers expect quick and efficient responses to their inquiries or issues.
Knowledgeable and well-trained staff: Customer care representatives should be well-informed about the products or services offered.
Personalized service: Tailoring interactions to the specific needs and preferences of each customer.
Multichannel support: Providing support through various channels such as phone, email, chat, and social media.
Proactive communication: Keeping customers informed about any updates or changes that may affect them.
Empathy and understanding: Showing empathy and understanding towards customers’ concerns and frustrations.
Resolution-focused: Working towards resolving customer issues in a timely and effective manner.
Feedback collection: Gathering feedback from customers to continuously improve services.
Continuous training and development: Providing ongoing training and development opportunities for customer care staff.
Data-driven decision-making: Using data and analytics to identify trends and improve customer care processes.
To Improve Customer Care Services, Restaurant Can Consider Implementing The Following Strategies:
Invest in technology: Implementing customer relationship management (CRM) systems and other tools to streamline customer interactions.
Conduct regular training: Providing ongoing training to customer care staff to enhance their skills and knowledge.
Monitor and analyze customer feedback: Collecting and analyzing customer feedback to identify areas for improvement.
Implement self-service options: Offering self-service options such as FAQs, knowledge bases, and chatbots to empower customers to find solutions on their own.
Foster a customer-centric culture: Encouraging a customer-centric mindset throughout the organization to prioritize customer satisfaction.
Measure performance: Setting key performance indicators (KPIs) to track the effectiveness of customer care services and make data-driven decisions.
Empower employees: Giving customer care representatives the autonomy to make decisions and resolve issues independently.
Provide incentives: Rewarding and recognizing employees for delivering exceptional customer care.
Collaborate across departments: Encouraging collaboration between customer care, sales, marketing, and other departments to provide a seamless customer experience.
Stay updated on industry trends: Keeping abreast of industry trends and best practices to continuously improve customer care services.
If you liked this article please, share, comment and like.